
How to Grow Blackcurrants in Pots: Easy Steps for Bountiful Harvests in Small Spaces
Intro for growing blackcurrants in pots
Blackcurrants (Ribes nigrum) are perfect candidates for container growing, making these vitamin C-packed berries accessible even to gardeners with limited space. These compact shrubs produce tart, deeply flavored berries that are excellent for jams, cordials, and desserts. Container-grown blackcurrants can thrive on patios, balconies, or small gardens, offering the same nutritional benefits as those grown in open ground. With their attractive foliage and manageable size when pruned correctly, potted blackcurrants provide both ornamental value and a rewarding harvest. They’re particularly well-suited to temperate climates but can be grown successfully in various regions with proper care.
When to plant blackcurrants in pots
Blackcurrants are best planted during their dormant season, from late autumn to early spring (November to March in the UK, or similar temperate regions). This timing allows roots to establish before the growing season begins. Soil temperatures between 5-10°C (41-50°F) are ideal for root development. Avoid planting during frost periods, as freezing conditions can damage young plants. In warmer regions (US Zones 8-9), winter planting is preferable to give plants time to establish before summer heat arrives. Bare-root plants are typically available during winter months and are an economical choice, while container-grown plants offer more flexibility in planting time.
Best time to plant blackcurrants in pots
For cool temperate regions (UK, Northern Europe, US Zones 4-6), the optimal planting window is November to February. This allows plants to establish roots before spring growth begins. In warmer climates (Mediterranean, US Zones 7-9), December to January is preferable to avoid both late autumn warmth and early spring heat. Container-grown blackcurrants can technically be planted year-round, but avoid summer planting as the stress of transplanting during hot weather can significantly reduce success rates. If you must plant during warmer months, provide extra shade and water until established. Two-year-old plants typically establish more quickly than younger specimens.
Best blackcurrant varieties to grow
- Ben Connan – Compact growth habit making it perfect for containers, with large berries and excellent disease resistance.
- Ben Sarek – Very compact (only 1.2m/4ft tall), high-yielding variety that’s ideal for small spaces and containers.
- Big Ben – Produces exceptionally large berries with good flavor and is relatively compact for container growing.
- Ebony – Earlier ripening with excellent mildew resistance and particularly sweet berries compared to other varieties.
- Titania – Outstanding resistance to white pine blister rust and mildew, making it lower maintenance for container growing.
- Little Black Sugar – Sweeter than most blackcurrants with a more compact habit, perfect for smaller pots.
- Consort – Resistant to white pine blister rust, making it suitable for regions where this disease is prevalent.
How to plant blackcurrants in pots
Materials needed:
- Container (minimum 40-45cm/16-18in diameter and depth)
- High-quality potting mix with added compost
- Slow-release fertilizer
- Blackcurrant plant (bare-root or container-grown)
- Mulch (bark chips or compost)
- Watering can or hose
- Drainage material (broken pottery or gravel)
Step-by-step planting:
- Select a container at least 40-45cm (16-18in) in diameter and depth with adequate drainage holes.
- Place a layer of drainage material at the bottom of the pot to prevent waterlogging.
- Fill the container about one-third full with potting mix enriched with compost.
- If planting a bare-root blackcurrant, soak the roots in water for 1-2 hours before planting.
- Position the plant in the center of the pot, ensuring the previous soil mark on the stem is level with the new soil surface.
- For bare-root plants, spread the roots out evenly; for container-grown plants, gently tease out some roots from the rootball.
- Fill around the plant with more potting mix, firming gently as you go to eliminate air pockets.
- Water thoroughly until water runs from the drainage holes.
- Apply a 5cm (2in) layer of mulch on top, keeping it away from the stem to prevent rot.
- Position the pot in its final location, ideally in a spot that receives morning sun and afternoon shade.
How to grow blackcurrants in pots
Blackcurrants in containers need at least 4-6 hours of sunlight daily, though in hotter regions, some afternoon shade is beneficial. Water consistently to keep the soil moist but not waterlogged—typically every 2-3 days during growing season, possibly daily during hot weather. Check moisture levels by inserting your finger 2.5cm (1in) into the soil; if it feels dry, water thoroughly. Feed with a balanced liquid fertilizer monthly during the growing season (March to August), switching to a high-potash fertilizer once flowering begins to encourage fruit production.
Apply a fresh layer of mulch each spring to retain moisture and suppress weeds. Prune annually in late winter, removing old wood to encourage new growth where fruit will form. Container-grown blackcurrants may need more frequent pruning to maintain a manageable size. Consider repotting every 2-3 years in fresh compost, or top-dress annually by removing the top 5cm (2in) of soil and replacing with fresh compost. In very cold regions, provide winter protection by wrapping pots with bubble wrap or moving to a sheltered location.
Caring for blackcurrants in pots
Regular care includes checking soil moisture daily during summer months and ensuring consistent watering. Inspect leaves weekly for signs of pests and diseases. Common issues include aphids (causing curled leaves), which can be controlled with insecticidal soap or a strong water spray. Powdery mildew appears as white powder on leaves and can be managed with proper spacing for air circulation and fungicidal sprays if necessary. Reversion disease causes abnormal flowers and reduced fruit, requiring removal of affected branches.
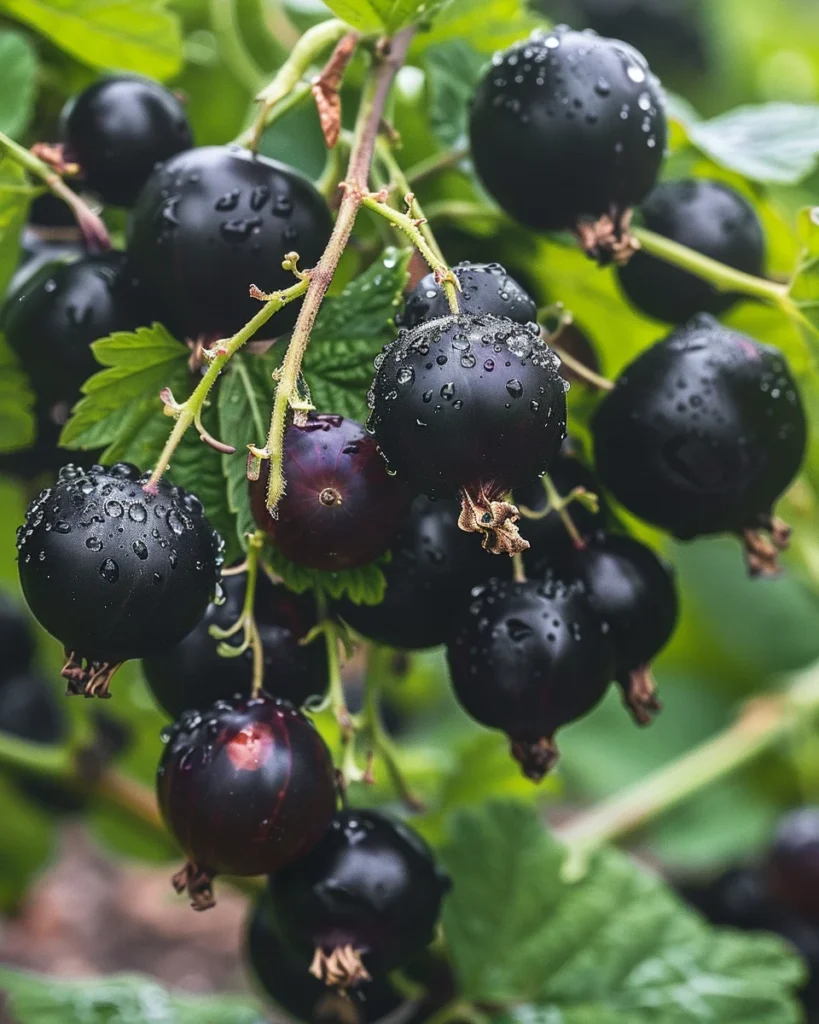
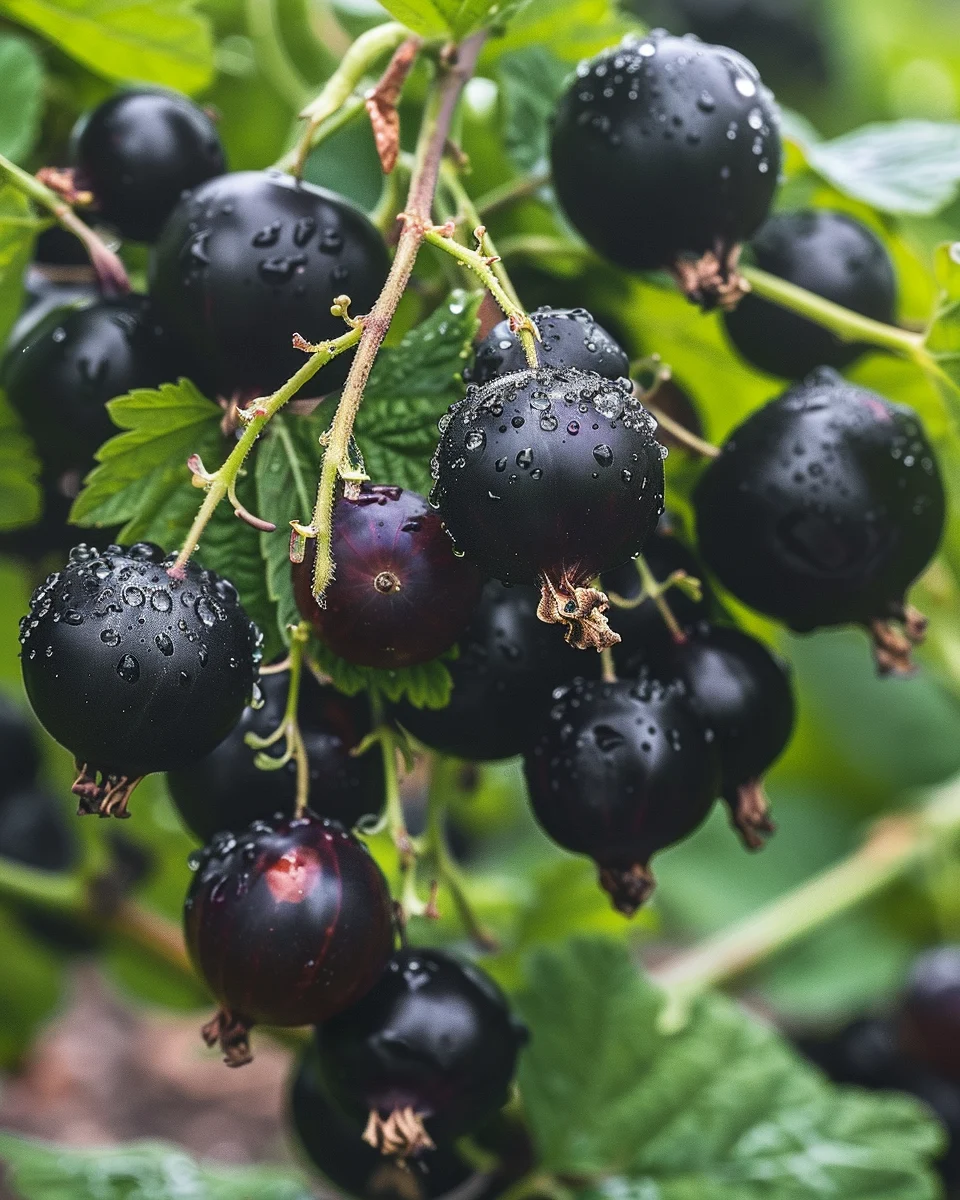
Harvest blackcurrants when the fruits are uniformly dark purple-black and slightly soft to touch, typically in July or early August. Harvest entire strigs (fruit clusters) rather than individual berries by snipping with scissors. Fresh berries will keep in the refrigerator for 3-5 days, or they can be frozen for up to 6 months. For long-term storage, consider making jam, cordial, or freezing the berries on trays before transferring to freezer bags.
Understanding bolting in blackcurrants
Unlike annual vegetables, blackcurrants don’t bolt in the traditional sense (premature flowering and seed production). However, they can experience stress responses that affect fruiting. Environmental stressors like drought, extreme temperature fluctuations, or nutrient deficiencies can cause blackcurrants to drop fruit prematurely or produce smaller harvests. To prevent stress responses, maintain consistent watering, especially during fruit development, and ensure adequate nutrients through regular feeding. If your plant shows signs of stress (yellowing leaves, fruit drop), increase watering frequency and apply a balanced liquid feed. Remember that blackcurrants are deciduous shrubs that naturally lose their leaves in autumn—this is not bolting but part of their normal growth cycle.
Why does blackcurrant fruit turn bitter?
- Harvesting too early – Blackcurrants need to fully ripen on the bush; picking too soon results in excessive tartness. Wait until berries are uniformly dark and slightly soft.
- Inconsistent watering – Drought stress during fruit development can concentrate compounds that create bitterness. Maintain even soil moisture throughout the growing season.
- Variety selection – Some varieties are naturally more tart than others. For sweeter berries, choose varieties like ‘Little Black Sugar’ or ‘Ebony’.
- Nutrient imbalance – Excessive nitrogen fertilizer promotes leaf growth at the expense of fruit quality. Use balanced or potassium-rich fertilizers during fruiting.
- Poor sunlight – Insufficient sunlight can prevent proper sugar development in fruits. Ensure plants receive at least 4-6 hours of sunlight daily.
Companion planting for blackcurrants
When arranging multiple containers on a patio or balcony, consider these beneficial companions for your potted blackcurrants:
- Alliums (chives, garlic) – Repel aphids and other insect pests while taking up minimal space in nearby containers.
- Tagetes (French marigolds) – Their roots release compounds that deter nematodes and their bright flowers attract pollinators.
- Borage – Attracts beneficial insects and pollinators, potentially increasing fruit set on your blackcurrants.
- Comfrey – Grown in its own container, the leaves can be harvested to make nutrient-rich plant feed for blackcurrants.
- Nasturtiums – Act as a trap crop for aphids, drawing them away from your blackcurrants.
Avoid placing containers with these plants near your blackcurrants:
- Tomatoes – Can compete for similar nutrients and potentially share diseases.
- Other Ribes species – Close proximity increases the risk of disease spread between related plants.
Seasonal calendar
- January-February: Ideal time for planting bare-root plants; prune established plants, removing old wood.
- March: Apply slow-release fertilizer and fresh mulch; water as needed as growth begins.
- April: Increase watering as leaf growth accelerates; watch for early signs of pests.
- May: Flowering period; ensure consistent watering; apply liquid feed high in potash.
- June: Fruit development begins; maintain regular watering; protect from birds if necessary.
- July-August: Harvest period; check daily for ripe fruit; continue regular watering.
- September: Post-harvest care; continue watering if dry; final liquid feed of the season.
- October-November: Reduce watering as plants enter dormancy; clean up fallen leaves.
- December: Minimal care needed; check soil moisture occasionally; protect pots from freezing in very cold regions.
Problems & solutions
| Problem | Quick Fix |
|---|---|
| Yellowing leaves | Check for waterlogging or nutrient deficiency; ensure proper drainage and apply balanced liquid feed. |
| Powdery white coating on leaves | Powdery mildew; improve air circulation, avoid overhead watering, apply organic fungicide if severe. |
| Curled, distorted leaves | Likely aphid infestation; spray with insecticidal soap or strong water jet, encourage natural predators. |
| Poor fruit production | Insufficient pruning or feeding; prune correctly in winter, apply high-potash fertilizer during flowering. |
| Fruits dropping before ripening | Stress from inconsistent watering; maintain even soil moisture, especially during fruit development. |
| Cracked container causing root exposure | Repot immediately into a new container with fresh potting mix, water thoroughly after transplanting. |
| Waterlogged soil | Improve drainage by adding holes to container if possible; raise pot on feet; consider repotting with better drainage material. |
Common questions about growing blackcurrants in pots
How often should I water potted blackcurrants?
During the growing season, check soil moisture every 1-2 days. Water when the top 2.5cm (1in) of soil feels dry. In summer heat, daily watering may be necessary, while in cooler, rainy periods, you might water just once a week. Always ensure water drains freely from the container.
What size container is best for blackcurrants?
Use a container at least 40-45cm (16-18in) in diameter and depth. Larger containers (50-60cm/20-24in) will require less frequent watering and allow for better root development. Ensure any container has adequate drainage holes.
Do blackcurrants need full sun?
Blackcurrants perform best with 4-6 hours of sunlight daily. In cooler regions, they can tolerate full sun, but in hotter climates, afternoon shade is beneficial. Morning sun with afternoon shade is often the ideal balance for container-grown plants.
How often should I repot my blackcurrant bush?
Repot every 2-3 years, preferably in late autumn or early spring when the plant is dormant. If full repotting isn’t possible, refresh the top 5-10cm (2-4in) of soil annually with fresh compost to provide nutrients.
Can blackcurrants survive winter in containers?
Yes, blackcurrants are cold-hardy, but their roots are more vulnerable in containers. In regions with freezing winters, protect pots by wrapping them with bubble wrap, moving them to a sheltered location, or temporarily burying the pots in soil or mulch for insulation.
When will my potted blackcurrant produce fruit?
Most blackcurrant varieties will produce a small crop in their second year after planting, with full production from the third year onwards. Proper pruning is essential for maintaining fruiting – blackcurrants fruit primarily on one-year-old wood.
How long do potted blackcurrant bushes live?
With proper care, including regular repotting and pruning, container-grown blackcurrants can remain productive for 7-10 years. After this time, consider propagating new plants from cuttings to replace aging bushes.