
How to Read Your Garden Soil: Understanding Signs, Testing Methods & Improving Soil Health

Intro for Your Soil Is Trying To Tell You Something Are You Listening
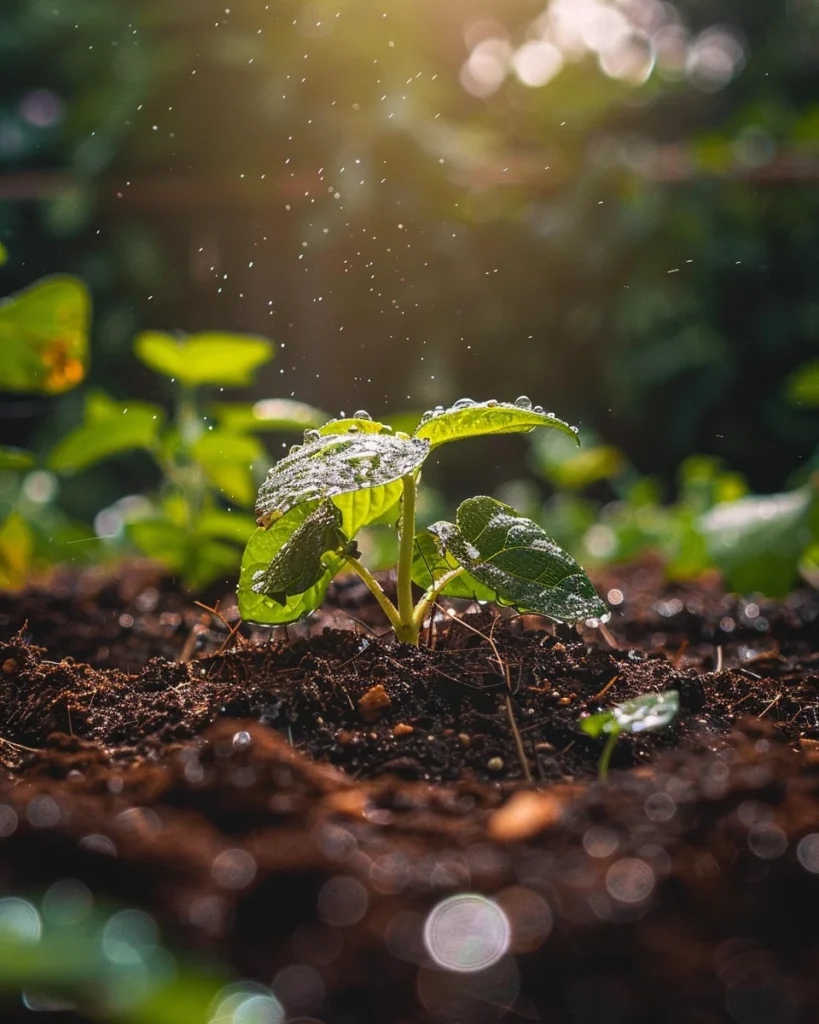
Soil is the foundation of every successful garden, yet many gardeners overlook the valuable information their soil is constantly communicating. Healthy soil is a living ecosystem containing minerals, organic matter, water, air, and countless microorganisms working together to support plant life. By learning to interpret soil signals—from its texture and color to plant performance and weed populations—you can make informed decisions that dramatically improve your garden’s productivity. Rather than fighting against your soil’s natural properties, understanding what your soil is telling you allows you to work with nature, addressing deficiencies and building a resilient growing environment that requires less intervention and produces healthier plants.
When to observe your soil
Soil observation should be a year-round practice, but certain times yield more information than others. Early spring before planting provides baseline data when soil is moist but not waterlogged (soil temperatures around 10-15°C/50-59°F). Mid-growing season observations reveal how plants interact with soil under stress. Fall assessment (after harvest but before frost) shows cumulative effects of the growing season. Winter soil checks during thaws can reveal drainage issues not apparent in drier seasons. For temperate regions, soil is most “talkative” during transition periods between seasons when moisture levels fluctuate.
Best time to test your soil
For cool climate regions (Zones 3-6), conduct comprehensive soil tests in late fall (October-November) or early spring (March-April) when soil biology is less active. In warmer regions (Zones 7-10), testing in late winter (January-February) provides time to amend soil before spring planting. For specific amendments, test 3-4 months before planting to allow corrections to integrate. pH testing is most accurate when soil moisture is moderate—not following heavy rain or during drought conditions. For vegetable gardens, annual testing is recommended, while perennial beds benefit from biennial testing schedules.
Best soil testing methods to use
- Professional Lab Testing – Most comprehensive option providing detailed nutrient analysis, pH levels, and amendment recommendations specific to your region.
- DIY pH Test Kits – Affordable and quick for monitoring soil acidity; less precise than lab tests but useful for tracking changes.
- Jar Test for Texture – Simple method to determine soil composition percentages of sand, silt, and clay using a mason jar.
- Infiltration Test – Measures drainage by timing how quickly water disappears from a hole; excellent for identifying compaction issues.
- Earthworm Count – Biological indicator of soil health; 10+ worms per cubic foot suggests healthy soil biology.
- Ribbon Test – Tactile method to assess clay content by rolling moist soil between fingers.
- Smell Test – Healthy soil has a pleasant earthy aroma; sour or metallic smells indicate poor drainage or anaerobic conditions.
How to interpret soil signs
Materials needed:
- Garden trowel or shovel
- Clear glass jar with lid
- pH test kit or meter
- Soil thermometer
- Notebook and pen
- Camera for documentation
- White paper for color comparison
Step-by-step interpretation:
- Observe soil color – Dark brown/black indicates high organic matter; red suggests iron content; gray indicates poor drainage.
- Assess texture by rubbing soil between fingers – Gritty (sandy), silky (silty), or sticky (clay).
- Perform the jar test by mixing soil with water, shaking, and allowing layers to settle for 24 hours.
- Check drainage by digging a 12-inch (30 cm) hole, filling with water, and timing how quickly it drains (ideal: 1-3 inches/hour).
- Note weed populations – Certain weeds indicate specific soil conditions (e.g., chickweed thrives in fertile soil; dandelions indicate compaction).
- Examine plant roots – Healthy roots are white/cream-colored and extensive; brown, stunted roots suggest problems.
- Test soil pH using a kit or meter (most plants prefer 6.0-7.0).
- Document findings in your garden journal for seasonal comparisons.
How to improve your soil
Sunlight exposure affects soil temperature and moisture retention—full sun locations (6+ hours daily) dry out faster and may need more organic matter for moisture retention. Water deeply but infrequently to encourage deep root growth, adjusting frequency based on soil type (sandy soils need more frequent watering than clay). Apply organic fertilizers based on soil test results, typically in spring and mid-season for heavy feeders. Maintain a 2-3 inch (5-7.5 cm) layer of organic mulch to regulate soil temperature and moisture. Practice crop rotation to prevent nutrient depletion. For container gardens, use high-quality potting mix and monitor moisture more frequently, as containers dry out faster than in-ground soil.
Caring for different soil types
For sandy soil, incorporate 2-4 inches (5-10 cm) of compost annually to improve water retention and add nutrients. Clay soil benefits from gypsum applications (2 lbs per 100 sq ft/1 kg per 10 sq m) and coarse organic matter to improve drainage. Address compaction by avoiding working wet soil and using broadforks rather than rototillers. Control erosion on slopes with terracing, cover crops, or contour planting. For alkaline soils (pH above 7.0), gradually lower pH with sulfur applications or acidic organic materials like pine needles. For acidic soils (pH below 6.0), incorporate limestone at rates determined by soil tests. Manage salt buildup in arid regions by improving drainage and leaching with deep watering.
Understanding soil structure
Soil structure refers to how soil particles arrange themselves into aggregates or crumbs. Good structure creates pore spaces for air, water, and root penetration. Factors that destroy structure include overworking soil, working wet soil, heavy equipment traffic, and leaving soil bare. Prevention tactics include minimal tillage, using raised beds to eliminate foot traffic, incorporating diverse organic materials, and maintaining living roots year-round with cover crops. If poor structure develops, rebuild by adding diverse organic materials, using cover crops with deep taproots like daikon radish, and applying compost tea to stimulate soil biology.
Why does soil become depleted?
- Intensive cultivation – Repeated growing of heavy feeders without rotation or replenishment depletes specific nutrients.
- Erosion – Wind and water carry away topsoil containing organic matter and nutrients; visible as exposed roots or soil accumulation at garden edges.
- Overuse of synthetic fertilizers – Creates nutrient imbalances and damages soil biology; fix by transitioning to organic amendments and cover crops.
- Lack of organic inputs – Without regular additions of organic matter, soil life diminishes; remedy with annual compost applications.
- Soil compaction – Restricts root growth and biological activity; address with careful bed design and deep-rooted cover crops.
Companion practices for soil health
Cover cropping builds organic matter and prevents erosion—plant clover, vetch, or winter rye in fall for spring incorporation. Composting recycles garden and kitchen waste into valuable soil amendments—aim for a 30:1 carbon-to-nitrogen ratio. Vermicomposting (worm composting) produces nutrient-rich castings ideal for seedlings and container plants. Avoid planting the same family in the same location for 3-4 years to prevent pest and disease buildup. Integrate deep-rooted perennials like comfrey or yarrow to mine nutrients from subsoil. Mulching with diverse materials (leaves, straw, wood chips) feeds different soil organisms and builds complete soil food webs.
Seasonal soil care calendar
- Spring (March-May): Apply compost to planting beds; conduct pH test; sow cover crops in unused areas; add organic fertilizers based on soil test.
- Summer (June-August): Maintain mulch layer; monitor moisture levels; side-dress heavy feeders with compost tea; observe plant performance for deficiency signs.
- Fall (September-November): Collect soil samples for testing; incorporate spent plants; apply amendments based on soil tests; sow fall/winter cover crops.
- Winter (December-February): Review soil test results and plan amendments; start compost for next season; research cover crop options; observe drainage during winter rains.
Note: In warmer regions (Zones 8-10), extend fall planting and soil work into winter; in colder regions (Zones 3-5), compress spring activities into a shorter window.
Problems & solutions
| Problem | Quick Fix |
|---|---|
| Compacted soil | Insert garden fork and rock back and forth without turning soil; top with 2″ compost |
| Poor drainage | Create raised beds or mounds; incorporate coarse organic matter like pine bark |
| Low organic matter | Apply 1-2″ compost annually; use diverse mulches; plant cover crops |
| Nutrient deficiencies | Apply balanced organic fertilizer; use targeted amendments based on soil test |
| High pH (alkaline soil) | Incorporate elemental sulfur; mulch with pine needles or oak leaves |
| Low pH (acidic soil) | Apply limestone at rates based on soil test; use wood ash sparingly (½ cup per square meter) |
| Soil crusting | Apply fine mulch after seeding; use compost tea to improve structure |
Common questions about understanding soil
How often should I test my garden soil?
Test soil every 2-3 years for established gardens, annually for new gardens or when addressing specific problems. Vegetable gardens benefit from more frequent testing than ornamental beds.
Can I improve my soil in a single season?
While significant improvement takes multiple seasons, you can see noticeable changes in one season by adding 2-3 inches (5-7.5 cm) of quality compost, using appropriate mulch, and planting cover crops in unused areas.
What’s the fastest way to identify my soil type?
The jar test provides quick identification: fill a jar ⅓ with soil, add water, shake vigorously, and let settle for 24 hours. Sand settles first (bottom), then silt, with clay on top. Measure the layers to determine percentages.
How can I tell if my soil has enough organic matter?
Healthy soil should be dark brown to black, hold shape when squeezed but crumble easily, have an earthy smell, and contain visible earthworms. Soil that dries quickly, crusts over, or feels dense likely needs more organic matter.
Is it possible to over-amend soil?
Yes. Excessive amendments, particularly concentrated fertilizers or single materials, can create imbalances. Follow soil test recommendations, limit compost to 1-2 inches annually, and use diverse amendment sources rather than relying on one material.
How do I know if my soil biology is healthy?
Count earthworms (10+ per cubic foot indicates good biology), look for fungal threads (white filaments) in decomposing mulch, check for crumbly soil structure, and observe rapid decomposition of organic matter—all signs of active soil biology.
Can I use the same soil improvement methods for containers?
Container soil requires more frequent attention. Use high-quality potting mix (not garden soil), refresh annually by replacing ⅓ of the volume, incorporate worm castings for biology, and apply liquid organic fertilizers more frequently as nutrients leach more quickly.