
How to Turn Kitchen Scraps Into Garden Gold With This Easy Compost Trick: A Complete Guide to Home Composting
Intro for Turn Kitchen Scraps Into Garden Gold With This Easy Compost Trick
Composting kitchen scraps is one of the most rewarding practices for any gardener, transforming what would be waste into nutrient-rich soil amendment. This natural recycling process reduces landfill contributions while creating “garden gold” that improves soil structure, adds essential nutrients, and promotes healthy plant growth. Home composting works in virtually any climate, from cool temperate regions to warm Mediterranean zones, requiring minimal equipment and maintenance. By implementing the simple layering technique outlined in this guide, you’ll create a sustainable cycle that benefits both your garden and the environment, all while reducing your household waste by up to 30%.
When to plant Turn Kitchen Scraps Into Garden Gold With This Easy Compost Trick
Composting is a year-round activity that can be started in any season, though the decomposition process varies with temperature. In temperate regions, bacterial activity peaks when compost pile temperatures range between 10-32°C (50-90°F). During winter months in colder climates (below 4°C/40°F), decomposition slows significantly but doesn’t stop completely. For frost-prone areas, consider insulating your compost bin with straw bales or relocating it to a sheltered location to maintain moderate temperatures. Summer is ideal for starting a new compost pile as the warm temperatures accelerate the initial breakdown process.
Best time to plant Turn Kitchen Scraps Into Garden Gold With This Easy Compost Trick

In cool climate regions (US Zones 3-6, UK northern regions), begin outdoor compost piles from late March through October when temperatures consistently remain above 7°C (45°F). For warm climate regions (US Zones 7-10, Mediterranean areas), composting can be maintained year-round with attention to moisture levels during hot summer months. Indoor composting systems like bokashi or worm bins can be started any time regardless of outside temperatures. For beginners, spring (April-May) offers ideal conditions as increasing temperatures accelerate decomposition while avoiding summer heat that might cause odor issues before good habits are established.
Best Turn Kitchen Scraps Into Garden Gold With This Easy Compost Trick varieties to grow
• Traditional Layered Pile – Perfect for gardeners with space, accommodating large volumes of yard and kitchen waste with minimal maintenance.
• Tumbling Composter – Ideal for small spaces, speeds decomposition through easy turning, and deters pests with enclosed design.
• Worm Composting (Vermicomposting) – Produces exceptionally rich compost tea and castings, perfect for apartment dwellers with limited kitchen waste.
• Bokashi Fermentation – Anaerobic system that handles all food scraps including meat and dairy, producing compost in just 2-4 weeks.
• Trench Composting – Direct-to-garden method requiring no bin, perfect for gardeners who want to compost directly where nutrients are needed.
• Compost Tea Brewing – Liquid fertilizer production method that extends the benefits of small amounts of finished compost.
• Three-Bin System – Efficient method for continuous composting, allowing simultaneous collection, active decomposition, and finished compost access.
How to plant Turn Kitchen Scraps Into Garden Gold With This Easy Compost Trick
Materials needed:
• Compost bin or designated area (minimum 3ft x 3ft)
• Kitchen scraps (fruit/vegetable peels, coffee grounds, eggshells)
• Brown materials (dry leaves, shredded paper, cardboard)
• Garden fork or compost aerator tool
• Watering can
• Optional: compost thermometer
• Optional: compost activator
Step-by-step process:
1. Select a level, partially shaded location with good drainage, ideally with easy access from your kitchen.
2. Prepare your bin by ensuring adequate ventilation holes or create a simple enclosure using wire fencing or wooden pallets.
3. Create a 10-15 cm (4-6 inch) base layer of coarse brown materials like small twigs or shredded cardboard to promote airflow.
4. Add a 5-8 cm (2-3 inch) layer of green materials (kitchen scraps, fresh grass clippings).
5. Cover completely with a 10-15 cm (4-6 inch) layer of brown materials to prevent odors and deter pests.
6. Moisten the layers until they feel like a wrung-out sponge – damp but not soggy.
7. Repeat these alternating green and brown layers as kitchen scraps accumulate.
8. Turn or aerate the pile every 1-2 weeks using a garden fork to incorporate oxygen.
9. Monitor moisture levels, adding water during dry periods or more browns if too wet.
10. Harvest finished compost from the bottom of the pile after 3-12 months, depending on conditions and management.
How to grow Turn Kitchen Scraps Into Garden Gold With This Easy Compost Trick
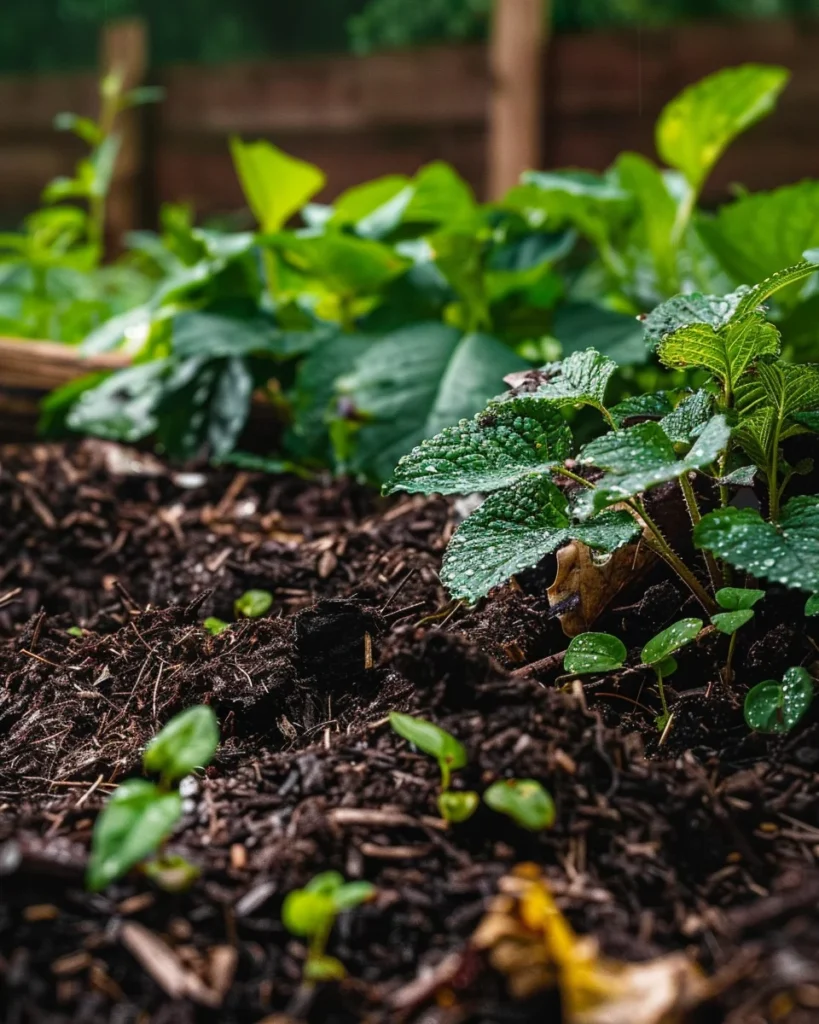
A successful compost pile requires balanced exposure to indirect sunlight – too much direct sun can dry it out while complete shade slows decomposition. Maintain moisture levels similar to a wrung-out sponge, watering during dry periods and covering during excessive rainfall. Unlike plants, compost doesn’t need regular fertilizing, but occasional additions of finished compost or commercial compost activator can introduce beneficial microorganisms. Apply a thin layer of brown materials as mulch over fresh kitchen scraps to prevent flies and odors. Turn the pile every 1-2 weeks to incorporate oxygen and speed decomposition. For container composting, ensure adequate drainage holes and place on a tray to catch any leachate, which makes excellent liquid fertilizer when diluted. Aim for a carbon-to-nitrogen ratio of approximately 30:1 by maintaining roughly three parts brown materials to one part green materials by volume.
Caring for Turn Kitchen Scraps Into Garden Gold With This Easy Compost Trick
Regular maintenance includes monitoring moisture levels and turning the pile to prevent anaerobic conditions that cause odors. Common issues include fruit flies, which can be controlled by thoroughly covering kitchen scraps with brown materials, and slow decomposition, remedied by chopping materials into smaller pieces and ensuring proper moisture. If rodents become problematic, switch to a closed bin system or avoid adding cooked foods and oils. Harvest compost when it appears dark, crumbly, and earthy-smelling with no recognizable food scraps remaining. Sift finished compost through hardware cloth to remove any undecomposed materials. Store excess finished compost in covered containers or bags to preserve microbial activity until needed. For maximum nutrient retention, use finished compost within a year of harvesting.
Understanding bolting in Turn Kitchen Scraps Into Garden Gold With This Easy Compost Trick
While traditional plants bolt (produce flowers and seeds prematurely), compost experiences a similar concept called “going anaerobic.” This occurs when oxygen becomes depleted in the pile, causing anaerobic bacteria to take over, resulting in unpleasant odors similar to rotten eggs or garbage. This is typically triggered by excessive moisture, compaction, or too many green materials without enough browns. Prevent anaerobic conditions by maintaining the proper balance of browns to greens (3:1), turning the pile regularly to incorporate oxygen, and ensuring adequate drainage. If your compost goes anaerobic, remedy it by adding dry brown materials, turning thoroughly to incorporate oxygen, and possibly spreading the pile temporarily to allow excess moisture to evaporate before rebuilding it with proper layering.
Why does Turn Kitchen Scraps Into Garden Gold With This Easy Compost Trick turn bitter?
• Imbalanced C:N ratio – Too many green materials (nitrogen) without enough browns (carbon); add more dried leaves, shredded paper, or cardboard.
• Excessive moisture – Waterlogged piles develop anaerobic conditions; add dry browns and turn thoroughly to restore aerobic decomposition.
• Lack of oxygen – Compacted materials prevent proper airflow; turn pile more frequently and consider adding coarse materials to improve structure.
• Acidic inputs dominating – Too many citrus peels, coffee grounds, or pine needles; balance with crushed eggshells or a light dusting of wood ash.
• Incomplete decomposition – Attempting to use compost before it’s fully mature; allow more time and ensure proper turning and moisture levels.
Companion planting for Turn Kitchen Scraps Into Garden Gold With This Easy Compost Trick
Compost works harmoniously with comfrey, which can be planted nearby as its deep roots mine nutrients from subsoil and its leaves make excellent nitrogen-rich additions to the pile. Yarrow accelerates decomposition when added occasionally as it contains natural compounds that stimulate microbial activity. Borage attracts beneficial insects that may help with the decomposition process while its leaves make excellent compost material. Nettles add iron and nitrogen when included in small amounts. Avoid placing compost piles near black walnut trees as their juglone toxin can inhibit decomposition processes. Similarly, keep compost away from direct contact with cedar trees, as their natural oils can slow microbial activity in the pile.
Seasonal calendar
Spring (March-May): Turn winter compost thoroughly; harvest mature compost for spring planting; add balanced green and brown materials as garden cleanup provides materials.
Summer (June-August): Monitor moisture levels closely, watering during dry spells; add extra browns to absorb moisture from abundant kitchen scraps; harvest finished compost for mid-season garden feeding.
Fall (September-November): Capitalize on fallen leaves as valuable brown material; build volume in the pile before winter; consider covering pile in very wet regions to prevent waterlogging.
Winter (December-February): In cold regions, insulate bin with straw bales; continue adding kitchen scraps even though decomposition slows; in mild climates, maintain regular turning schedule but expect slower processing.
Problems & solutions
| Problem | Quick Fix |
|---|---|
| Foul odor (rotten egg smell) | Turn pile thoroughly, add dry brown materials, and reduce watering |
| Pile not heating up | Add more green materials, ensure adequate moisture, and turn to activate |
| Attracting pests/rodents | Avoid meat/dairy, bury kitchen scraps in center of pile, use enclosed bin |
| Too wet and soggy | Add dry brown materials, improve drainage, cover during heavy rains |
| Too dry, decomposition stalled | Add water until moisture level matches a wrung-out sponge, turn thoroughly |
| Fruit flies swarming | Cover fresh kitchen scraps with 10cm (4in) layer of browns or finished compost |
| Decomposition too slow | Chop materials into smaller pieces, ensure proper moisture, add compost activator |
Common questions about growing Turn Kitchen Scraps Into Garden Gold With This Easy Compost Trick
How often should I water my compost pile?
Monitor moisture levels weekly, adding water when the pile feels dry to the touch. Aim for the consistency of a wrung-out sponge – damp but not soggy. During hot summer months, you may need to water twice weekly, while winter may require no additional moisture.
How much sunlight does a compost pile need?
Partial shade is ideal for compost piles. Some morning sun helps heat the pile and accelerate decomposition, but too much direct sunlight can dry it out excessively. In hot climates, favor more shade; in cool climates, more sun exposure is beneficial.
What size container works best for kitchen scrap composting?
For active decomposition, a minimum volume of 3ft x 3ft x 3ft (1m x 1m x 1m) is recommended to generate sufficient heat. For smaller spaces, tumbling composters of 35-50 gallons work well, while indoor vermicomposting can be done in containers as small as 10-20 gallons.
How far should I space my compost pile from plants?
Keep compost piles at least 2-3 feet (60-90cm) away from growing vegetables and ornamentals to prevent nutrient competition from compost pile roots and potential leachate runoff. However, place it close enough to garden beds for convenient application when finished.
Can I compost in extreme temperatures?
Yes, though decomposition slows below 40°F (4°C) and above 90°F (32°C). In very cold climates, insulate bins with straw bales or move to a sheltered location. In extreme heat, provide shade and monitor moisture more frequently to prevent drying out.
How often should I harvest compost?
Most home compost systems produce finished compost in 3-12 months, depending on management practices and climate. Harvest from the bottom of the pile where decomposition completes first, typically once or twice annually for seasonal gardeners or continuously for year-round gardening.
Can I add weeds to my compost pile?
Yes, but avoid adding weeds with mature seeds or perennial weeds with persistent root systems unless your pile consistently reaches high temperatures (above 63°C/145°F). For cooler piles, add young annual weeds only, or solarize problematic weeds in a black plastic bag for several weeks before composting.