
The Ultimate Mulch Trick That Keeps Gardens Moist and Healthy: When to Apply, Best Materials & Layering Techniques

Intro for The One Mulch Trick That Keeps My Garden Moist and Healthy
Proper mulching is the unsung hero of successful gardens, acting as a protective blanket that transforms plant health while dramatically reducing maintenance. The key mulch trick that professional gardeners rely on is the strategic layering of organic materials to create a moisture-retention system that simultaneously suppresses weeds, regulates soil temperature, and gradually feeds your soil. This technique works in virtually all growing zones, from arid regions to humid environments, and can reduce watering needs by up to 70%. When implemented correctly, this mulching approach creates a self-sustaining ecosystem that promotes robust plant growth while minimizing the time you spend watering, weeding, and troubleshooting common garden problems.
When to Apply The One Mulch Trick That Keeps My Garden Moist and Healthy
The optimal timing for applying this mulch technique depends on your local climate and seasonal patterns. In temperate regions, apply your initial mulch layer in early spring when soil temperatures reach 10-13°C (50-55°F), after the threat of hard frost has passed. This timing allows soil to warm properly while still capturing spring moisture. In warmer zones (US 8-10), apply mulch earlier, around late winter, to prepare for the hot, dry season ahead. For cool-climate gardens, wait until soil has thoroughly warmed to prevent delaying plant growth. Regardless of region, always refresh mulch layers in early autumn to insulate roots before winter and to allow organic materials to begin breaking down during the dormant season.
Best Time to Apply The One Mulch Trick That Keeps My Garden Moist and Healthy
For cool-climate regions (UK, Northern US, Canada), the ideal mulching window falls between mid-April and early May when soil has warmed but before summer heat intensifies. In warm-climate areas (Southern US, Mediterranean), February to March provides the perfect opportunity to establish moisture-retaining layers before hot weather arrives. For established gardens, apply mulch after spring weeding but before summer annuals are planted. For vegetable gardens, mulch immediately after transplanting seedlings but wait until direct-sown seeds have emerged and grown to at least 5-8 cm (2-3 inches) tall. Always mulch in the morning after watering thoroughly, which helps lock in moisture and prevents heat damage to plants.
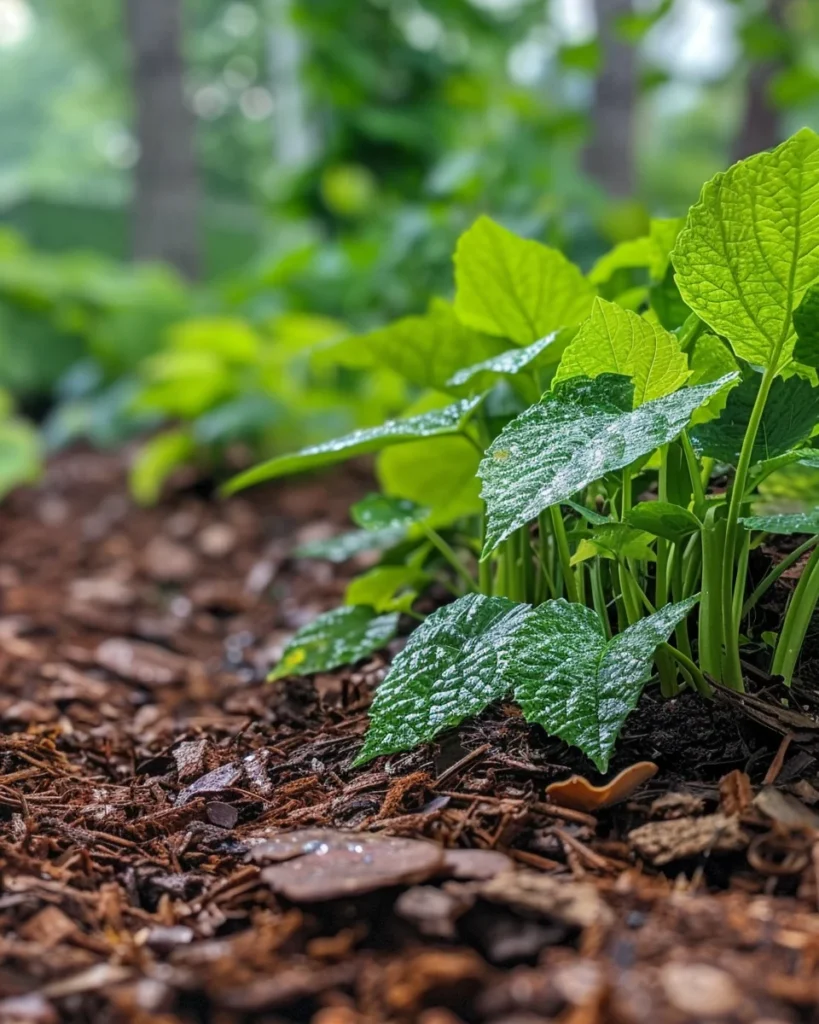
Best Mulch Materials to Keep Your Garden Moist and Healthy
- Shredded Leaves – Nature’s perfect mulch that breaks down slowly, adds valuable nutrients, and creates ideal habitat for beneficial soil organisms.
- Arborist Wood Chips – Superior to commercial mulch with mixed wood sizes that create optimal water filtration and long-lasting protection.
- Straw (Not Hay) – Excellent for vegetable gardens with exceptional moisture retention and minimal weed seed content.
- Pine Needles – Perfect for acid-loving plants with a natural interlocking structure that stays in place on slopes.
- Composted Manure – Dual-purpose mulch that feeds plants while protecting soil, ideal for heavy feeders like tomatoes.
- Cocoa Hulls – Premium mulch with rich color, pleasant scent, and excellent moisture retention (note: toxic to dogs).
- Grass Clippings (Dried) – Free and readily available nitrogen-rich mulch that breaks down quickly to feed soil.
How to Apply The One Mulch Trick That Keeps My Garden Moist and Healthy
Materials needed: Wheelbarrow, garden rake, garden fork, newspaper or cardboard, organic mulch materials (from list above), watering can or hose, garden gloves, pruning shears.
- Water your garden thoroughly before beginning, ensuring soil is deeply moistened.
- Remove all existing weeds completely, including roots, to prevent them from growing through mulch.
- Edge your garden beds clearly to create a defined boundary that contains mulch materials.
- Apply a base layer of newspaper (5-8 sheets thick) or cardboard directly on soil, overlapping edges by 10-15 cm (4-6 inches).
- Wet this paper/cardboard layer thoroughly to prevent it from blowing away and to start the decomposition process.
- Add a thin 1 cm (½ inch) layer of compost or well-rotted manure directly on top of the paper layer.
- Apply your chosen mulch material in a 7-10 cm (3-4 inch) layer, keeping it 5-8 cm (2-3 inches) away from plant stems and tree trunks to prevent rot.
- Create a slight depression around each plant to form a water-catching basin that directs moisture to roots.
- Water the entire mulched area lightly to help settle materials and activate the moisture-retention system.
- For vegetable gardens, leave small gaps in mulch around direct-sown seed rows until seedlings emerge and establish.
How to Grow Plants Using The One Mulch Trick That Keeps My Garden Moist and Healthy
With your mulch system in place, adjust your garden maintenance routine to maximize its benefits. Water deeply but less frequently, allowing moisture to penetrate through mulch layers to encourage deep root growth. When watering, apply water directly to soil rather than mulch surface when possible. Fertilize less often, as organic mulches gradually release nutrients; when needed, apply liquid fertilizers directly to soil beneath mulch or use slow-release granules on top. For container gardens, use a thinner 2-5 cm (1-2 inch) mulch layer and monitor moisture more frequently as containers dry faster than ground soil. In full sun locations, choose lighter-colored mulches like straw to reflect heat, while in partial shade, darker mulches like leaf mold help maintain warmth. Replenish mulch when it compresses to less than 5 cm (2 inches) thick, typically adding 2-3 cm (1 inch) annually rather than removing old layers.
Caring for Your Garden Using The Mulch Trick
Maintain your mulch system by fluffing compacted areas with a garden fork monthly to prevent water runoff and ensure proper aeration. Watch for fungal growth on mulch during humid periods; if spotted, rake to thin excessive layers and improve air circulation. Monitor for slugs and snails that may shelter in mulch; control with iron phosphate baits or by temporarily reducing mulch thickness during wet seasons. Harvest vegetables by gently moving mulch aside to access plants, then replacing it afterward. For perennial beds, pull mulch back slightly in early spring to allow soil to warm, then replace it as plants emerge. When adding new plants to mulched areas, create a mulch-free circle around each transplant until established, gradually filling in as plants mature. For winter protection, increase mulch depth by 2-5 cm (1-2 inches) around cold-sensitive perennials after the first light frost.
Understanding Mulch Decomposition and Renewal
Mulch naturally breaks down over time, which is beneficial for soil health but requires monitoring. Recognize decomposition signs: darkening color, compaction, and visible soil organisms indicate your mulch is feeding the soil as intended. Prevent excessive decomposition by avoiding over-application of nitrogen fertilizers near mulch, which accelerates breakdown. If mulch becomes matted or water begins to run off rather than penetrate, use a garden fork to gently lift and separate materials. For slow-decomposing mulches like wood chips, incorporate a nitrogen source (like coffee grounds or blood meal) when refreshing to prevent nitrogen competition with plants. If mulch develops an ammonia smell, it’s composting too rapidly; rake to thin the layer and add carbon-rich materials like dry leaves. Remember that different mulch materials decompose at varying rates—leaf mulch may need replacement twice yearly while wood chips can last 1-2 years.
Why Does Mulch Sometimes Fail to Keep Gardens Moist?
- Insufficient depth – Mulch layers less than 5 cm (2 inches) thick don’t provide adequate moisture retention; increase to 7-10 cm (3-4 inches).
- Hydrophobic mulch – Some wood mulches become water-repellent when dry; add a drop of dish soap to watering can to break surface tension.
- Incorrect application – Mulch piled against plant stems creates dry pockets around roots; maintain a 5-8 cm (2-3 inch) stem-free zone.
- Wrong mulch for conditions – Fine mulches in rainy regions can mat and block water; switch to coarser materials like wood chips.
- Underlying soil compaction – Even with mulch, compacted soil limits water penetration; aerate before mulching.
Companion Planting Strategies with Mulched Gardens
Certain plants thrive particularly well in mulched environments and can enhance your mulch system’s effectiveness. Shallow-rooted herbs like thyme and oregano benefit from mulch’s temperature moderation while adding aromatic pest deterrence. Deep-rooted plants like comfrey bring up nutrients that eventually incorporate into mulch as leaves decompose. Nitrogen-fixing plants such as beans and peas complement mulched areas by adding nutrients that help break down carbon-rich mulches. Living mulches like white clover work well between rows of brassicas, adding nitrogen while suppressing weeds. Avoid planting moisture-sensitive plants like lavender or rosemary in heavily mulched areas, as they prefer drier conditions and can develop root rot. Similarly, self-seeding annuals struggle to propagate through thick mulch layers, so leave small mulch-free zones if you want them to spread naturally.
Seasonal Calendar
- January-February: Plan mulch needs for coming season; source materials; apply winter mulch in warm regions.
- March: Pull back mulch from perennial and bulb areas to allow soil warming; prepare newspaper/cardboard base layers.
- April: Apply initial spring mulch layers in cool regions after soil warms; mulch around early vegetable transplants.
- May: Complete all spring mulching; apply mulch around warm-season vegetable transplants.
- June-July: Monitor mulch moisture; supplement during dry periods; add mulch around heat-sensitive plants.
- August: Replenish any depleted mulch areas; prepare for fall vegetable garden mulching.
- September-October: Apply fall mulch layers; collect fallen leaves for composting or direct mulching.
- November: Add winter protective mulch around sensitive perennials after first frost.
- December: Mulch vacant vegetable beds with compostable materials to improve soil for spring.
Problems & Solutions
| Problem | Quick Fix |
|---|---|
| Mulch washing away in heavy rain | Create mulch-retaining edges with rocks or logs; use coarser, heavier mulch materials. |
| Fungal growth/mushrooms appearing | Reduce mulch thickness; rake to aerate; this usually indicates healthy decomposition. |
| Ants nesting in mulch | Lightly disturb mulch with rake weekly; apply diatomaceous earth in affected areas. |
| Plants yellowing after mulching | Pull mulch away from stems; check for nitrogen deficiency from fresh wood mulch; apply diluted liquid fertilizer. |
| Mulch developing sour smell | Mulch is too wet and compacted; rake to aerate; reduce thickness; add lime if very acidic. |
| Rodents nesting in mulch | Reduce depth to 5 cm (2 inches); keep mulch 30 cm (12 inches) away from structures; consider adding sharp-edged mulch like cocoa hulls. |
Common Questions About Using Mulch to Keep Gardens Moist and Healthy
Q: How often should I water my mulched garden?
A: Typically 50-70% less frequently than unmulched gardens. Check moisture by pushing fingers through mulch into soil—water only when the soil feels dry 5 cm (2 inches) below the surface. Most established mulched gardens need deep watering just once weekly in moderate weather, twice weekly during hot periods.
Q: Can I use grass clippings as mulch?
A: Yes, but only when dried first and applied in thin layers (2-3 cm/1 inch) to prevent matting. Never use clippings from lawns treated with herbicides, and mix with brown materials like leaves to prevent nitrogen excess.
Q: Should I remove old mulch before adding new mulch?
A: Generally no—allow organic mulches to decompose into the soil. Only remove mulch if it’s developed mold problems or if total depth exceeds 10 cm (4 inches). Otherwise, simply add a thinner 2-3 cm (1 inch) refresher layer annually.
Q: Is landscape fabric necessary under mulch?
A: No, newspaper or cardboard is more effective, biodegradable, and allows beneficial organisms to move between soil and mulch. Landscape fabric eventually allows weeds to grow through while preventing mulch from improving soil.
Q: How do I mulch on slopes without it washing away?
A: Create small terraces or contour lines with logs or stones to catch mulch; use interlocking materials like pine needles or shredded bark; apply a thinner initial layer (5 cm/2 inches) and build up gradually after rain tests its stability.
Q: Can mulch attract termites to my home?
A: Keep all mulch at least 15-20 cm (6-8 inches) away from building foundations. Use non-wood mulches like stone or rubber near structures if concerned. Cedar and cypress mulches naturally repel many insects including termites.
Q: How do I prevent mulch from becoming hydrophobic (water-repellent)?
A: Avoid fine-textured mulches in dry climates; incorporate compost into top layer of mulch annually; add a few drops of dish soap to watering can occasionally to break surface tension; gently rake surface before heavy watering to improve penetration.