
How to Grow Worm Composting Vermicompost Indoors: A Complete Guide for Sustainable Gardening
Intro for worm composting vermicompost indoors
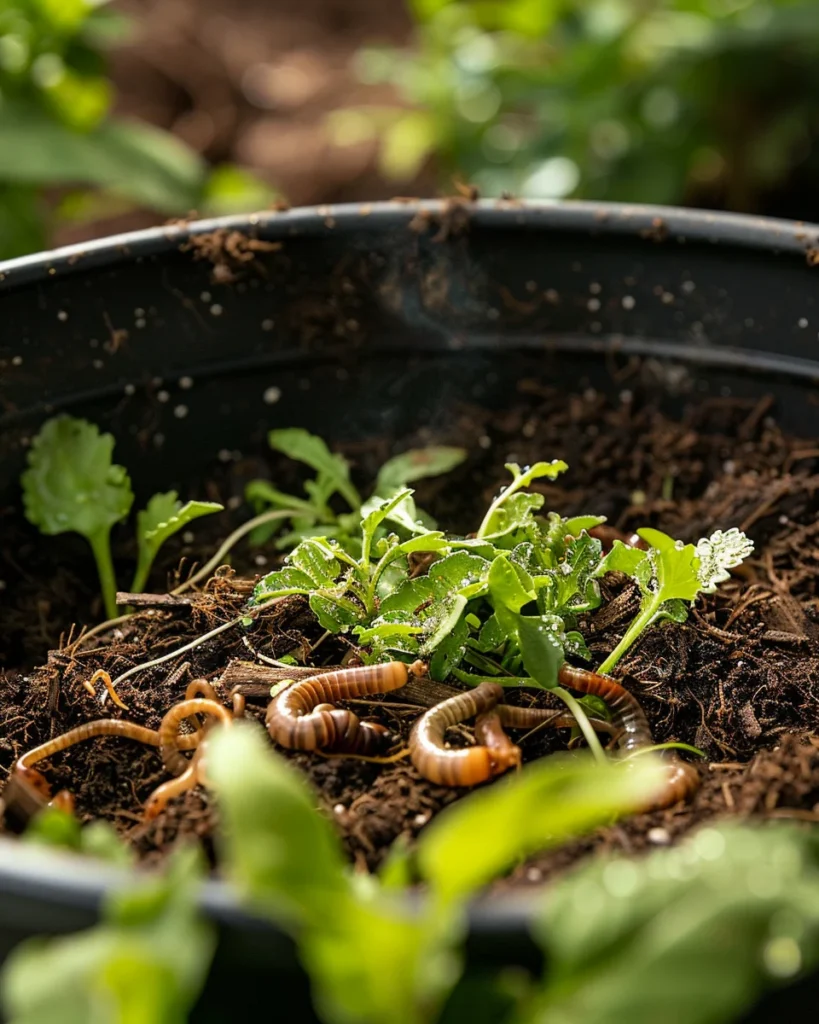
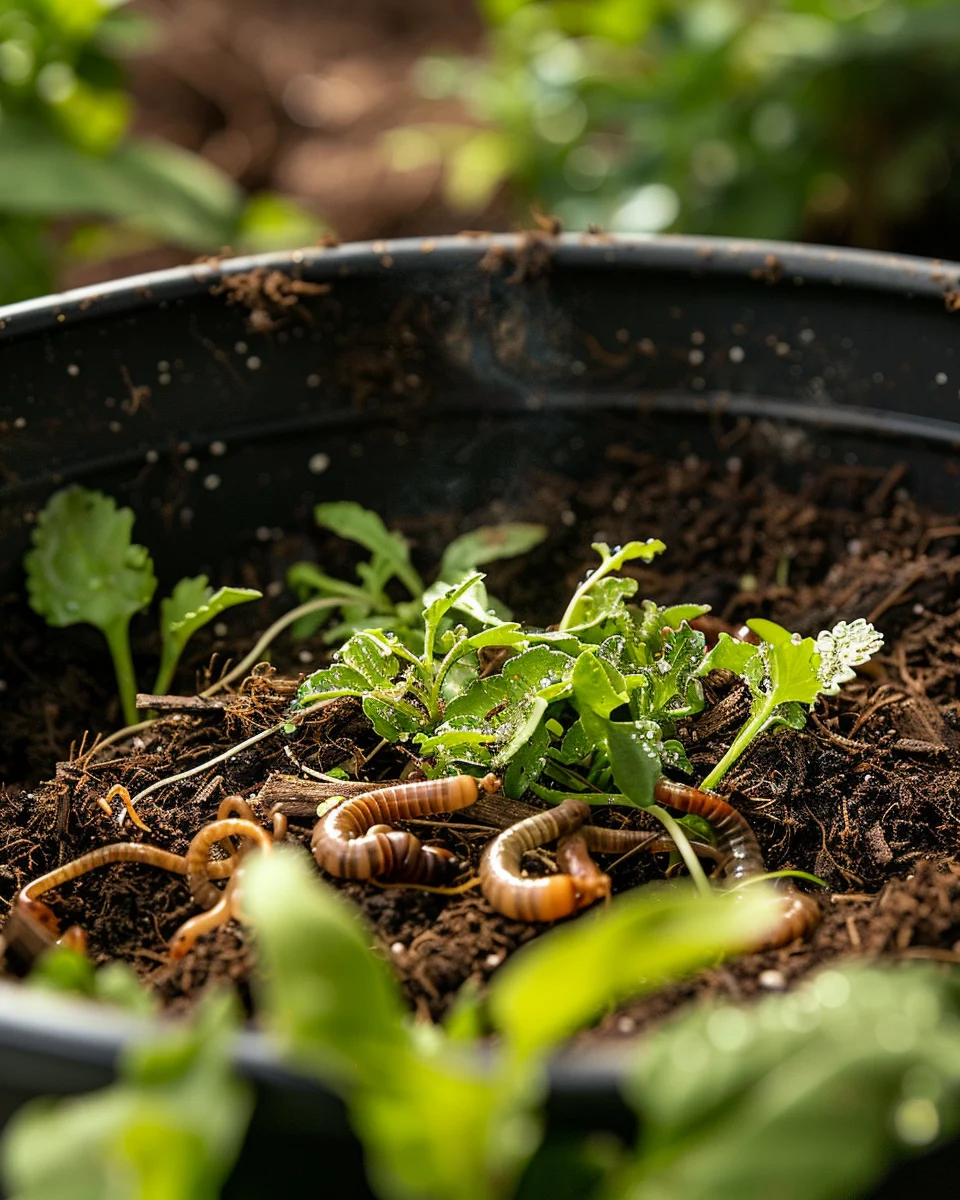
Vermicomposting is an eco-friendly indoor composting method that uses worms to transform kitchen scraps and paper waste into nutrient-rich compost. This natural process creates “black gold” for your plants—a balanced fertilizer teeming with beneficial microorganisms and plant growth hormones. Unlike traditional composting, vermicomposting works year-round in a controlled indoor environment, making it perfect for apartment dwellers or gardeners in extreme climates. A properly maintained worm bin produces no odor and requires minimal space. With just a small bin of red wiggler worms, you can recycle food waste while producing premium organic fertilizer for houseplants, container gardens, and outdoor beds.
When to plant worm composting vermicompost indoors
The beauty of indoor vermicomposting is that you can start anytime, regardless of outdoor temperatures. However, when purchasing worms, it’s best to avoid shipping during extreme temperature periods (below 0°C/32°F or above 32°C/90°F) as transit conditions can stress or kill the worms. For beginners, spring and fall offer moderate temperatures that help worms acclimate to their new environment. Indoor vermicomposting maintains consistent conditions year-round, with ideal bin temperatures between 15-25°C (59-77°F). Unlike outdoor composting, vermicomposting isn’t affected by frost dates or growing seasons, making it a continuous process that produces harvestable compost every 3-6 months.
Best time to plant worm composting vermicompost indoors
While you can establish a worm bin any month of the year, many gardeners prefer starting in early spring (March-April) to have finished compost ready for summer planting. In cooler climates, starting in September-October provides rich vermicompost for winter houseplants and spring seedlings. The worms themselves adapt quickly to their new home regardless of season, but their activity level and reproduction rate will be highest when kept at 18-22°C (65-72°F). If you’re planning to use your first harvest for specific garden projects, start your bin approximately 3-4 months beforehand. Remember that a new bin takes about 2 weeks to establish before reaching optimal processing capacity.
Best worm composting vermicompost varieties to grow
- Red Wigglers (Eisenia fetida) – The gold standard for vermicomposting due to their voracious appetite, rapid reproduction, and ability to thrive in confined spaces.
- European Nightcrawlers (Eisenia hortensis) – Larger than red wigglers, excellent for processing coarser materials and creating deeper aeration channels in the compost.
- Indian Blues (Perionyx excavatus) – Fast breeders that excel in warmer environments, perfect for homes kept above 21°C (70°F).
- African Nightcrawlers (Eudrilus eugeniae) – Tropical worms that process large volumes of waste quickly but require consistently warm temperatures.
- Red Worms (Lumbricus rubellus) – Adaptable to various conditions and excellent at breaking down tougher organic matter.
- Tiger Worms (Eisenia andrei) – Close relatives of red wigglers with similar characteristics but distinctive striping, excellent for beginners.
How to plant worm composting vermicompost indoors
Materials needed:
- Plastic bin with lid (opaque, 40-60L/10-15 gallon capacity)
- Drill (for ventilation holes)
- Shredded newspaper, cardboard, or coconut coir
- Garden soil or finished compost (1 cup)
- Spray bottle with water
- Red wiggler worms (500-1000 to start)
- Kitchen scraps
- Tray to catch leachate (optional)
Step-by-step setup:
- Drill 10-15 small ventilation holes (1/8 inch) in the lid and upper sides of your bin for airflow.
- Create drainage holes in the bottom if you plan to collect leachate, or keep the bottom solid to retain moisture.
- Shred newspaper or cardboard into 1-inch strips and soak in water until damp but not soggy.
- Squeeze excess water from bedding and fluff it up to fill the bin about 3/4 full (15-20cm/6-8 inches deep).
- Mix in one cup of garden soil or finished compost to introduce beneficial microorganisms.
- Add your worms to the bedding and cover them lightly, allowing them to burrow down naturally.
- Place a few handfuls of food scraps in one corner of the bin, burying them under 5cm/2 inches of bedding.
- Cover the bin with the ventilated lid and place in a location with stable temperatures (15-25°C/59-77°F).
- Let the system rest for 1-2 days before adding more food to allow worms to acclimate.
How to grow worm composting vermicompost indoors
Place your worm bin in a location with consistent temperatures—under a sink, in a closet, utility room, or any space away from direct sunlight and temperature extremes. Worms prefer darkness, so an opaque bin is ideal. Maintain bedding moisture similar to a wrung-out sponge; if too dry, mist with water, and if too wet, add dry bedding materials. Feed worms by burying small amounts of kitchen scraps (excluding meat, dairy, oils, and citrus) in different areas of the bin, rotating feeding zones. For a typical household, start with about 1 cup of scraps weekly, increasing as the worm population grows. Add fresh bedding monthly by placing new shredded paper on top. For apartment dwellers, stackable worm bins maximize space efficiency while making compost harvesting easier.
Caring for worm composting vermicompost indoors
Monitor moisture levels weekly by squeezing a handful of bedding—it should release a few drops of water but not be soggy. Check pH occasionally using test strips; maintain a neutral 6.5-7.5 range by adding crushed eggshells if too acidic. Common issues include fruit flies (remedy by burying food deeper and covering with damp newspaper) and unpleasant odors (indicating overfeeding or poor drainage—reduce feeding and add dry bedding). Harvest vermicompost every 3-6 months using the light-exposure method: place compost in small piles under bright light and wait for worms to move downward, then collect the top worm-free compost. Store finished vermicompost in breathable containers for up to a year. If leaving for vacation, feed worms extra bedding material and a larger amount of food before departing.
Understanding bolting in worm composting vermicompost indoors
While plants bolt when stressed, worms exhibit their own stress responses in vermicomposting systems. “Worm bolting” refers to mass exodus attempts when conditions become unfavorable. This typically occurs due to temperature extremes (above 30°C/86°F or below 10°C/50°F), excessive moisture (waterlogged bedding), acidic conditions from overfeeding, or vibrations near the bin. Prevent worm escape attempts by maintaining optimal bin conditions, avoiding overfeeding, and keeping the bin in a stable environment away from appliances that cause vibration. If worms are climbing the sides or gathering at the lid, immediately check moisture levels, reduce acidic foods, and ensure proper ventilation. Adding a light above the bin temporarily can encourage worms to burrow deeper, as they naturally avoid light.
Why does worm composting vermicompost turn bitter?
- Excessive acidity: Too many acidic food scraps (coffee grounds, citrus) – balance with crushed eggshells or garden lime.
- Anaerobic conditions: Compacted, waterlogged bedding without enough oxygen – add dry bedding and fluff contents to increase aeration.
- Protein overload: Too much nitrogen-rich material (vegetable scraps) without enough carbon (paper) – add more shredded paper or cardboard.
- Overfeeding: Food scraps decomposing faster than worms can process – reduce feeding amount and frequency until bin catches up.
- Toxic buildup: Accumulation of worm castings without harvesting – harvest mature compost regularly to prevent casting toxicity to worms.
Companion planting for worm composting vermicompost indoors
While traditional companion planting doesn’t apply to vermicomposting, certain materials complement your worm bin ecosystem:
- Aged coffee grounds – Adds nitrogen and improves texture while attracting worms.
- Crushed eggshells – Provides calcium, helps maintain pH balance, and offers grit for worm digestion.
- Aged manure – Small amounts introduce beneficial microbes that accelerate decomposition.
- Coconut coir – Excellent bedding alternative to paper that retains moisture perfectly.
- Dried leaves – Adds carbon and creates air pockets for better bin aeration.
Avoid adding these materials to your worm bin:
- Citrus peels and onions – Too acidic and potentially repellent to worms.
- Meat, dairy, and oils – Attract pests and create odor problems.
- Fresh grass clippings – Can heat up and create ammonia when decomposing.
Seasonal calendar
- January-February: Maintain bin in warm location; harvest mature compost for spring seedlings; feed sparingly.
- March-April: Excellent time to start new bins; increase feeding as worm activity rises; use harvested compost for seed starting.
- May-June: Peak worm reproduction period; monitor moisture as ambient temperatures rise; harvest compost for summer garden applications.
- July-August: Keep bin cool in hot weather; increase bedding to absorb excess moisture from summer fruit scraps; watch for fruit flies.
- September-October: Good time to divide overcrowded bins; harvest compost for fall plantings; prepare bin for winter with extra bedding.
- November-December: Move bins to warmer locations if house temperatures drop; reduce feeding during holidays if traveling; add holiday vegetable scraps gradually.
Problems & solutions
| Problem | Quick Fix |
|---|---|
| Foul odor | Reduce feeding, add dry bedding, aerate bin contents by gently turning |
| Fruit flies | Bury food deeper, cover with 5cm/2in of bedding, add fruit fly trap nearby |
| Mold growth | White mold is normal; excessive mold means too much moisture—add dry bedding |
| Worms trying to escape | Check moisture, temperature, and pH; add fresh bedding and reduce feeding |
| Slow decomposition | Chop food scraps smaller, ensure proper temperature (18-25°C/65-77°F) |
| Bin too wet | Add dry bedding, leave lid ajar temporarily, ensure drainage holes aren’t blocked |
| Declining worm population | Check pH, ensure proper feeding, verify temperature range, add fresh bedding |
Common questions about growing worm composting vermicompost indoors
Q: How much should I feed my worms?
A: Start with 1 cup of food scraps per pound of worms weekly. A healthy bin can process about half its weight in food weekly when established. Always wait until previous food is mostly consumed before adding more.
Q: Will my worm bin smell?
A: A properly maintained worm bin should have an earthy, forest-floor smell. Foul odors indicate overfeeding, poor drainage, or inadequate aeration. Reduce feeding and add dry bedding to correct.
Q: How many worms do I need to start?
A: Begin with 500-1000 red wigglers (about 1 pound) for a typical home bin (40-60L/10-15 gallons). They’ll reproduce to match their environment’s carrying capacity over time.
Q: How often should I harvest the compost?
A: Harvest vermicompost every 3-6 months, depending on bin size and feeding rate. When the bin is 3/4 full of dark, soil-like material with few recognizable scraps, it’s ready for harvesting.
Q: Can I keep a worm bin in an apartment?
A: Absolutely! Choose a location in a closet, under a sink, or in a utility area. A properly maintained bin is odorless and compact, making it perfect for apartment living.
Q: What temperature range can worms tolerate?
A: Red wigglers perform best between 15-25°C (59-77°F). They slow down below 10°C (50°F) and may die above 30°C (86°F) or below freezing. Indoor locations typically provide ideal conditions year-round.
Q: How do I use the finished vermicompost?
A: Mix 1 part vermicompost with 4 parts potting soil for containers, sprinkle 1/4 inch on houseplants monthly, brew compost tea by steeping in water, or add directly to garden beds at 1-2 cups per square foot annually.