
How to Grow Vegetables with Drip Irrigation: Efficient Watering for Bountiful Harvests
Intro for how to grow vegetables with drip irrigation
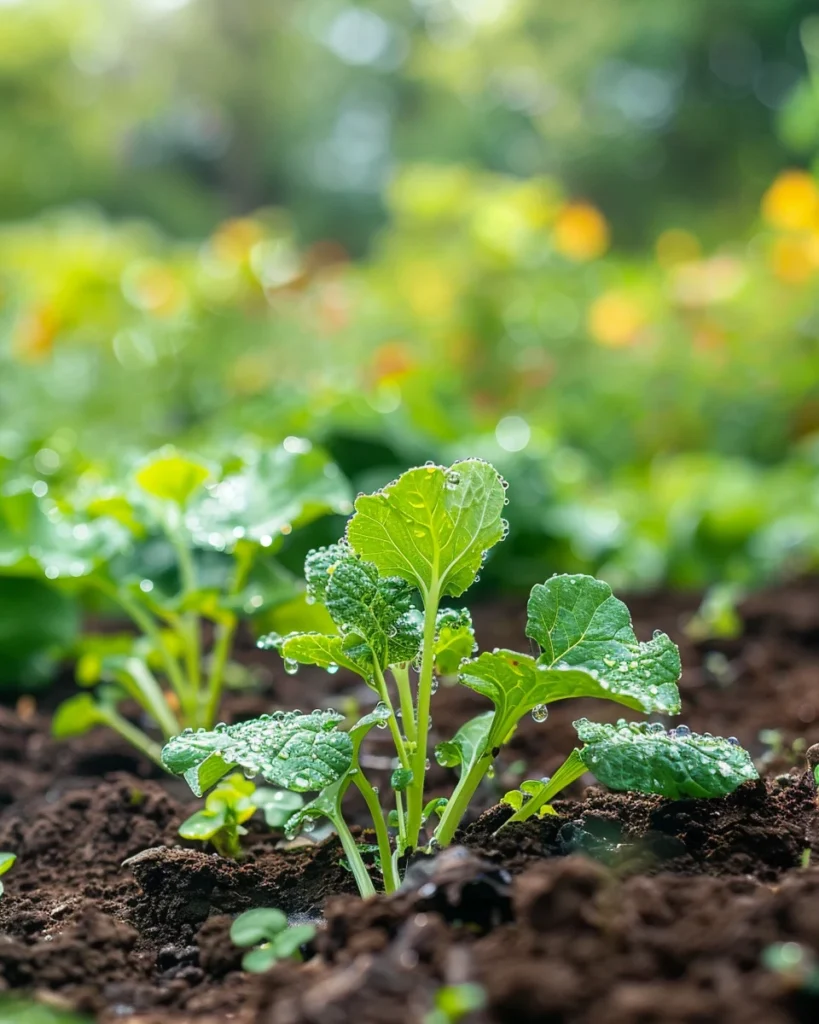
Drip irrigation is a water-efficient method that delivers moisture directly to plant roots through a network of tubes, emitters, and drippers. This targeted approach reduces water waste by up to 60% compared to traditional sprinkler systems while minimizing weed growth and foliar diseases. Drip irrigation works exceptionally well in vegetable gardens of all sizes, from small raised beds to extensive garden plots. By providing consistent moisture at the root zone, plants develop stronger root systems and produce higher yields. This system is adaptable to most climates and particularly valuable in regions with water restrictions or during drought conditions.
When to plant how to grow vegetables with drip irrigation
Installing a drip irrigation system is best done before or during planting season. In temperate regions, early spring (after the last frost) is ideal for setting up your system alongside spring vegetable planting. For year-round gardens, you can install drip irrigation any time the ground isn’t frozen. Soil temperatures should be workable (above 10°C/50°F) to easily insert stakes and secure tubing. In frost-prone areas, consider installing the system with quick disconnects that allow you to drain and store pressure regulators and filters during winter to prevent freeze damage.
Best time to plant how to grow vegetables with drip irrigation

In cool-climate regions (UK, Northern US, Canada), install your drip system in April-May when preparing spring gardens. For warm-climate regions (Southern US, Mediterranean), February-March installation allows for early spring vegetables, or September-October for fall/winter gardens. Direct-sown seeds benefit from drip irrigation with closely spaced emitters or drip tape, while transplants do well with individual drippers placed near each plant’s root zone. For established gardens, you can retrofit drip irrigation any time during the growing season, though it’s easier to install before plants become large and sprawling.
Best how to grow vegetables with drip irrigation varieties to grow
- Drip Tape Systems – Ideal for row crops like lettuce and carrots with evenly spaced emitters along the entire length.
- Emitter Tubing – Perfect for mixed vegetable beds with pre-installed emitters at regular intervals (typically 12-18 inches apart).
- Individual Emitters – Best for widely spaced plants like tomatoes and squash where customized water delivery is needed.
- Micro-Sprinklers – Excellent for leafy greens and seedlings that benefit from a wider spray pattern while still conserving water.
- Pressure-Compensating Systems – Superior for sloped gardens where consistent water flow is needed regardless of elevation changes.
- Timer-Controlled Systems – Perfect for busy gardeners, delivering precise amounts of water on a programmable schedule.
- Soaker Hoses – Budget-friendly option that works well for small gardens and raised beds with mixed vegetables.
How to plant how to grow vegetables with drip irrigation
Materials needed: Drip irrigation starter kit or components (main line, drip tape/emitters, connectors), pressure regulator, filter, timer (optional), hole punch, end caps, stakes or landscape pins, hose adapter, Teflon tape, scissors or tubing cutter.
- Plan your garden layout, mapping rows and plant spacing before installing irrigation.
- Connect your water source to a backflow preventer, followed by the pressure regulator and filter.
- Lay out the main supply line (½-inch tubing) around the perimeter of your garden beds.
- For row crops, connect drip tape or emitter lines perpendicular to the main line using appropriate fittings.
- Secure tubing with stakes or landscape pins every 2-3 feet (60-90 cm) to prevent movement.
- For individual plants like tomatoes or peppers, use a hole punch to add emitters at each plant location.
- Cap the ends of all lines or create a flush valve for periodic cleaning.
- Test the system before planting to ensure even water distribution and check for leaks.
- Plant seeds or transplants near emitters, ensuring the water will reach root zones.
- Apply a layer of mulch around plants and over drip lines to further conserve moisture and protect the system.
How to grow how to grow vegetables with drip irrigation
Most vegetables need full sun (6+ hours daily), though leafy greens can tolerate partial shade. Set your drip system to water deeply 2-3 times per week rather than daily shallow watering to encourage deep root growth. For sandy soils, shorter, more frequent cycles may be necessary. Apply balanced organic fertilizer (like 5-5-5) at planting time, then switch to a lower-nitrogen, higher-phosphorus formula (like 2-5-3) when plants begin flowering. Liquid fertilizers can be added through the drip system using an injector or reservoir.
For container vegetables, use specialized drip emitters with lower flow rates (0.5-1 GPH) and water more frequently as containers dry out faster. Mulch around plants with straw, compost, or wood chips to retain moisture and insulate the soil, keeping drip lines covered but emitters exposed. For climbing vegetables like peas and cucumbers, install trellises before laying drip lines to avoid damaging the system later.
Caring for how to grow vegetables with drip irrigation
Inspect your drip system weekly for clogged emitters or damaged lines. Flush the system monthly by opening end caps and running water through at full pressure to clear sediment. Monitor soil moisture by digging down 2-3 inches (5-7 cm) – soil should be moist but not soggy. Common issues include clogging from mineral deposits (treat with vinegar flush) and sun damage to exposed tubing (cover with mulch).
For pest control, drip irrigation helps prevent many fungal issues by keeping foliage dry. Watch for aphids and spider mites during dry periods; treat with insecticidal soap or neem oil. Harvest vegetables in the morning when plants are hydrated for best flavor and storage life. Most root vegetables and fruiting crops benefit from reduced irrigation just before harvest to concentrate flavors, while leafy greens need consistent moisture until cutting.
Understanding bolting in how to grow vegetables with drip irrigation
Bolting occurs when leafy vegetables like lettuce and spinach prematurely produce flower stalks, making leaves bitter. Consistent soil moisture from drip irrigation significantly reduces bolting triggered by drought stress. However, high temperatures remain a primary bolting trigger, so use drip irrigation to maintain cooler soil temperatures by watering in the early morning and using mulch over the drip lines. If temperatures exceed 27°C (80°F) for extended periods, consider adding shade cloth above heat-sensitive crops while maintaining drip irrigation below. If bolting begins, harvest immediately and replant heat-tolerant varieties, ensuring your drip system is programmed for more frequent watering during hot periods.
Why does how to grow vegetables with drip irrigation turn bitter?
- Inconsistent watering – Even with drip irrigation, improper scheduling can cause stress; use a timer to maintain regular watering.
- Heat stress – During heatwaves, increase watering frequency via your drip system and consider temporary shade.
- Nutrient imbalance – Too much nitrogen causes bitter growth; use balanced fertilizers through your drip system.
- Emitter clogging – Partial blockages cause uneven watering; check and clean emitters regularly.
- Inadequate coverage – Insufficient emitters leave dry spots; ensure proper emitter spacing for complete root zone coverage.
Companion planting for how to grow vegetables with drip irrigation
Good companions:
- Basil and tomatoes – Share similar water needs and basil deters tomato hornworms; use individual emitters for each plant.
- Carrots and onions – Both thrive with moderate, consistent moisture; use drip tape with close emitter spacing.
- Cucumbers and sunflowers – Sunflowers provide natural trellising while sharing water needs; use higher-flow emitters for these thirsty plants.
- Lettuce and radishes – Quick-growing companions with similar shallow root zones; use drip tape with frequent, light watering.
- Peppers and marigolds – Marigolds deter pests while both enjoy similar drip irrigation schedules with soil drying slightly between waterings.
Avoid planting near:
- Deeply rooted plants next to shallow-rooted ones – They compete for water and make irrigation scheduling difficult.
- Water-loving plants (celery, cucumbers) next to drought-tolerant ones (rosemary, sage) – Creates conflicting irrigation needs.
- Plants susceptible to similar fungal diseases – Even with drip irrigation, proximity can spread disease between related plants.
Seasonal calendar
- January-February: Plan garden layout and drip irrigation system design; order components; repair existing systems.
- March: Install main drip lines before spring planting; set up timers; plant cool-season crops with appropriate emitters.
- April-May: Plant warm-season vegetables; adjust drip system timer as weather warms; monitor soil moisture levels.
- June-July: Increase watering frequency during hot weather; check for clogged emitters; apply liquid fertilizer through drip system.
- August: Maintain system during peak harvest; flush lines to prevent mineral buildup; repair any sun-damaged components.
- September-October: Adjust watering schedule for cooler weather; plant fall crops; add new drip lines as needed.
- November: Reduce watering frequency for winter crops; prepare to winterize system in cold regions.
- December: In freeze-prone areas, disconnect pressure regulators and drain lines; in mild climates, maintain reduced watering schedule.
Problems & solutions
| Problem | Quick Fix |
|---|---|
| Clogged emitters | Remove and soak in vinegar solution or replace; install a better filter at the water source. |
| Uneven watering | Check for kinks in tubing; add pressure-compensating emitters; ensure proper system pressure. |
| Leaking connections | Tighten fittings; replace damaged components; use Teflon tape on threaded connections. |
| System won’t turn on | Check water source, timer batteries, and pressure regulator; look for closed valves or major leaks. |
| Plants still wilting | Increase watering duration or frequency; add more emitters per plant; check for root-bound plants. |
| Animal damage to lines | Bury main lines 2-3 inches deep; cover with mulch; use protective tubing in vulnerable areas. |
| Algae growth in lines | Use opaque tubing; add hydrogen peroxide to system during flushing; keep filter clean. |
Common questions about growing how to grow vegetables with drip irrigation
Q: How often should I run my drip irrigation system?
A: Most vegetable gardens need watering 2-3 times per week for 30-60 minutes per session during moderate weather, increasing to daily watering during hot periods. Check soil moisture 2-3 inches deep to fine-tune your schedule.
Q: How many emitters do I need per plant?
A: Small plants like lettuce and herbs need 1 emitter, medium plants like peppers need 2 emitters, and large plants like tomatoes and squash need 3-4 emitters spaced around the root zone.
Q: Can I use drip irrigation in containers?
A: Yes, use specialized micro-emitters (0.5-1 GPH) for containers. For multiple containers, run ¼-inch distribution tubing with individual emitters to each pot, programming more frequent watering cycles than in-ground gardens.
Q: What’s the ideal spacing for drip emitters or drip tape?
A: For row crops, use drip tape with emitters every 6-12 inches (15-30 cm). For individual plants, space emitters based on plant size: 12 inches (30 cm) apart for small plants, 18-24 inches (45-60 cm) for medium plants, and 24-36 inches (60-90 cm) for large plants.
Q: How do I prevent my drip system from freezing in winter?
A: In cold regions, disconnect the system from the water source, remove the timer and pressure regulator, and blow out the lines with compressed air. Use quick-connect fittings for easy seasonal removal of key components.
Q: Can I fertilize through my drip irrigation system?
A: Yes, using liquid fertilizers with a fertilizer injector or reservoir. This “fertigation” delivers nutrients directly to the root zone. Use water-soluble organic or conventional fertilizers at half the recommended strength but twice as often.
Q: How much water does drip irrigation save?
A: Drip irrigation typically saves 30-70% of water compared to sprinkler systems by minimizing evaporation, runoff, and wind drift. A properly designed system delivers water only where plants need it, at the correct rate for optimal growth.