
How to Grow Oats as a Cover Crop: When to Plant, Best Varieties & Soil Benefits
Intro for growing oats as a cover crop
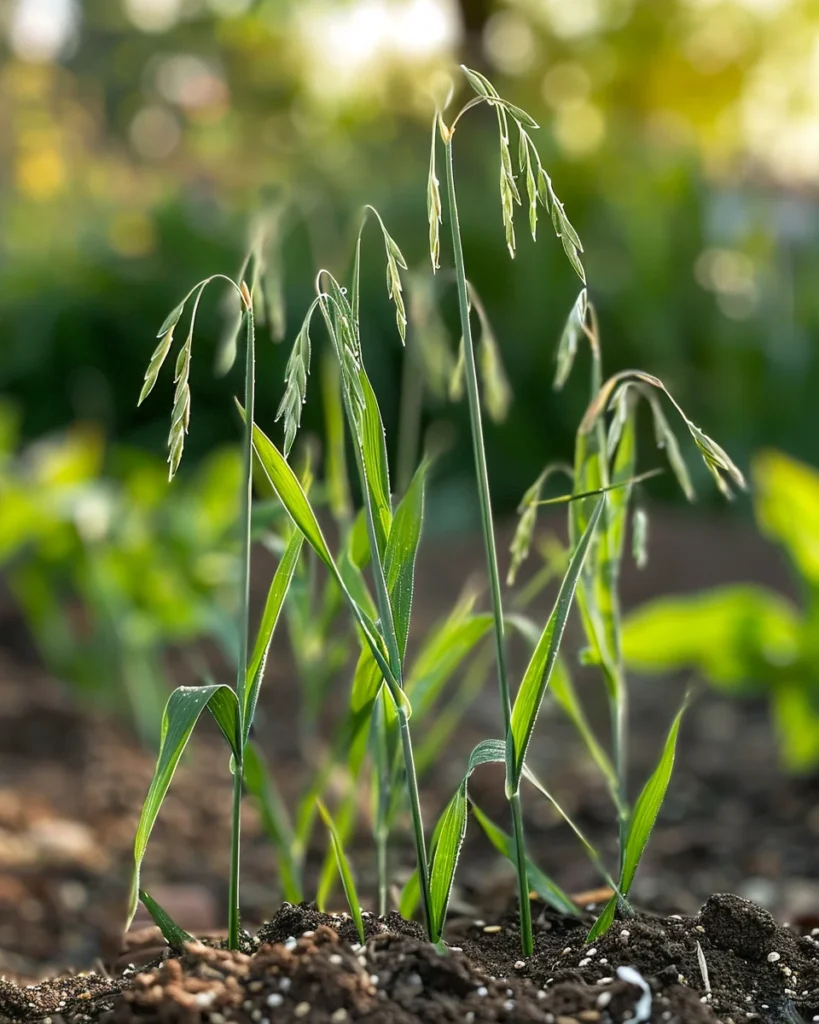
Oats (Avena sativa) make an excellent cool-season cover crop for home gardens, offering multiple benefits while protecting and improving your soil during dormant periods. This fast-growing annual grass creates a dense root system that prevents erosion, suppresses weeds, and adds valuable organic matter when turned under. Oats are particularly valuable in vegetable garden rotations, breaking pest cycles while capturing excess nutrients that might otherwise leach away during winter rains. Unlike some cover crops, oats winterkill in colder regions (below -6°C/20°F), creating a natural mulch that’s easy to work with in spring. They’re adaptable to most soil types and require minimal maintenance, making them perfect for both beginner and experienced gardeners looking to improve soil health naturally.
When to plant oats as a cover crop
Oats perform best when planted in cool weather, typically in early fall or early spring. For fall planting, aim to sow oats 4-6 weeks before your first expected frost date, allowing enough time for establishment before winter. Soil temperatures between 7-24°C (45-75°F) are ideal for germination, with faster emergence at the warmer end of this range.
In colder regions (USDA zones 3-6), fall-planted oats will naturally winterkill when temperatures drop below -6°C (20°F), leaving a protective mat of dead plant material. In milder climates (zones 7-9), oats may survive winter and continue growing, requiring termination in spring before they set seed.
Spring planting works well in all regions but provides a shorter growth period before summer heat arrives. Sow as soon as soil can be worked, typically 4-6 weeks before your last spring frost.
Best time to plant oats as a cover crop

In cool temperate regions (UK, Northern US, Canada), the optimal planting window is late August through September for fall crops, and March through early April for spring planting. Direct sowing is the standard method for oats as they don’t transplant well.
In warmer temperate regions (Southern US, Mediterranean climates), plant from September through November for fall crops that will grow through the mild winter. Spring planting is less common in these regions but can be done in February if needed.
For maximum biomass production, fall planting generally yields better results than spring planting, as oats have more time to establish before temperature extremes. Aim to have oats established at least 30 days before hard freezes occur in your area.
Best oats varieties to grow as cover crops
- Avena sativa ‘Cayuse’ – Produces abundant biomass and has excellent winter hardiness for areas with moderate winters.
- Avena sativa ‘Bob’ – Early maturing variety with good disease resistance and exceptional biomass production.
- Avena sativa ‘Forage Plus’ – Develops an extensive root system, making it excellent for breaking up compacted soils.
- Avena strigosa (Black Oats) – More cold-tolerant than common oats with superior nematode suppression properties.
- Avena sativa ‘Soil Saver’ – Quick establishment and dense growth habit that effectively smothers weeds.
- Avena sativa ‘Jerry’ – Excellent winter hardiness for northern regions with good disease resistance.
- Avena sativa ‘Ogle’ – Early maturing with good resistance to rust diseases, ideal for shorter growing windows.
How to plant oats as a cover crop
Materials needed:
- Oat seeds (1.5-2 kg per 100 m² or 3-4 lbs per 1,000 ft²)
- Garden rake or harrow
- Broadcast spreader (optional)
- Garden hose with sprinkler attachment
- Lawn roller or flat board (optional)
Step-by-step planting instructions:
- Clear the planting area of weeds, debris, and any large rocks. Remove any remaining plant material from previous crops.
- Loosen the top 5-10 cm (2-4 inches) of soil using a garden rake, hoe, or tiller. Break up any large clumps to create a smooth seedbed.
- Test soil pH if possible – oats prefer a pH between 5.5-7.0 but will tolerate a wider range.
- Broadcast seeds evenly across the prepared area by hand or using a broadcast spreader. Aim for a seeding rate of 1.5-2 kg per 100 m² (3-4 lbs per 1,000 ft²).
- Rake the area lightly to incorporate seeds into the top 1-2 cm (½-¾ inch) of soil. Seeds should be covered but not deeply buried.
- If soil is very loose, lightly tamp the seeded area with a lawn roller or by walking on a flat board to ensure good seed-to-soil contact.
- Water thoroughly but gently to avoid washing away seeds. Keep the soil consistently moist until germination occurs (typically 5-10 days).
- For larger areas, consider dividing the space into sections to ensure even seed distribution.
How to grow oats as a cover crop
Oats require full to partial sunlight to thrive, with at least 4-6 hours of direct sun daily for optimal growth. In hotter regions, some afternoon shade can be beneficial.
Water requirements are minimal once established. After germination, oats typically only need supplemental irrigation during extended dry periods. Aim to provide about 2.5 cm (1 inch) of water per week, including rainfall. Overwatering can lead to disease issues and shallow root development.
Fertilizing is generally unnecessary for cover crops, as one goal is to scavenge existing nutrients. If planting in very poor soil, a light application of balanced organic fertilizer (10-10-10) at planting can help establishment.
No mulching is needed as the oats themselves act as living mulch. Similarly, no thinning, pruning, or staking is required for oats grown as cover crops.
For container growing, oats can be planted in large containers or raised beds at least 15 cm (6 inches) deep. Use the same seeding rate but ensure containers have adequate drainage. Container-grown oats may require more frequent watering than those planted in open ground.
Caring for oats as a cover crop
Ongoing maintenance for oat cover crops is minimal. Monitor for adequate moisture during the establishment phase and occasionally check for pest or disease issues.
Common pests and diseases:
- Aphids: Small green or black insects that cluster on stems and leaves. Control with a strong spray of water or insecticidal soap if infestation is severe.
- Crown rust: Orange-yellow pustules on leaves. Typically not a concern for cover crops but rotate planting areas if it becomes persistent.
- Powdery mildew: White powdery coating on leaves. Ensure adequate air circulation and avoid overhead watering during humid conditions.
Termination timing and methods: In cold regions, allow oats to winterkill naturally. In milder areas, terminate oats 2-3 weeks before planting your next crop. Methods include:
- Mowing close to the ground when oats reach 30-45 cm (12-18 inches) tall
- Rolling/crimping at flowering stage
- Turning under with a garden fork or tiller
For maximum soil benefit, incorporate oats into the soil before they produce seed heads. Allow 2-3 weeks after incorporation before planting vegetables to avoid nitrogen tie-up during decomposition.
Understanding bolting in oats as a cover crop
Bolting in oats refers to the plant’s transition from vegetative growth to producing seed heads. Unlike with vegetable crops, bolting in cover crop oats isn’t necessarily problematic unless you want to prevent self-seeding.
Oats naturally bolt in response to increasing day length and rising temperatures. This typically occurs in spring for fall-planted oats that survive winter. The main trigger is photoperiod (day length), though heat and plant maturity also play roles.
If preventing seed production is important, terminate oats before they develop mature seed heads. This is particularly important in warmer regions where oats might complete their lifecycle and self-seed. In most garden settings, mowing or incorporating oats before seed heads mature is sufficient to prevent unwanted volunteers.
If bolting occurs earlier than desired (reducing biomass production), consider earlier planting dates in future seasons or selecting varieties better suited to your climate conditions.
Why does oats as a cover crop turn yellow?
- Nitrogen deficiency: Yellowing beginning at leaf tips and progressing inward. Add diluted fish emulsion or other nitrogen-rich organic fertilizer if robust growth is desired.
- Waterlogged soil: Uniform yellowing across plants in poorly drained areas. Improve drainage or select a different cover crop for wet areas.
- Natural senescence: Yellowing from bottom up as plants mature or respond to cold. This is normal, especially as plants approach winter or reproductive stages.
- Frost damage: Sudden yellowing after cold temperatures. Generally not concerning as winterkill is often desirable.
- Disease pressure: Yellow streaking or spotting patterns. Typically not worth treating in cover crops; note for future rotations.
Companion planting for oats as a cover crop
Good companions:
- Field peas or vetch – Legumes fix nitrogen while oats provide structural support, creating a balanced cover crop mix.
- Crimson clover – Adds nitrogen fixation and attracts pollinators while oats prevent erosion.
- Radish – Deep taproots complement oats’ fibrous root system, breaking up compaction at different soil levels.
- Buckwheat – Quick establishment helps suppress weeds while oats develop, and attracts beneficial insects.
- Phacelia – Excellent for attracting pollinators and beneficial insects while oats improve soil structure.
Avoid planting near:
- Other grains (wheat, barley, rye) – Can share diseases and pests, reducing the rotation benefits of cover cropping.
- Established perennials – Oats can compete for resources and may be difficult to terminate without disturbing permanent plantings.
Seasonal calendar
- January-February: Plan cover crop rotations; order seeds for spring planting.
- March-April: Direct sow spring oats as soon as soil can be worked; terminate fall-planted oats in warmer regions.
- May: Terminate spring-planted oats before summer crops in cooler regions.
- June-July: Generally not suitable for oat planting (too warm).
- August: Begin preparing beds for fall cover crop planting.
- September-October: Optimal time for fall oat planting in most regions; ensure 4-6 weeks before first frost.
- November: Last chance for fall planting in mild winter areas; oats should be established before hard freezes.
- December: Monitor fall-planted oats; expect winterkill in regions with temperatures below -6°C (20°F).
Note: In warmer regions (zones 8-10), shift fall planting later by 2-4 weeks and spring planting earlier by 2-4 weeks.
Problems & solutions
| Problem | Quick Fix |
|---|---|
| Poor germination | Ensure proper seed-to-soil contact; maintain consistent moisture until established; check soil temperature is above 7°C (45°F). |
| Thin, spindly growth | Increase seeding rate; check for nitrogen deficiency; ensure adequate sunlight. |
| Oats surviving when winterkill desired | Mow or crimp plants; incorporate into soil 2-3 weeks before spring planting; choose less winter-hardy varieties next season. |
| Difficult to incorporate residue | Mow first to chop material; allow some decomposition before incorporation; consider partial incorporation with some residue left as mulch. |
| Unwanted volunteers next season | Terminate before seed heads mature; shallow cultivation to eliminate volunteers; use stale seedbed technique before planting next crop. |
| Nitrogen deficiency in following crop | Allow 2-3 weeks between incorporation and planting; add nitrogen-rich amendments when turning under; pair with legumes in future cover crop mixes. |
Common questions about growing oats as a cover crop
Q: How much water do oats need after germination?
A: Once established, oats are relatively drought-tolerant. They typically need about 2.5 cm (1 inch) of water weekly, including rainfall. During extended dry periods, supplemental irrigation will improve growth, but frequent watering is unnecessary.
Q: Can I grow oats as a cover crop in partial shade?
A: Yes, oats can grow in partial shade with at least 4-6 hours of direct sunlight daily. Growth may be somewhat reduced compared to full sun locations, but they’ll still provide soil protection and organic matter benefits.
Q: What’s the minimum area needed for oats to be effective?
A: Oats can be effective even in small garden beds of 1-2 m² (10-20 ft²). The key is achieving adequate density, so maintain the recommended seeding rate regardless of area size.
Q: How close together should I plant oats?
A: For cover cropping, broadcast seeds densely at 1.5-2 kg per 100 m² (3-4 lbs per 1,000 ft²). This creates a thick stand with plants approximately 2-5 cm (1-2 inches) apart, which maximizes soil coverage and weed suppression.
Q: How cold-tolerant are oats as a cover crop?
A: Oats will continue growing in temperatures down to about -1°C to -3°C (30-26°F) but will be killed when temperatures drop below -6°C (20°F) for extended periods. This natural winterkill is often desirable in cold-winter regions.
Q: When is the best time to terminate oats before planting vegetables?
A: Terminate oats 2-3 weeks before planting your spring vegetables. This timing allows some decomposition to occur, reducing the risk of nitrogen tie-up while preserving much of the organic matter benefit.
Q: Can I use regular oats from the kitchen as cover crop seeds?
A: While whole oats from the kitchen may germinate, they’re often heat-treated or processed in ways that reduce viability. For best results, use untreated agricultural or cover crop seed, which has better germination rates and is free of weed seeds.