

From Weeds to Wonders: How Mulch Changed My Garden – A Complete Transformation Guide
Intro for From Weeds to Wonders How Mulch Changed My Garden
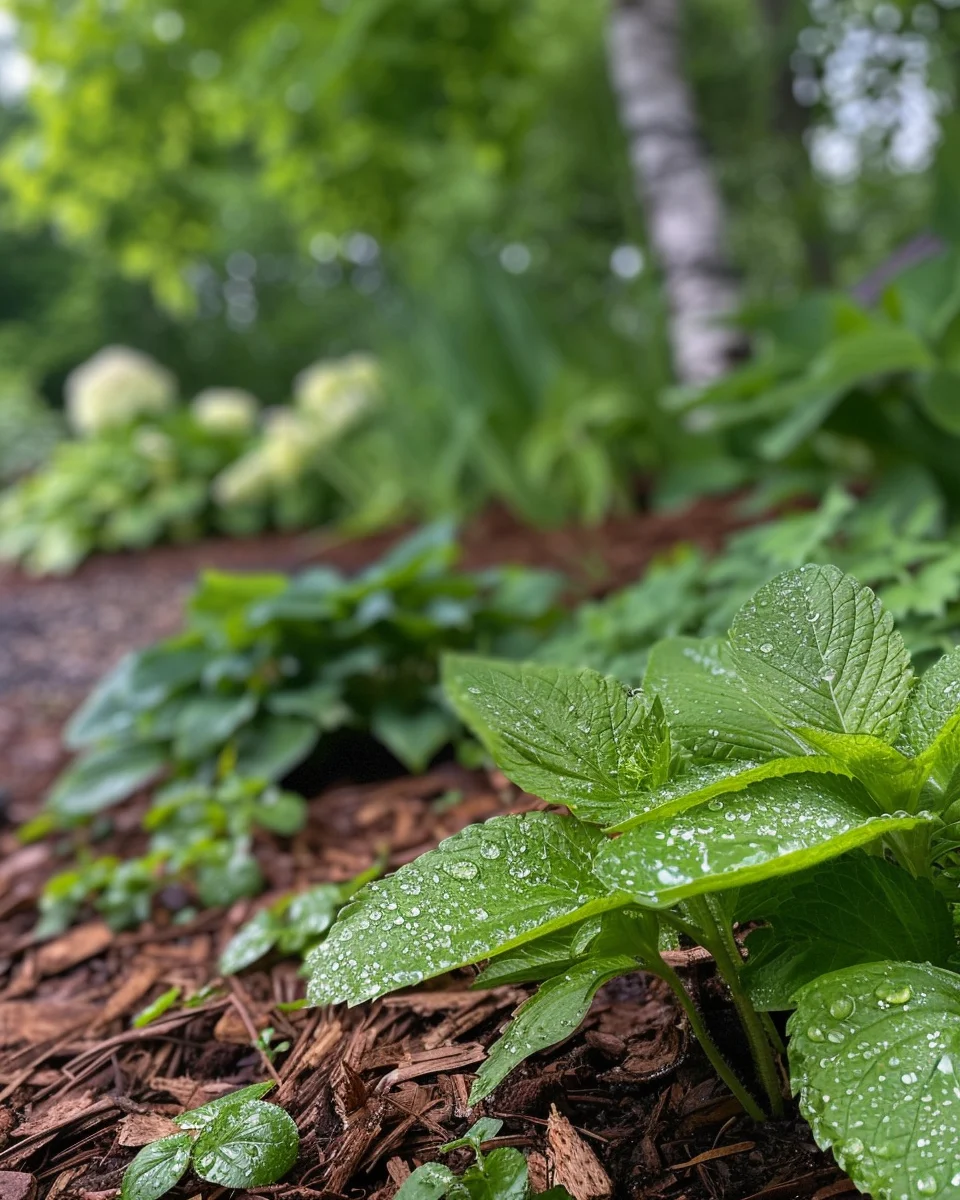
Mulching is a game-changing garden practice that transformed my weed-infested plot into a thriving oasis. This simple technique involves covering soil with protective materials that suppress weeds, retain moisture, regulate temperature, and improve soil health over time. My journey from battling persistent weeds to enjoying a low-maintenance, productive garden hinged entirely on implementing proper mulching strategies. Whether you’re dealing with a neglected garden space or simply want to enhance your existing beds, mulching offers remarkable benefits across all temperate regions. The transformation is both immediate in weed suppression and long-term in soil improvement, making it one of the most valuable techniques in sustainable gardening.
When to plant From Weeds to Wonders How Mulch Changed My Garden
Mulch can be applied year-round, but timing can optimize its benefits. In temperate regions, early spring application (before weed seeds germinate) provides season-long protection. Fall mulching insulates soil and plant roots from winter temperature fluctuations. Apply mulch when soil has warmed to at least 10°C (50°F) in spring to avoid delaying soil warming. In frost-prone areas, wait until after the last frost to mulch tender plants, but mulch established perennials and trees in late fall for winter protection. For vegetable gardens, apply after seedlings are established or immediately after planting transplants.
Best time to plant From Weeds to Wonders How Mulch Changed My Garden
In cool climate regions, apply organic mulches in mid-to-late spring (April-May) when soil has warmed but before summer heat intensifies. For warm climate areas, early spring (March-April) application works best before the growing season accelerates. Refresh mulch layers in early fall (September-October) to prepare for winter in all regions. For direct-sown seeds, wait until seedlings reach 7-10 cm (3-4 inches) before applying mulch to avoid smothering. For transplants, apply mulch immediately after planting, keeping it 2-5 cm (1-2 inches) away from stems to prevent rot.
Best From Weeds to Wonders How Mulch Changed My Garden varieties to grow
• Shredded Bark – Long-lasting woody mulch that breaks down slowly while adding rich organic matter to soil.
• Compost – Nutrient-rich option that feeds plants while suppressing weeds and improving soil structure.
• Straw – Excellent for vegetable gardens with its lightweight nature and ability to prevent soil splash on crops.
• Leaf Mold – Created from decomposed fall leaves, it improves soil structure while providing habitat for beneficial organisms.
• Pine Needles – Perfect for acid-loving plants with slow decomposition and attractive appearance.
• Cocoa Hulls – Attractive, chocolate-scented mulch that adds nitrogen as it breaks down (note: toxic to pets).
• Living Mulches – Low-growing cover crops like clover that suppress weeds while fixing nitrogen in the soil.
• Wood Chips – Ideal for pathways and perennial beds with excellent weed suppression and long-lasting protection.
How to plant From Weeds to Wonders How Mulch Changed My Garden
Materials list:
– Selected mulch material (3-4 cubic yards per 100 square feet for 3-inch depth)
– Garden rake or hoe
– Wheelbarrow or garden cart
– Garden gloves
– Cardboard or newspaper (optional for sheet mulching)
– Garden hose or watering can
– Edging material (optional)
Step-by-step:
1. Clear the area of existing weeds, pulling them completely including roots.
2. Water the soil thoroughly to ensure moisture beneath your mulch layer.
3. For severe weed problems, lay down overlapping sheets of cardboard or 5-10 layers of newspaper as a biodegradable weed barrier.
4. Apply mulch in an even layer, typically 5-10 cm (2-4 inches) thick for organic materials.
5. Keep mulch 5-8 cm (2-3 inches) away from plant stems, tree trunks, and building foundations to prevent rot and pest issues.
6. Create a slight depression around plants to channel water toward roots rather than away.
7. For sloped areas, apply a slightly thicker layer to prevent erosion and washing away.
8. Water lightly after application to help settle the mulch.
9. Install edging if desired to contain mulch and create defined borders.
10. Monitor and replenish mulch as it decomposes, typically adding 2-3 cm (1 inch) annually.
How to grow From Weeds to Wonders How Mulch Changed My Garden
Sunlight requirements depend on your plants, but mulch helps moderate soil temperature in both sun and shade. Watering becomes less frequent with mulch – check soil moisture by inserting your finger beneath the mulch layer; water deeply when the top 2-5 cm (1-2 inches) feels dry. Fertilizing needs decrease as organic mulches decompose and feed the soil; supplement with balanced organic fertilizer in spring if plants show nutrient deficiencies. Maintain mulch depth of 5-10 cm (2-4 inches), refreshing annually or when thickness drops below 2.5 cm (1 inch). For container gardens, use a thinner mulch layer of 2-5 cm (1-2 inches) and ensure proper drainage. In vegetable gardens, pull mulch back slightly in early spring to allow soil warming, then reapply after seedlings establish. For perennial beds, rake mulch lightly in spring to break up compacted layers before adding fresh material.
Caring for From Weeds to Wonders How Mulch Changed My Garden
Ongoing tasks include monitoring mulch depth and refreshing as needed, typically annually. Pull occasional weeds promptly before they establish. Watch for mulch compaction, especially after heavy rains, and fluff with a rake if needed. Pest issues include slugs and snails that may shelter in mulch; control with diatomaceous earth barriers or beer traps. Fungal growth on mulch is usually beneficial decomposition, but excessive growth in wet conditions can be reduced by loosening mulch to improve air circulation. Rodents may nest in thick mulch; keep it away from tree trunks and building foundations. If mulch develops water-repellent properties (common with pine bark), break up the surface with a rake and water thoroughly. Harvest the benefits of mulch by noting reduced watering needs, fewer weeds, and improved soil texture over time. Store extra mulch in a dry, covered area to prevent premature decomposition.
Understanding bolting in From Weeds to Wonders How Mulch Changed My Garden
Bolting refers to plants rapidly producing flowers and seeds prematurely, which isn’t directly related to mulching. However, proper mulching helps prevent conditions that trigger bolting in vegetables. Mulch moderates soil temperature fluctuations that can stress plants into reproductive mode. It also maintains consistent soil moisture, preventing drought stress that often triggers bolting. Heat-reflecting mulches like straw around lettuce and spinach can keep soil cooler in summer, delaying bolting in heat-sensitive crops. If leafy vegetables do begin bolting despite mulching, harvest immediately as flavor will deteriorate rapidly. For future plantings, select bolt-resistant varieties and use light-colored mulches during warm seasons to reflect heat away from soil.
Why does From Weeds to Wonders How Mulch Changed My Garden turn bitter?
• Mulch too close to stems – Can cause rot and stress plants, leading to bitter-tasting vegetables; maintain 5 cm (2 inch) gap around stems.
• Incorrect mulch type – Fresh wood chips or sawdust can temporarily deplete soil nitrogen as they decompose; use aged wood products or supplement with nitrogen fertilizer.
• Excessive mulch depth – Too thick a layer can prevent water penetration and suffocate soil life; maintain appropriate 5-10 cm (2-4 inch) depth.
• Anaerobic conditions – Wet, compacted mulch can create oxygen-poor soil conditions; fluff regularly and avoid over-watering.
• Allelopathic effects – Walnut, eucalyptus, or pine mulches can inhibit certain plants; match mulch type to appropriate plants or compost these materials before use.
Companion planting for From Weeds to Wonders How Mulch Changed My Garden
Good companions for mulched gardens include:
• Marigolds – Repel nematodes and other soil pests while adding color between mulched areas.
• Comfrey – Deep roots bring up nutrients that benefit neighboring plants; leaves can be cut and used as nutrient-rich mulch.
• Nasturtiums – Act as trap crops for aphids while covering bare soil between mulched plants.
• Alliums (garlic, onions) – Deter pests with strong scents and grow well in mulched conditions.
• Herbs (thyme, oregano) – Thrive in mulched conditions and repel many garden pests.
Avoid planting near mulched areas:
• Crown-sensitive plants (irises, peonies) – Can rot if mulch covers their crowns.
• Self-seeding annuals – Mulch prevents their natural reseeding process.
• Plants prone to fungal issues – In very humid climates, some plants may suffer from increased humidity near mulch.
Seasonal calendar
• January-February: Plan mulch needs for coming season; order materials.
• March: Remove winter mulch from sensitive perennials; prepare beds for spring planting.
• April: Apply fresh mulch to perennial beds after soil warms; keep away from emerging shoots.
• May: Mulch vegetable gardens after seedlings establish; apply around transplants.
• June: Check mulch depth and replenish where needed; pull any weeds that emerge.
• July-August: Maintain mulch during hot months; water beneath mulch during dry periods.
• September: Refresh mulch layers in preparation for fall; collect leaves for composting or direct mulching.
• October: Apply fresh mulch to perennial beds for winter protection after first light frost.
• November: Mulch around tender plants and newly planted perennials for winter protection.
• December: Apply winter mulch to protect root zones of trees and shrubs.
Problems & solutions
| Problem | Quick Fix |
|---|---|
| Mulch washing away in heavy rain | Use heavier mulch types or create mulch basins around plants to catch water |
| Fungal growth on mulch surface | Rake to increase air circulation; reduce depth if consistently wet |
| Nitrogen depletion from fresh wood mulch | Add nitrogen-rich fertilizer or use composted wood products instead |
| Ants or termites nesting in mulch | Keep mulch 15-20 cm (6-8 inches) away from foundations; use cedar mulch which deters insects |
| Mulch becoming water-repellent | Break up surface with rake and add wetting agent or fresh compost layer |
| Weeds growing through mulch | Increase mulch depth to 7-10 cm (3-4 inches) and use newspaper/cardboard underlayer |
| Mulch attracting rodents | Reduce depth near structures; avoid fruit/nut shells in mulch mix |
Common questions about growing From Weeds to Wonders How Mulch Changed My Garden
How often should I water my mulched garden?
Much less frequently than unmulched soil – check moisture beneath the mulch and water deeply when the top 5 cm (2 inches) of soil feels dry, typically 30-50% less often than unmulched areas.
Can I use grass clippings as mulch?
Yes, but dry them first and apply in thin layers (2-3 cm/1 inch) to prevent matting and anaerobic conditions; avoid clippings from lawns treated with herbicides.
How much space should I leave between mulch and plant stems?
Maintain a 5-8 cm (2-3 inch) gap around stems and trunks to prevent rot, fungal issues, and pest habitat.
Do I need to remove old mulch before adding new?
Generally no – simply rake existing mulch to break up compacted layers, then add fresh material to reach the desired depth; completely replace only if disease is present.
Can mulch attract unwanted pests?
Some mulches can harbor slugs, snails, or rodents; minimize issues by keeping proper depth, avoiding over-watering, and using cedar or cypress mulch which naturally deters many insects.
Is it better to use organic or inorganic mulch?
Organic mulches (bark, compost, straw) improve soil as they decompose but need regular replenishment; inorganic mulches (stone, rubber) last longer but don’t enhance soil health – choose based on your primary goals.
How deep should mulch be in different garden areas?
Vegetable gardens: 5-7 cm (2-3 inches); perennial beds: 7-10 cm (3-4 inches); trees and shrubs: 7-10 cm (3-4 inches) but not touching trunk; containers: 2-5 cm (1-2 inches).