
A practical, no-fuss system for recording what you planted, what worked, what didn’t, and what to do next season.
You can remember a lot about your garden—until you can’t.
Planting dates blur together. Varieties get mixed up. You forget which bed produced best, or why a crop struggled.
A garden journal solves that problem by turning your everyday gardening into a clear record you can learn from.
What a Garden Journal Is (and Why It Matters)
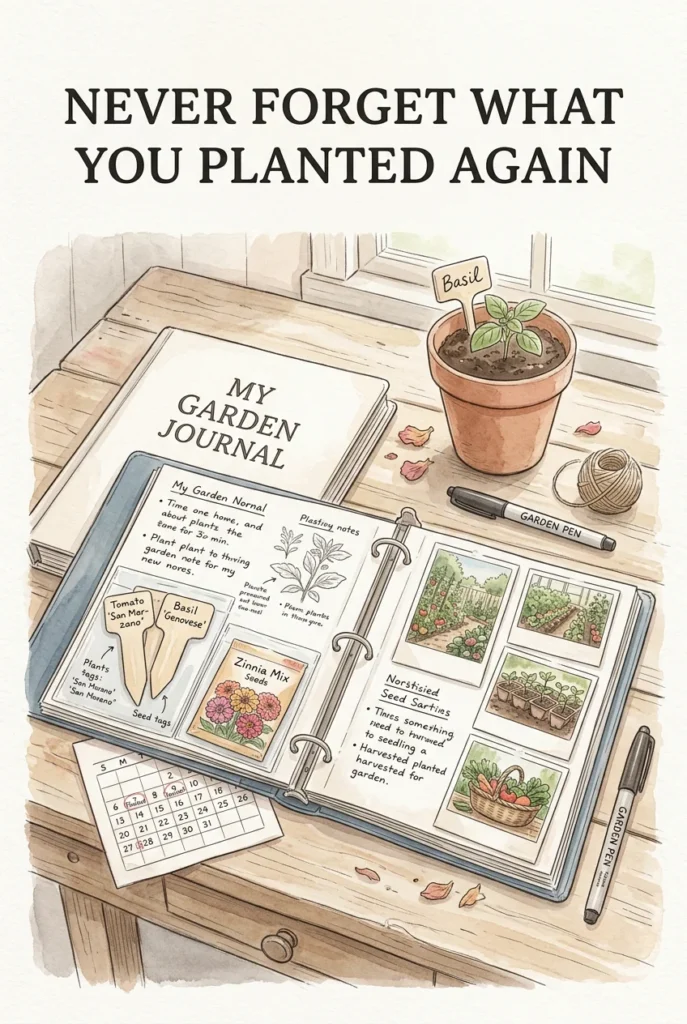
A garden journal is simply a record of what you have done in your garden. It helps you capture past, present, and future activities in one place—so you’re not relying on memory alone.
Remembering everything about each plant and everything you’ve been doing can be a real challenge, especially as your garden grows. Notes and photos give you a reliable way to look back and see what grew well, what didn’t, and what you might do differently next time.
If you grow produce for the market, a garden journal can also help keep you on track and keep your business and garden in order. That said, it’s valuable for any gardener—whether you’re growing a few pots on a patio or running multiple beds.
Garden Journal Supplies
You don’t need fancy tools. A few basics make it easier to keep everything together, protect what you collect, and find information quickly later.
Core items to gather
- Plastic photo sleeves (assorted sizes are helpful for plant tags, photos, and seed packets)
- Three-ring binder (a zip binder is ideal so papers don’t slide out)
- Permanent markers (choose ones that won’t fade for important notes)
- Calendar (to track planting dates and when you reaped/harvested)
- Blank pages (for extra notes you can tuck into sleeves)
- Camera (to capture both the good and the bad in your garden)
Helpful additions (optional, but practical)
If you like a bit more structure, you can also include dividers (for months or beds), a simple hole punch, and a pen that writes well outdoors. These aren’t required, but they can make the habit easier to maintain.
How to Organize Your Garden Journal
Once your supplies are ready, the most important step is straightforward: start making notes. The goal is to create a record you can use—not a perfect scrapbook.
Start with the information you’ll want later
Use your pen to record key milestones, such as:
- When something was planted
- When it first bloomed
- How long it took each plant to reach maturity
Save what most people throw away
Don’t toss plant tags or seed packets. Keep them in a sleeve pocket. Those small items quickly answer big questions later (variety name, planting guidance, spacing reminders), and they’re easy to store neatly when you use sleeves.
Map your beds so you can find everything
Keep pictures of the locations of your garden beds in a separate sleeve. This makes it easier to locate different plants across the season and to remember what grew where when you’re planning next year’s layout.
Highlight what matters
Use your permanent marker to highlight important dates and notes. This small step makes your journal more scannable when you’re flipping through it in a hurry—especially during busy planting and harvest weeks.
Mini-point: Keep it simple enough to maintain
A journal that takes five minutes will get used. A journal that takes an hour tends to get postponed. Aim for quick entries and consistent updates.
Garden Journal Photos: The Missing Piece Most People Skip
A garden journal isn’t complete without photos. In many ways, it becomes like a photo album—one you’ll enjoy revisiting because it captures real progress, real mistakes, and real memories over the years.
What to photograph
Take photos regularly, not only when everything looks perfect. Keep following and photographing the growth right through to harvest time. Pictures help you see patterns you might otherwise miss, such as where shade increased, which bed stayed too wet, or which plants thrived in a certain location.
Consider black-and-white photos, too
If it’s possible to take pictures in black and white, that can be useful. Some details may look clearer in black and white, making it easier to spot contrast and structure in a plant or bed.
How to store photos safely
Use plastic photo sleeves and place them securely in your binder. This keeps pictures protected and easy to flip through, while also allowing you to keep related items together (like a seed packet beside the harvest photo).
Tracking: What to Write Down (So It’s Worth the Effort)
Making note of important things in your garden journal is what turns it from “nice idea” into a tool you actually use. The simplest way to do that is to keep your journal with you whenever you visit the garden.
When you notice something—good or bad—capture it quickly. A few words in the moment can save you from repeating the same problems next season.
What to track in your journal
Here are specific items worth recording, exactly because they tend to be forgotten:
- Plants you intend to re-plant
- When you planted different seeds
- Work that needs to be done (so tasks don’t get lost)
- Vegetables that need to be transplanted
- Problem areas that need close attention
- Areas that are overgrown and need care
- Seasonal notes: spring plants, winter plants, and autumn plants
A simple logging format you can copy
If you want your entries to be consistent, use a repeatable set of prompts. Keep it brief, but specific.
| What to record | Examples of what you might write |
|---|---|
| Date | “Planted,” “first bloom,” “transplanted,” “harvested/reaped” |
| Plant + location | Bed name/number, container, or row (match your bed photos) |
| Progress | Growth notes, time to maturity, general health |
| Actions needed | Weeding, staking, thinning, transplanting, tidying overgrown areas |
| Problems and wins | What struggled, what thrived, what you’d repeat next year |
Tips to Make the Habit Stick
A garden journal only works if you use it. These tips keep it practical and easy to maintain—without turning it into a chore.
Quick, realistic ways to stay consistent
- Keep the binder close to your garden routine so it’s easy to grab before you head out.
- Write short notes immediately when you notice something. Waiting until later usually means forgetting details.
- Use sleeves for “loose” items (tags, packets, extra pages) so nothing disappears.
- Highlight key dates like planting, first bloom, and harvest to make seasonal review faster.
- Photograph the “bad” as well as the “good” so you can recognize issues earlier next time.
- Review your journal briefly each season to plan what to re-plant and what to change.
Mini-point: Your journal doesn’t need to be perfect
Smudged pages, messy handwriting, and quick shorthand notes are fine. The value is in the record—what you did, when you did it, and what happened next.
Your Garden Journal Becomes a Lifetime Record
Over time, your garden journal becomes more than a planning tool. It becomes a lifetime record.
As you get older—whether you eventually retire from gardening or simply slow down—you can look through your journal and enjoy revisiting the memories of years gone by. You’ll also have something genuinely useful: a clear history of what you planted, what you learned, and what your garden taught you season after season.
Start small: choose a binder, add sleeves, save your tags and seed packets, and write down your first planting date. Your future self will thank you.