

How to Grow Microgreens at Home Without Soil: Easy Methods, Best Varieties & Care Tips
Intro for how to grow microgreens at home without soil
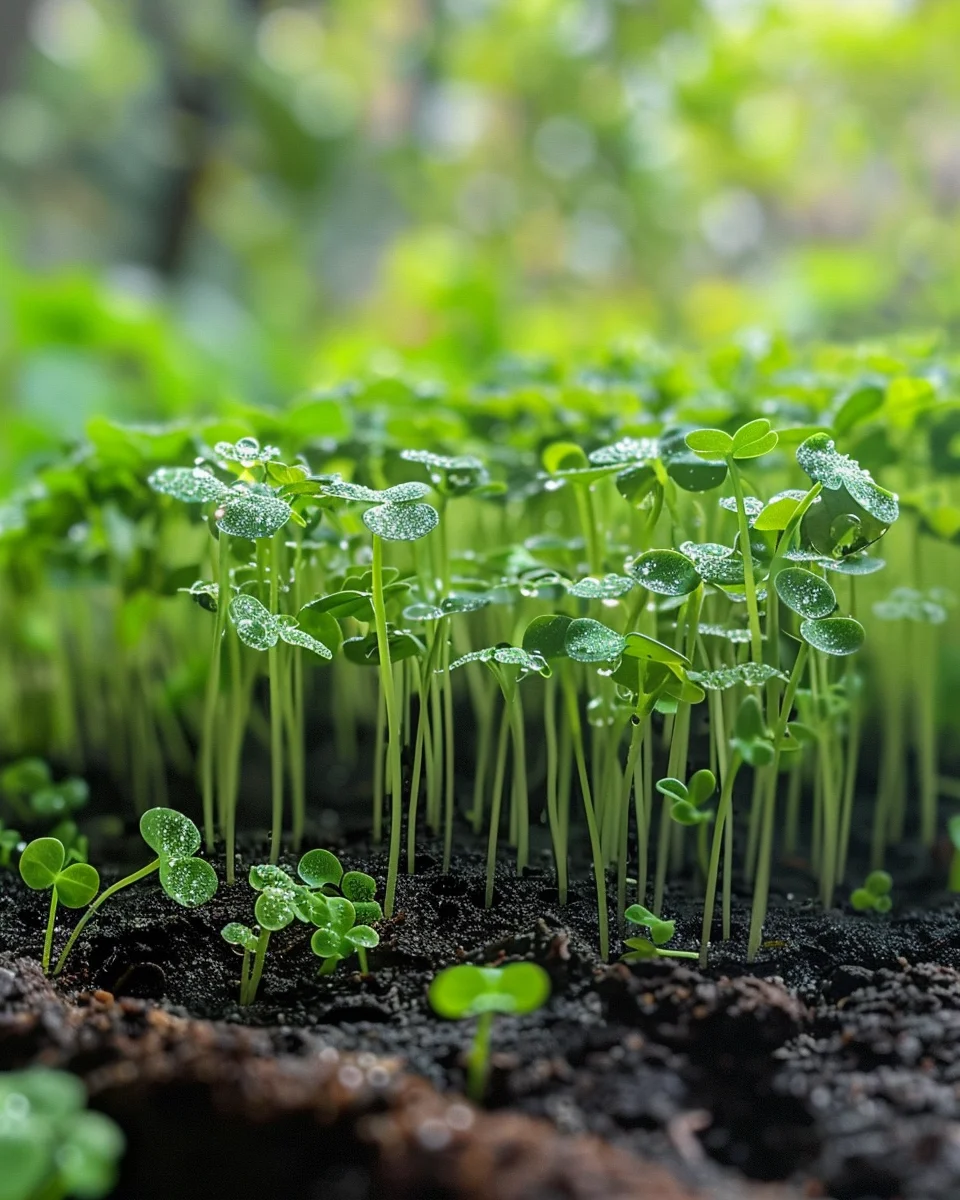
Microgreens are young vegetable greens harvested just after the cotyledon leaves have developed. Growing them without soil (hydroponically) offers a clean, space-efficient way to produce nutrient-dense greens year-round. These tiny powerhouses contain up to 40 times more nutrients than their mature counterparts while requiring minimal space and resources. Soil-free growing eliminates many pest and disease issues, creates less mess, and allows for precise nutrient control. Perfect for urban dwellers, apartment gardeners, or anyone looking to grow fresh greens in limited space, soil-free microgreens can be grown on kitchen countertops, windowsills, or under grow lights, making them accessible to gardeners of all experience levels.
When to plant how to grow microgreens at home without soil
The beauty of growing microgreens without soil is that traditional planting seasons become irrelevant. Since you’ll be growing indoors in a controlled environment, you can start microgreens any time of year. Temperature is still important—most microgreens germinate best between 18-24°C (65-75°F). If your home experiences extreme temperature fluctuations, avoid placing growing trays near drafty windows in winter or in direct sunlight during summer heat waves. Unlike outdoor gardening, there’s no need to worry about frost dates or soil temperature—simply maintain a comfortable room temperature, and your microgreens will thrive year-round.
Best time to plant how to grow microgreens at home without soil
While you can grow microgreens without soil any time of year, planning your growing schedule can maximize success. In cooler months (October-March in northern temperate regions), you may need supplemental lighting as natural daylight decreases. Summer months (June-August) might require attention to cooling if your growing area exceeds 27°C (80°F), as some varieties like lettuce and spinach germinate poorly in high heat. For beginners, start your first trays in spring or fall when temperature management is easier. Since most microgreens reach harvest stage in 7-21 days, you can stagger plantings weekly for continuous harvests, regardless of outdoor growing seasons.
Best how to grow microgreens at home without soil varieties to grow
- Broccoli – Exceptionally nutritious with high levels of sulforaphane and quick to grow in just 7-10 days.
- Sunflower – Produces large, crunchy microgreens with a nutty flavor and excellent protein content.
- Pea Shoots – Vigorous growers with sweet flavor that perform exceptionally well in hydroponic systems.
- Radish – Ready in just 5-7 days with a spicy kick and vibrant color, perfect for beginners.
- Amaranth – Offers stunning red/purple coloration and grows well in warmer conditions when other varieties struggle.
- Buckwheat – Produces tender greens with a mild, slightly tangy flavor and grows rapidly without light during germination.
- Basil – Aromatic and flavorful, though slightly slower growing (12-15 days) but worth the wait for culinary uses.
How to plant how to grow microgreens at home without soil
Materials needed:
- Shallow growing trays (1-2 inches deep) with drainage holes
- Collection trays (without holes)
- Growing medium (paper towels, coconut coir, hemp mats, or hydroponic growing pads)
- Microgreen seeds (untreated, preferably organic)
- Spray bottle
- Clean water
- Optional: grow lights, humidity dome, liquid nutrients
Step-by-step planting:
- Prepare your growing tray by placing it inside a collection tray to catch excess water.
- Cut your growing medium to fit inside the growing tray, ensuring it lies flat.
- Pre-moisten your growing medium thoroughly until saturated but not soggy.
- Measure your seeds according to package directions (typically 1-2 tablespoons per 5″×5″ area, depending on variety).
- Sprinkle seeds evenly across the moist growing medium, aiming for dense but not overcrowded coverage.
- Mist the seeds lightly with water using a spray bottle.
- Cover the tray with another tray or a humidity dome to create darkness and retain moisture (most microgreens germinate better in darkness).
- Place in a warm location (18-24°C/65-75°F) away from direct sunlight during the germination phase.
- Check daily and mist as needed to keep the medium moist until germination occurs (typically 2-3 days).
- Once seeds have sprouted, remove the cover and move to a well-lit location or under grow lights.
How to grow how to grow microgreens at home without soil
Lighting: After germination, microgreens need 12-16 hours of light daily. A sunny south-facing window works for many varieties, but for optimal growth, consider LED grow lights positioned 10-15 cm (4-6 inches) above the plants. Without adequate light, microgreens become leggy and pale.
Watering: Bottom-watering is ideal for soil-free systems. Add water to the collection tray and allow the growing medium to absorb moisture from below for 10-20 minutes, then drain excess water. This approach prevents damping off and keeps delicate greens dry. Water when the growing medium begins to feel light or slightly dry, typically every 1-2 days depending on your home’s humidity and temperature.
Nutrients: While many microgreens can grow to harvest using just water, adding a diluted hydroponic nutrient solution (at ¼ to ½ strength of regular recommendations) can enhance growth and nutrition, especially for longer-growing varieties. Begin nutrients after true leaves appear, typically around day 5-7.
Air circulation: Provide gentle air movement with a small fan nearby to prevent mold and strengthen stems, particularly important in humid environments or dense plantings.
Container specifics: For small-scale growing, repurposed plastic clamshell containers work well. Ensure any container has drainage holes in the growing tray and a solid tray underneath. Stackable microgreen systems allow vertical growing to maximize space efficiency.
Caring for how to grow microgreens at home without soil
Daily monitoring: Check moisture levels daily by lifting the growing tray to assess weight—lighter trays need watering. Inspect for any signs of mold (white fuzzy growth) or yellowing.
Common issues and solutions:
- Mold: Appears as white fuzz on seeds or medium. Improve air circulation, reduce watering frequency, and ensure growing medium isn’t oversaturated.
- Yellowing leaves: Often indicates nutrient deficiency. Add diluted hydroponic nutrients to water.
- Leggy growth: Caused by insufficient light. Move closer to light source or increase light duration.
- Root rot: Results from standing water. Ensure proper drainage and never leave trays sitting in water for extended periods.
Harvesting: Most microgreens are ready to harvest when they’re 5-10 cm (2-4 inches) tall and have developed their first true leaves, typically 7-21 days after planting, depending on the variety. Use clean scissors to cut just above the growing medium, harvesting in the morning when nutrient content is highest.
Storage: After harvesting, gently pat dry with paper towels if needed. Store unwashed in a container lined with paper towels in the refrigerator. Most varieties stay fresh for 5-7 days. For best flavor and nutrition, harvest just before use.
Understanding bolting in how to grow microgreens at home without soil
Bolting refers to a plant’s premature flowering and seed production, typically triggered by stress. While traditional garden plants bolt due to heat or day length changes, microgreens rarely reach this stage since they’re harvested so young. However, if left to grow beyond the microgreen stage, they will eventually elongate rapidly and produce flowers.
If you notice your microgreens suddenly stretching upward rapidly with stems becoming stringy, they’re entering the bolting phase. This is more common with brassica family microgreens (radish, mustard, arugula) when grown under stress conditions. The main triggers include:
- Excessive heat (above 27°C/80°F)
- Inadequate water
- Nutrient deficiencies
- Extended light exposure (over 16 hours daily)
Prevention involves maintaining optimal growing conditions and harvesting at the appropriate stage. If bolting begins, harvest immediately as flavor will deteriorate rapidly. For continuous production, simply start new trays on a staggered schedule rather than trying to maintain existing crops past their prime harvest window.
Why does how to grow microgreens at home without soil turn bitter?
- Overgrowth: Microgreens left too long become bitter as they mature toward their adult form—harvest at the recommended stage for each variety.
- Heat stress: Temperatures above 27°C (80°F) can trigger biochemical changes that create bitter compounds—maintain cooler growing conditions.
- Light intensity: Excessive direct sunlight can increase bitterness, especially in mustard family greens—provide bright but filtered light.
- Water stress: Inconsistent watering or allowing the growing medium to dry completely can trigger defense mechanisms that produce bitter flavors—maintain even moisture.
- Nutrient imbalance: Overly concentrated nutrient solutions can cause bitterness—always dilute hydroponic nutrients to ¼-½ strength for microgreens.
Companion planting for how to grow microgreens at home without soil
While traditional companion planting focuses on pest management and growth enhancement in soil gardens, the concept works differently for soil-free microgreens. In hydroponic microgreen systems, “companionship” relates more to compatible growing conditions and harvest timing:
Good growing companions:
- Radish + Broccoli – Both germinate quickly and have similar water and light requirements, ready to harvest within 7-10 days.
- Sunflower + Pea Shoots – Both are larger seeds that benefit from similar soaking times and grow at comparable rates with similar height.
- Amaranth + Basil – Both prefer warmer conditions and can tolerate slightly less frequent watering than other varieties.
- Kale + Cabbage + Kohlrabi – This brassica family trio has nearly identical growing requirements and harvest windows.
Avoid growing together:
- Fast + Slow growers (e.g., radish with basil) – The fast-growing variety will be ready to harvest while the slow grower is still developing.
- Tall + Short varieties (e.g., pea shoots with amaranth) – Taller varieties can shade shorter ones, affecting growth and color development.
- Heavy + Light feeders – When using nutrients, some varieties require more than others, making shared nutrient solutions problematic.
Seasonal calendar
Year-round indoor growing schedule (adjust lighting as needed):
- January-February: Supplement with grow lights during short days; focus on cold-tolerant varieties if growing near windows (kale, broccoli, radish).
- March-April: Natural light increases; good time to experiment with new varieties as conditions become more forgiving.
- May-June: Watch temperatures as summer approaches; move growing stations away from hot windows if needed.
- July-August: Monitor for heat stress; consider heat-tolerant varieties (sunflower, amaranth); may need air conditioning or cooler locations.
- September-October: Ideal growing conditions return; excellent time for all varieties.
- November-December: Supplement lighting as days shorten; focus on quick-growing varieties (radish, mustard) if using mainly natural light.
For continuous harvest, start new trays every 5-7 days regardless of season. In warmer climates, focus more on cooling during summer months; in colder regions, ensure growing areas maintain minimum temperatures of 18°C (65°F) year-round.
Problems & solutions
| Problem | Quick Fix |
|---|---|
| Seeds not germinating | Check seed quality and expiration date; ensure medium is consistently moist and temperature is 18-24°C (65-75°F); some varieties benefit from pre-soaking. |
| White fuzzy mold | Improve air circulation with a small fan; reduce humidity by removing dome earlier; spray with diluted food-grade hydrogen peroxide (1 part 3% H₂O₂ to 10 parts water). |
| Leggy, pale seedlings | Increase light intensity; move lights closer (10-15 cm/4-6 inches above plants); ensure 12-16 hours of light daily. |
| Yellowing leaves | Add diluted hydroponic nutrients (¼ strength) to water; ensure pH is between 5.8-6.2 for optimal nutrient uptake. |
| Slow growth | Check temperature (should be 18-24°C/65-75°F); increase light intensity; ensure adequate moisture without waterlogging. |
| Root rot/foul smell | Ensure proper drainage; never leave growing medium sitting in water; clean trays thoroughly between crops with vinegar solution. |
| Uneven growth | Distribute seeds more evenly at planting; ensure growing medium is level; rotate trays daily if using natural light from windows. |
Common questions about growing how to grow microgreens at home without soil
How often should I water my soil-free microgreens?
Bottom-water when the growing medium feels lighter or slightly dry to the touch, typically every 1-2 days depending on your home’s humidity and temperature. Allow the medium to absorb water for 10-20 minutes, then drain excess water to prevent root rot.
Do microgreens need direct sunlight?
Microgreens need bright light but not necessarily direct sunlight. A sunny window works well, but indirect light is often better as direct sun can cause heat stress. For optimal results, LED grow lights positioned 10-15 cm (4-6 inches) above the plants for 12-16 hours daily provide ideal conditions.
What’s the minimum container depth needed for growing microgreens without soil?
Containers only need to be 2.5-5 cm (1-2 inches) deep for microgreens. The growing medium is primarily for holding moisture and providing support for the roots, not for nutrient provision as in traditional gardening.
Can I reuse my growing medium for multiple crops?
Paper-based mediums should be composted after one use. Coconut coir and hemp mats can sometimes be reused for a second crop after thorough cleaning and sterilization (soak in 1:10 hydrogen peroxide solution), but fresh medium generally produces better results and reduces disease risk.
How do I know when my microgreens are ready to harvest?
Most varieties are ready when they’re 5-10 cm (2-4 inches) tall and have developed their first true leaves beyond the cotyledons (seed leaves). This typically occurs 7-21 days after planting, depending on the variety. Taste test a leaf—when flavor is optimal, it’s time to harvest.
Do I need to add nutrients to water when growing microgreens without soil?
Many fast-growing microgreens (ready in 7-10 days) can grow successfully with just clean water. For slower-growing varieties or to enhance nutrition, add diluted hydroponic nutrients (¼ to ½ strength) after the first few days of growth. Always follow product instructions for dilution rates.
Can I grow microgreens in just water (true hydroponics)?
Yes, some microgreens can grow in water-only systems using floating rafts or similar setups. However, beginners usually have better success with a growing medium like coconut coir or hemp mats that provide stability while still being soil-free.