
Simple tools, one-step methods, and DIY solutions that help you remove dust without wasting time—or money.
Dust shows up in every season, in every room, no matter how tidy you keep your home.
It builds slowly on shelves, electronics, trim, blinds, and décor—then suddenly looks like it appeared overnight. And because dust often gathers in thin layers, it’s easy to ignore until it starts looking dull, making your home feel less fresh.
And when you’re busy, the “traditional” way of dusting—multiple tools, multiple passes, lots of cleanup—can feel like more trouble than it’s worth. Dry dusting with the wrong cloth can also create an extra problem: it can lift dust into the air and resettle it on surfaces you already cleaned.
The good news: you can make dusting easier with a handful of practical hacks, many of which use items you already have at home. A few small changes in tools and technique can reduce the number of steps, keep dust contained, and prevent that “why does it already look dusty again?” feeling.
Why it matters: Dusting isn’t only about appearances. A dusty home can feel stuffy, grime builds up faster, and neglected areas (like vents, fan blades, and baseboards) can quickly undo the work you’ve already done. Dust can also mix with moisture in kitchens and bathrooms and turn into stubborn film, or combine with oils (like cooking residue) and stick to cabinets and light fixtures. The goal is to remove dust efficiently, without sending it back into the air or spreading it from surface to surface.
Before you start, a quick prep step can make every hack work better: open a window for a few minutes (if weather and air quality allow), turn off fans that blow dust around while you work, and grab a small trash bag so you can toss used sheets, lint roller refills, or disposable wipes immediately. If you’re sensitive to dust, a simple mask can also make the job more comfortable—especially for vents, fan blades, and behind-appliance cleaning.
How to Use These Dusting Hacks
You don’t need to do all 15 every time. Pick the ones that match your home, your schedule, and the areas you want to improve. Some homes need constant attention on pet hair and floors, while others need help in high places, around electronics, or near windows and blinds.
Some of the hacks below are designed for speed (one swipe, done). Others focus on control (capturing dust so it doesn’t fly everywhere). A few are about saving money by replacing disposable products with reusable alternatives.
One simple approach is to think in “zones” rather than the whole house at once. For example: today is living room surfaces and electronics; tomorrow is bedrooms and baseboards; later in the week is vents and fans. Using a small routine prevents dust from building into a bigger job.
Dusting Hacks You Can Try Today
1) Dust Blinds with a Cloth-Wrapped Pair of Tongs
Blinds can be frustrating because every slat collects dust, and wiping them one by one takes time. This method lets you clean both sides at once. It’s especially helpful for horizontal blinds that build up dust along the edges, where fingers and standard cloths tend to miss.
What you need: tongs, two dusting cloths, and elastic bands.
- Wrap one dusting cloth around each end of the tongs.
- Secure each cloth in place with an elastic band.
- Slide the covered tongs along each blind slat to trap dust on both sides.
For best results, start at the top of the blinds and work downward so you don’t knock dust onto slats you already cleaned. Use light pressure—pressing too hard can bend slats or pop them out of alignment. If your blinds are greasy (common in kitchens), lightly moisten one cloth with your dusting spray so it grabs residue instead of dragging it.
When the cloth is full, swap it out or flip it to a cleaner side. Wash, dry, and reuse when finished. If you’re short on time, even doing just the first few most-visible inches of each slat can make a big difference in how the room looks.
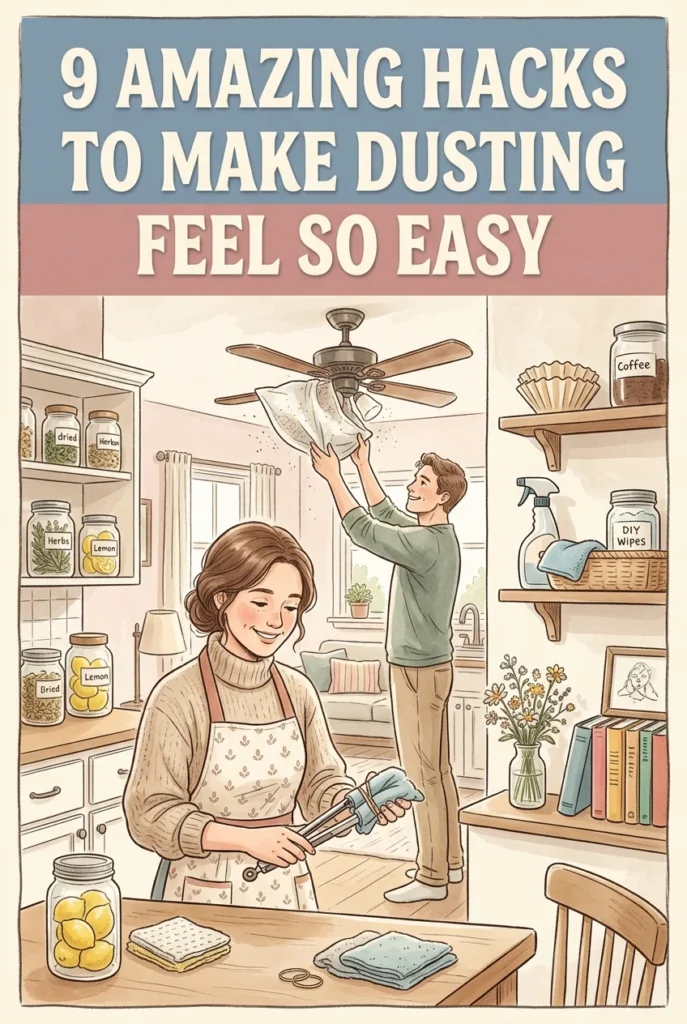
2) Clean Ceiling Fan Blades with an Old Pillowcase
If you’ve ever dusted a ceiling fan and watched debris drift onto the floor (and your furniture), this one is a game-changer for keeping dust contained. It works because the pillowcase acts like a pocket, trapping the dust instead of letting it rain down.
- Open an old pillowcase and place it over one fan blade.
- With both hands on the outside of the case, wipe down the blade in a single pull.
- Repeat for each blade.
The dust stays inside the pillowcase. Empty it into the bin, then wash the pillowcase for reuse. If there’s sticky buildup on the blades (often from humidity or kitchen air), spray a little dusting solution onto the inside of the pillowcase first—lightly, not soaking—so it loosens grime as you pull.
A few quick safety notes make this easier: turn the fan off, wait for blades to fully stop, and use a sturdy step stool if needed. If you can reach the blades without climbing, even better. After you finish, wipe the fan’s pull chains and the light fixture rim, since those areas also collect dust and fingerprints.
3) Use Coffee Filters to Wipe Screens and Mirrors
Screens and glossy surfaces can be tricky—dust, fingerprints, and smudges often take repeated wiping. You don’t need expensive specialty products to get a cleaner finish, and you don’t want a cloth that sheds lint onto the surface you’re trying to polish.
Grab a coffee filter and gently wipe computer screens, television screens, and mirrors. Coffee filters lift dust and fingerprints without simply redistributing them. They’re also handy for quick touch-ups when you notice a smudge in bright light.
For mirrors and glass, you can use the filter dry for dust, or very lightly dampen it with water for stubborn spots. For screens, keep the wipe gentle and avoid applying liquid directly to the device. If you’re cleaning around buttons, corners, or bezels, fold the filter into a smaller pad so you can control pressure and avoid streaks.
4) Make Your Own DIY Dusting Spray
Dusting spray makes it easier to pick up debris instead of pushing it around. If you want a low-cost option, you can mix your own using common household ingredients. This can be especially helpful on furniture and shelves where you want dust to cling to the cloth instead of floating back into the room.
You’ll need: 1 cup water, 1 tablespoon olive oil, 1 cup 70% isopropyl alcohol, and 10 drops essential oil.
- Pour all ingredients into a spray bottle.
- Shake well before each use.
- Spray lightly on a cloth and wipe furniture instead of dry dusting.
Shaking matters because oil and water separate quickly. Use a very light mist—over-spraying can leave residue, especially on darker surfaces. A microfiber cloth works well here because it traps fine dust in the fibers rather than spreading it. This is a good option for quick maintenance dusting once the surface is already fairly clean.
If you’re dusting around framed photos, artwork, or books, spray the cloth away from those items so you don’t accidentally mist paper or fabric. The goal is a slightly “grabby” cloth, not a wet surface.
5) DIY Dusting Wipes with Lemon and Herbs
For a moist dusting method that feels a little more “ready-to-go,” make your own wipes in a jar. This can be a convenient solution for quick daily wipe-downs of shelves, coffee tables, nightstands, or entryway furniture that collects dust and lint.
What you need: cleaning cloths, water, one lemon, and an herb of your choice.
- Mix water with lemon juice.
- Place cloths into a jar and pour the mixture over them.
- Add lemon slices and your chosen herb if you want it to look decorative.
Use a cloth whenever you’re ready to dust, then launder and reuse. Wring the cloth slightly before wiping so it’s damp rather than dripping, which helps prevent moisture marks on some finishes.
This hack is especially useful if you like to keep a jar in a convenient spot (such as under the kitchen sink or in a laundry room) so dusting doesn’t feel like a major project. If you’re wiping delicate surfaces, test on a small, less-visible area first to be sure the finish responds well to a damp cloth.
6) Dust Baseboards and Crown Molding with a Microfiber Cloth on a Broom
Low baseboards and high trim both slow you down—either you’re bending or climbing. This hack helps you reach both without the hassle. It also makes it easier to dust long stretches in one pass, rather than stopping and starting.
- Wrap a microfiber cloth around a broom.
- Secure it with elastic bands.
- Swipe along baseboards or crown molding from end to end.
It’s simple, fast, and keeps you off your knees (and off a chair). For baseboards, start by dry-swiping to pick up loose dust and hair. If there are scuffs or sticky spots, follow up by lightly dampening a second cloth with water or dusting spray and running it along the area again.
For crown molding, work slowly around corners so you don’t knock into walls or ceilings. If the cloth gets loaded with dust, pause and shake it into a trash bag outdoors or swap it for a clean cloth. You’ll get better results with several quick cloth changes than by pushing a saturated cloth around the room.
7) Use Canned Air to Clear Dust from Vents (and More)
Canned air isn’t only for technicians. It can help homeowners remove dust from tight spaces quickly. It’s best used as a “dislodge” tool—then you capture what comes out with a cloth or vacuum—rather than blasting dust and walking away.
Use it to blow dust out of vents, and it also works well for keyboards and pianos. It’s also useful for small crevices in remote controls, around buttons on appliances, and along window tracks where dust gathers in corners.
Important handling tip
Angle the can away from your body. Avoid pointing the nozzle directly into a vent, or you may blow dust deeper inside. Keep the nozzle angled so dust comes out toward you where you can wipe or vacuum it up.
If you’re using canned air on a vent cover, it often helps to vacuum the vent cover first, then blow out the remaining dust, then vacuum once more. This “vacuum, blow, vacuum” rhythm keeps dust from resettling on nearby walls or floors.
8) Pick Up Dust with Dryer Sheets
Dryer sheets can do more than laundry. For dusting day, they’re useful for grabbing dust efficiently while leaving a fresh scent behind. The texture helps collect dust from flat surfaces, and they’re easy to keep in a drawer for quick touch-ups.
Another benefit: they help reduce how quickly a surface attracts dust again. Keep a box nearby so you can quickly wipe furniture without dust flying through the air. This can be especially helpful on areas that show dust quickly, like dark shelves, TV stands, and coffee tables.
Dryer sheets are also handy on baseboards in a pinch, especially in hallways where dust and pet hair tend to collect along edges. Use a light touch and replace the sheet once it starts looking gray so you’re not dragging dust back onto the surface.
9) Sanitize as You Dust with a Microfiber Cloth and Alcohol
If you don’t have dusting spray—or you don’t have time to make it—alcohol can step in as a quick option. It’s convenient for non-porous surfaces that you touch often, such as door handles, light switches, remote controls, and some tabletops.
- Moisten a microfiber cloth with alcohol.
- Wipe surfaces promptly, since alcohol dries fast (and higher concentrations dry even faster).
This helps lift dust and sanitize at the same time. It’s also useful for spot-cleaning sticky fingerprints where dry dusting just smears the residue around. Keep the cloth only slightly damp—too much can drip into seams, electronics, or joints.
Caution
Do not use alcohol on wood surfaces, as it may cause damage.
Also avoid using alcohol on certain painted, varnished, or acrylic surfaces where it can dull the finish. When in doubt, test a small hidden area first. And never spray alcohol directly onto electronics; apply it to the cloth instead, then wipe.
10) Clean Lampshades Quickly with a Lint Roller
Lampshades collect dust often, and the material can make wiping slow or awkward. A lint roller is a simple shortcut. It works especially well on fabric shades and textured shades that trap lint and dust in the weave.
Roll over the lampshade until the sheet fills with dust. Replace the sheet as needed based on the lampshade size and how dusty it is. Rotate the shade as you go so you cover the full surface evenly, including the top rim where dust can settle unnoticed.
If your lampshade has delicate trim, fringe, or a looser weave, roll gently and avoid catching edges. For a deeper clean, lint roll first to remove loose dust, then lightly wipe the interior metal frame (if accessible) with a dry microfiber cloth.
11) Replace Costly Swiffer Refills with Reusable Flannel Towels
Swiffer-style tools are convenient, but replacement pads can add up. You can create a reusable alternative using flannel. This is a great option if you dust floors often, have pets, or simply want to reduce disposable products in your routine.
- Cut flannel into squares sized like your usual Swiffer replacement.
- Fit the flannel into the tool as you would a disposable cloth.
It will pick up dust and help buff the floor, while saving money over time. Flannel grips dust well, and you can keep several squares on hand so you can swap to a clean one mid-room without stopping your momentum.
After use, shake the cloth out into a trash bag (preferably outdoors), then wash it with your regular laundry. Skipping fabric softener can help some cloths stay more “grippy” for dust pickup.
12) Always Start Dusting from the Top of the Room
This is one of the easiest ways to make dusting faster and more orderly. It reduces rework and keeps you from cleaning the same surfaces twice.
Start at the highest points (ceiling areas, crown molding) and work downward toward baseboards and floors. That way, any falling dust gets cleaned up as you go, instead of dirtying areas you already finished.
A simple top-to-bottom order might look like this: ceiling corners and vents, light fixtures, fan blades, curtain rods, tall shelves, picture frames, furniture surfaces, baseboards, then floors. Even if you only dust one room, this order helps you finish feeling “done,” rather than noticing dust falling onto freshly wiped tables.
13) Dust Indoor Plants with a Hair Dryer (Cold Setting)
Plants are easy to overlook during cleaning, but indoor leaves collect dust just like shelves do. Larger-leaf plants can act like dust catchers, and fine dust can cling to leaves and stems.
Dust can block leaves from absorbing enough light, which may cause deficiencies in your indoor plants. To remove loose dust quickly, use a handheld hair dryer on the cold setting and gently blow dust off the leaves.
Hold the dryer a comfortable distance away so you don’t stress the plant with strong airflow. It often helps to do this step near a sink, bathtub, or outside (if practical) so any loosened dust doesn’t resettle on nearby furniture.
If you prefer, you can use this step first and then follow up with a moist wipe method for a more thorough clean. For sturdy plants, a damp microfiber cloth can remove remaining film; for delicate leaves, the gentle airflow alone may be enough for regular maintenance.
14) Slide a Cloth-Wrapped Ruler into Narrow Gaps
Some spaces are too small for your hand, and too tight for a standard cloth to do much good. A ruler becomes a simple extension tool. It’s especially helpful for gaps where dust turns into fuzzy buildup, such as between appliances and counters or along narrow trim ledges.
- Wrap a dusting cloth around a ruler.
- Secure each end with an elastic band.
- Use it to reach narrow areas and remove dust.
This works well for small gaps and for cleaning inside an air conditioner or radiator vent. You can also lightly moisten the cloth with dusting spray or alcohol for certain spaces.
For best control, wrap the cloth tightly so it doesn’t bunch up halfway through the gap. If you’re cleaning around sensitive equipment (like electronics), keep the cloth dry and avoid snagging cords. A second pass with a clean cloth can help remove any remaining residue after the first pass loosens the dust.
15) Clean Behind the Refrigerator with a Coil Brush and Vacuum
Dust buildup behind the refrigerator can be intimidating, especially around the coils. You can make it manageable with the right pairing of tools. This area is often out of sight, so it can collect thick layers of dust over time—especially in homes with pets.
- Use a refrigerator coil brush to loosen dust around the coil area.
- Immediately follow with a vacuum to capture the dust you’ve loosened.
This helps remove dust trapped inside the refrigerator coil area more efficiently than brushing alone. If possible, move the refrigerator slowly to avoid scratching floors and to prevent strain—an appliance slider can help, but even a careful, inch-by-inch approach works.
Try to vacuum the floor area behind and beneath the refrigerator as well, since dust often gathers in corners and along the wall. Once you’re done, push the refrigerator back carefully and check that the cord and water line (if you have one) are positioned safely.
Tips to Make Dusting Faster (and Keep It Under Control)
- Choose one method per surface: dry dusting, damp wiping, or a spray-and-wipe approach—switching constantly slows you down. If a surface is lightly dusty, dry