
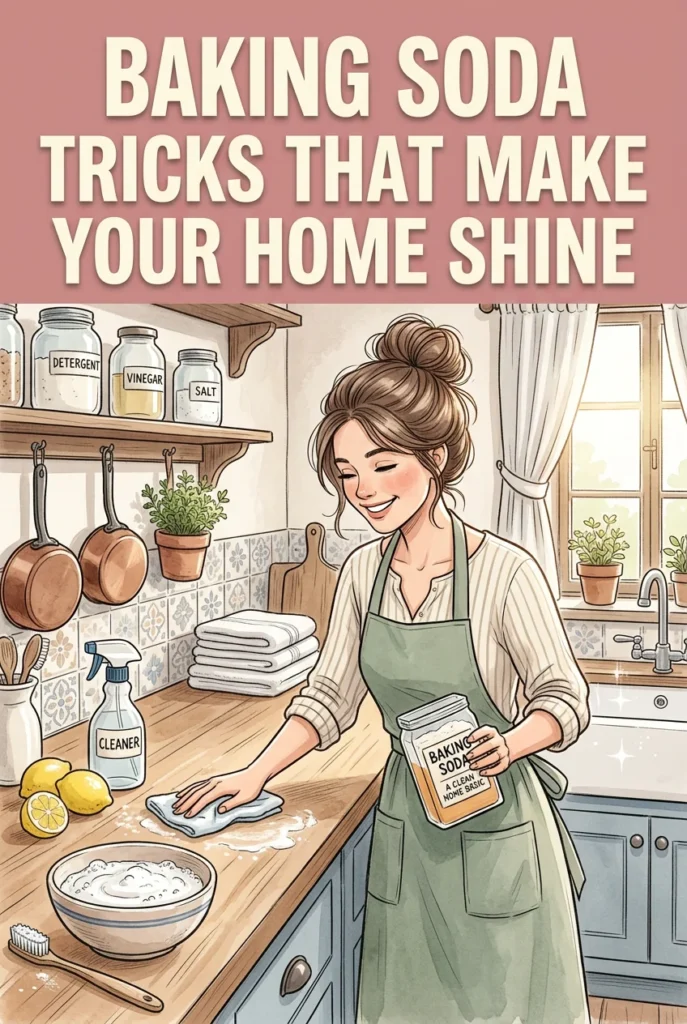
A single box can deodorize, lift grime, and simplify everyday cleaning—without stocking a cabinet full of specialty products.
Baking soda is best known as a kitchen staple, but it can do far more than help baked goods rise. Around the house, it’s a reliable helper for deodorizing, loosening stuck-on residue, and tackling everyday messes—often with nothing more than water, a brush, or a quick rinse. Because it’s mildly abrasive and naturally alkaline, it can help cut through the oily film that “holds on” to dirt, and it can also absorb and neutralize many everyday odors.
Why it matters: Most homes deal with the same repeating problems—odors, stains, greasy buildup, and “mystery grime” in hard-to-reach places. Baking soda offers a straightforward, low-fuss way to handle many of them using techniques that are easy to remember and quick to repeat. It’s also convenient: a single box can move from room to room, and many of the methods below rely on simple steps like sprinkling, waiting, scrubbing, and rinsing.
Before You Start: A Simple Way to Use Baking Soda Effectively
Baking soda is flexible. In most situations, you’ll use it in one of three forms:
- Dry sprinkle to absorb odors and freshen fabrics or enclosed spaces.
- Paste (baking soda + water) to scrub marks, grout, and stuck-on residue.
- Soak solution (baking soda + water) to refresh items like sponges, brushes, or oral appliances.
To get better results, match the form to the job. Dry baking soda is best when you want it to sit and “pull” odors out of fabric or air pockets. A paste is better when you need controlled scrubbing without liquid dripping everywhere. A soak is ideal for items with little crevices—like toothbrush heads, sponge pores, or brush bristles—where odor and residue tend to build up.
It also helps to keep a few simple tools nearby: an old toothbrush (for grout and tight edges), a soft scrub brush (for tubs, shoes, and floors), a microfiber cloth (for wiping), and a small bowl for mixing paste. If you’re cleaning a visible surface—especially painted walls, glossy plastic, or a delicate finish—test your method on a small, hidden spot first to make sure it doesn’t dull or scratch.
Bathroom Cleaning: Curtains, Toilets, Showers, and Grout
Shower Curtain Cleaner
Shower curtains can collect soap residue and mildew over time, but refreshing them doesn’t have to be complicated. In your washing machine, add 1 teaspoon of baking powder and 10 drops of tea tree essential oil. The tea tree oil helps address mold that may be on the curtain. Add the shower curtain and run a normal wash cycle. Many people are surprised by how clean the curtain looks afterward.
For best results, shake the curtain out before washing to remove loose debris, and make sure the curtain has room to move in the washer so the cleaning solution can reach the whole surface. If your curtain uses rings, remove them first so they don’t bang around or snag. After the cycle finishes, hang the curtain back up to air-dry fully; good airflow helps prevent musty smells from returning.
Bathroom Cleaner (Tank, Bowl, and Shower)
Baking soda can help with multiple bathroom jobs:
- Rusty toilet tank: Pour baking soda into the tank to help clean it.
- Toilet bowl stains: Use baking soda in the bowl to help eliminate stubborn stains.
- Shower grime: Use baking soda to help remove grease and gunk in the shower.
For a toilet bowl, sprinkling baking soda around the inside and letting it sit briefly can make scrubbing easier, especially around the waterline where buildup tends to cling. Use a toilet brush to work it into stained areas, then flush to rinse. For showers and tubs, focus on corners, ledges, and along the drain area where soap scum and body oils accumulate. Baking soda is especially helpful on the “film” that makes surfaces look dull even after a quick rinse.
For tougher spots, a baking soda-and-water paste can give you more scrubbing power than baking soda alone. Mix a small amount at a time so the paste stays thick and doesn’t slide off vertical surfaces. Apply it, let it sit for a couple of minutes, then scrub and rinse. If you’re working around metal fixtures, rinse well so residue doesn’t linger in crevices.
Tile Grout Cleaner
Grout can make a clean bathroom look dingy fast—especially in high-traffic or high-moisture areas. Instead of relying on expensive grout cleaners, mix half baking soda and half water to create a paste. Apply it to the grout lines and let it sit for a couple of minutes. Then scrub with an old toothbrush. Once the dirt loosens, wipe it away with a damp cloth.
Work in small sections so the paste doesn’t dry out before you scrub. If the grout lines are especially dark, a second application is often more effective than trying to scrub aggressively all at once. When you’re finished, wipe with clean water to remove any remaining grit, then dry the area with a towel to discourage new buildup. Keeping grout as dry as possible between cleanings can help it stay brighter longer.
Kitchen Cleaning: Stovetops, Drains, Sponges, and Microwaves
Stove Cleaner (Grease and Food Residue)
Stovetops collect grease, splatters, and burnt-on bits that plain water won’t lift. Sprinkle baking soda directly onto the stovetop, focusing on areas with heavy buildup. Scrub with a damp Scotch-Brite (or similar scrubber) until the residue loosens. Finish by wiping with a clean, damp cloth.
If the mess is thick or sticky, wipe away any loose crumbs first, then add baking soda. A slightly damp surface helps the powder cling where you need it instead of skittering across the top. Work from the least dirty area to the most dirty area so you’re not spreading greasy residue around. After wiping, do a final pass with a clean cloth and fresh water to remove any lingering grit that might dry into a dull haze.
Kitchen Drains Un-clogger (Baking Soda + Vinegar + Warm Water)
Many people reach for harsh chemicals when a kitchen drain slows down. A simpler approach uses baking soda, white vinegar, and warm water:
- Pour boiling water down the drain.
- Add 3/4 cup baking soda and let it sit for about two minutes.
- Pour in 2 cups of vinegar, followed by a little more boiling water.
- Let it sit for 15 minutes.
- Finish by pouring another pot of boiling water down the drain.
At this point, the sink should be unclogged.
This method is especially useful for the everyday mix of grease, soap residue, and food particles that can line pipes over time. The initial boiling water helps soften and move residue. The baking soda and vinegar reaction can help loosen buildup, and the final flush helps push it through. If your drain is fully blocked or backing up, you may need a different approach, but for slow drains this is a simple routine to try before reaching for stronger products.
As a general safety rule, don’t combine this approach with commercial drain cleaners. If something strong is already in the drain, flush with plenty of water and wait before trying another method.
Refresh Smelly Sponges (Overnight Soak)
When kitchen sponges start to smell or look “gross,” it’s tempting to toss them immediately. To extend their life, soak sponges in a solution of 5 tablespoons of baking soda to 1 quart of water. Let them sit overnight, then rinse well in the morning.
Make sure the sponge is fully submerged so the solution reaches deep into the pores. In the morning, rinse until the water runs clear, then squeeze thoroughly and let the sponge dry in an open, well-ventilated spot. Sponges that stay damp tend to smell faster, so drying them between uses is one of the simplest ways to keep them fresher.
Microwave Cleaner (Deodorize and Loosen Caked-On Food)
Fish, curry, and other strong foods can leave lingering smells in the microwave, and splatters can dry into stubborn patches. Add three teaspoons of baking soda to a microwave-safe bowl filled with one cup of water. Microwave it so the mixture steams. The steam helps deodorize and loosen caked-on food, making it easier to wipe the interior clean afterward.
After steaming, let the bowl sit briefly (with the door closed) so the warm moisture has time to soften dried splatters on the walls and ceiling. Carefully remove the bowl, then wipe the interior with a damp cloth or sponge. Pay special attention to the turntable and the ring beneath it, since spills often collect there. Once clean, leave the door open for a few minutes to air out and prevent lingering dampness.
Tupperware Cleaner (Stains and Discoloration on Plastic)
Many sauces and deeply colored foods can stain plastic storage containers over time. To help restore them, wipe the container with a damp sponge that has baking soda on it. Give it a thorough rub, then rinse with warm water.
Focus on the areas with the most discoloration, and use gentle pressure at first—especially on clear plastic that can scratch. If stains are stubborn, letting the baking soda sit briefly on the damp surface before rubbing can help. Rinse well and wash as usual so no powdery residue remains in corners or around lid seals.
Freshening and Deodorizing: Furniture, Mattresses, Sneakers, and Vacuums
Furniture Freshener (Cloth Upholstery)
Cloth-covered chairs and sofas can hold onto everyday odors. Sprinkle baking soda over the fabric upholstery and leave it overnight. The next day, use a handheld vacuum to remove the baking soda residue.
For even coverage, sprinkle from a small height and aim for a light, consistent layer rather than heavy piles. Baking soda works best when it has time to sit, so an overnight rest is helpful for rooms where smells tend to linger (like homes with cooking odors or pets). When vacuuming, use an upholstery attachment and work slowly to pull powder out of seams and creases.
Mattress Cleaner (Odors and Dust)
You can freshen a mattress with baking soda. Sprinkle a generous amount across the mattress surface and let it sit for 15 minutes to help draw out dust and odors. Then vacuum thoroughly using a hand vacuum.
If possible, strip the bed completely so you can reach the full surface, including edges where dust tends to collect. Vacuuming is the step that makes the difference—take your time and pass over the surface in overlapping lines. If the room is humid, give the mattress a little extra time to air out before you remake the bed. This is also a useful step after seasonal changes, when bedding can start to smell slightly stale from closed windows and reduced airflow.
Sneakers Odor Eliminator
Sneakers often develop a sweaty odor. To reduce the smell, pour a layer of baking soda into each sneaker and leave them overnight. In the morning, the odor should be noticeably reduced.
To make cleanup easier, you can tap the shoes upside down over a trash can before wearing them. For shoes with deep tread or textured insoles, a quick shake and a light brush can help remove leftover powder. Letting shoes dry fully between wears also helps keep odor from building up again.
Vacuum Cleaner Deodorizer (Hose, Canister, Filter)
If your vacuum gives off a “funny” scent while you’re cleaning, it may need deodorizing. Wash key parts using a mixture of baking soda and water—especially the hose, canister, and filter. Rinse well and allow everything to air-dry completely before reassembling.
Start by emptying the vacuum and checking for obvious sources of odor, like trapped debris in the canister or hair wrapped around rollers. Use a damp cloth and baking soda solution on washable parts, and be careful with any components that shouldn’t get wet. Let each piece dry completely—especially filters—since reassembling while damp can lead to lingering smells. Once everything is dry, reassemble and run the vacuum briefly to confirm the odor is gone.
Stains and Marks: Walls, Clothing, and Driveways
Crayon Marks (Walls and Surfaces)
If kids have decorated the walls with crayons, baking soda can help. Make a paste using baking soda and water, apply it to the crayon marks, and leave it for a few minutes. Then rub gently with a damp rag until the marks lift.
Use a light touch, especially on painted walls, since aggressive scrubbing can dull paint or create a shiny “clean spot” on flat finishes. Work slowly from the outside of the mark toward the center to avoid spreading waxy color. When the crayon lifts, wipe the area with clean water and dry with a soft cloth so no gritty residue remains.
Blood Stain Remover (Without Bleach)
Bleach can spoil the color of colored clothing, which is why it isn’t always the best choice for blood stains. For a gentler approach, mix 1 part baking soda with 2 parts water to form a paste. Rub the paste onto the blood-stained area and leave it for about 45 minutes. Then use a dry, clean cloth to remove the baking soda residue.
For clothing and fabrics, it also helps to address the stain before it’s been exposed to heat, since heat can set protein-based stains. After removing the baking soda residue, wash as usual according to the garment label. If any shadow remains, repeat the process rather than putting the item in a hot dryer right away.
Perspiration Stains (Shirts and Underarms)
Perspiration stains can still show even after washing. To target the stained areas, make a mixture of 5 teaspoons of baking soda and 3 cups of water into a paste-like scrub. Use a soft brush to scrub the stains, then let the garment sit for about 30 minutes before washing on your regular cycle.
This is especially useful for underarm areas where deodorant residue and sweat can combine into a stubborn film. Use a soft brush (or even an old toothbrush) to work the mixture into the fabric without fraying it. After the garment sits, wash promptly so the loosened residue is rinsed away. For delicate fabrics, reduce scrubbing pressure and test in an inconspicuous spot first.
Oil Stain Remover (Garage Floors and Driveways)
Oil stains can appear where cars are parked overnight. To tackle these stains, sprinkle baking soda over the oil spill area. Scrub with a damp brush until the stain lifts, then rinse. If needed, repeat the process for stubborn spots.
If the spill is fresh, blot or absorb as much oil as possible before scrubbing so you’re not spreading it around. Work the baking soda into the stained surface with firm, even strokes and add a little water as needed to keep the brush moving. After rinsing, check the stain once the surface dries; some oil marks look lighter when wet and reappear as they dry, so a second pass can help.
Personal Items and Small Tools: Oral Appliances and Hair Brushes
Oral Appliance Cleaner (Dentures, Retainers, Toothbrushes)
Oral appliances should be cleaned regularly to remove food particles and odors. To avoid cleaning them with harsh chemicals, mix two teaspoons of baking soda into a cup of water and soak items like toothbrushes, dentures, or retainers overnight. In the morning, rinse thoroughly and they’re ready to use.
Use a clean container and enough solution to fully cover the item. In the morning, rinse very well so no residue remains, especially in small crevices. If your appliance has special care instructions, follow those first, and treat baking soda as a simple, low-fuss option for