
14 Sponge Cleaning and Household Hacks That Make Everyday Chores Easier
A simple sponge can do far more than wash dishes—these practical, low-cost ideas help you clean smarter, stretch supplies, and solve small household problems fast.
You probably already keep a few sponges under the sink (or in a kitchen caddy). What many people don’t realize is that the same inexpensive tool can double as a sanitizer aid, a soap saver, a DIY scrubber, a small-space freshener, and even a quick fix when you’re missing a specialty cleaning tool.
Part of the appeal is that sponges are easy to customize. You can cut them to size, pair them with common items like tongs or a jar, and dedicate different sponges to different tasks. That flexibility matters in real life, because chores often happen in short bursts—between dinner and bedtime, during a quick bathroom reset, or right before guests arrive.
Why it matters: household cleaning tends to stall when the “right” tool isn’t available. Sponges are easy to store, easy to cut, easy to pair with other items, and versatile enough to cover a surprising number of jobs—especially when you know a few simple modifications. If you’re trying to reduce waste, the ability to repurpose a sponge for a second job (or get a little more mileage out of one before replacing it) can also make a noticeable difference over time.
Why Sponges Work So Well (and When They Don’t)
Sponges are effective because they combine absorbency with surface friction. That makes them useful for wiping, scrubbing, applying solutions, and protecting surfaces. They also cut easily, so you can shape them to fit the task—inside a jar, under a chair leg, around a bar of soap, or along a narrow groove where a cloth just won’t reach.
They’re also good “carriers.” A sponge can hold a cleaning mixture long enough to spread it evenly, or hold a scent oil long enough to gently freshen a small space. And because sponges compress, they can squeeze into tight spots like cup bottoms, faucet bases, window tracks, and blind edges.
The main limitation is hygiene: a sponge can hold onto grime and germs after repeated use. That’s why several of the hacks below focus on keeping sponges cleaner for longer—or using them in a way that makes replacement easy when the job is done. It also helps to be intentional about where each sponge lives and what it touches (for example: kitchen sponges for food areas, separate sponges for bathroom tasks, and a separate “utility” sponge for outdoor or garage messes).
Before You Start: A Quick Safety and Setup Note
These hacks are simple, but a little preparation makes them work better.
- Keep a few sponges on hand (a mix of soft sponges and sponges with a scouring pad helps). Even better: set aside a few older sponges specifically for non-kitchen jobs so you don’t feel bad cutting them up.
- Cut carefully when making slits or holes, and aim for snug fits so inserts stay in place. A small paring knife or craft knife tends to make cleaner cuts than tearing by hand.
- For any hack involving heat (microwave or dishwasher), make sure you’re using the sponge appropriately and avoid including anything that shouldn’t be heated.
- For magnets and hot glue, ensure everything is sealed and secure before using inside glassware.
- Label or color-code sponges if you can. A quick snip on one corner (or a marker dot) can tell you which sponge is “bathroom-only” versus “kitchen-only.”
The 14 Sponge Cleaning and Household Hacks
1) Microwave Sanitizer
After a sponge has been used for a while, it can hold onto dirt and germs. A quick microwave method can help freshen it up, especially when you’re not ready to swap it out yet.
How to do it:
- Fill a microwave-safe bowl with 1 part vinegar and 1 part water.
- Place the sponge in the bowl until it is fully immersed.
- Microwave on medium heat for 2–3 minutes.
The heat works with the vinegar to remove bacteria and leave the sponge squeaky clean, helping you keep sponges for longer periods of time. Let it cool before handling, then squeeze it out thoroughly so it dries faster between uses.
If you plan to do this regularly, consider setting a reminder (for example: once or twice a week) so the task stays quick. And if a sponge starts to smell even after cleaning, or begins to fall apart, it’s usually a sign it’s time to replace it and start fresh.
2) Soap Saver Sponge Dish
Standard soap dishes often let bar soap sit in water, which makes it melt away and wash down the drain. A sponge can act as a simple soap-saving holder that keeps the bar from sitting in a puddle.
How to do it:
- Trace a circle in the center of a sponge (about the size of your bar of soap or slightly larger).
- Score and cut out the center piece to create a recessed “seat.”
- Rest the soap in the opening.
The sponge absorbs drips and helps the bar dry between uses. When the soap is used up, moisten the sponge and use the residue that melted from the wet soap—an easy way to reduce waste.
This works well at the kitchen sink, in a shower niche, or next to a utility sink. If you notice the sponge staying too wet, squeeze it out occasionally or switch to a smaller piece so it dries faster.
3) Sponge Wall Decor (DIY Brick Effect)
For quick home-renovation style DIYs, a larger sponge can help you create a simple brick wall effect. This is especially useful when you want a visual change without taking on a full renovation project.
How to do it:
- Use the large side of a large sponge.
- Dip it into brown paint.
- Press it firmly against the wall to form one “block.”
- Repeat in the wall pattern you like.
This can be an easy way to refresh a garage wall or even a section of the living room. When you’re done, hanging a painting or adding a plant can help offset the design.
To make the pattern look more intentional, keep a consistent “brick size” by using the same side of the sponge each time. You can also rotate the sponge slightly between presses to create subtle variation, which often makes the effect look more natural from a distance.
4) Blind Cleaner with Tongs
Blinds can be tedious to clean because dust settles on individual blades. A couple of sponges can make the job much faster by letting you wipe both sides at once.
How to do it:
- Cut a hole in the short side of two sponges.
- Slip the sponges onto a pair of tongs.
- Slide the sponge-tongs tool along the blinds to wipe both sides at once.
For a deeper clean, soak the sponges in a cleaning solution of your choice. If you like, add essential oils to freshen the room and customize the scent, then keep the tool handy for blinds throughout the house.
For best results, start by closing the blinds in one direction and making a full pass across all slats. Then reverse the direction and repeat. That approach catches dust that sits on the “lip” of each slat and helps avoid pushing debris deeper into corners.
5) Window “Squeegee” Alternative
If you don’t have a squeegee and don’t want to buy one, a sponge can handle the wipe-down step on windows, mirrors, and even glass shower doors.
How to do it:
- Clean the window as you normally would.
- Use a soft sponge to absorb the water.
- Wipe away moisture in one direction, similar to a squeegee motion.
You can also scrub grime with soap first, then do a final wipe. If you’re getting streaks, switch to a softer, smoother sponge.
A helpful trick is to wring the sponge out often so you’re not dragging extra water back across the glass. Also, try finishing with long, steady strokes rather than short back-and-forth wiping, which can re-spread moisture and leave marks.
6) One-Step Scrubbing Sponge (Built-In Soap)
This hack turns a sponge into an all-in-one cleaning tool by housing soap inside it. It’s handy for quick cleanups because it reduces the number of times you have to reach for soap mid-scrub.
How to do it:
- Cut a hole in the side of a sponge—large enough to fit a small bar of soap.
- Insert the bar soap (or use grated soap as the insert).
- Moisten the sponge to create a lather and start scrubbing.
This reduces the need to repeatedly lather and rinse. Use one side for scrubbing and the other side to wipe away suds.
It’s especially useful for sinks, tubs, tile, and stovetop wipe-downs where you want a steady foam as you work. When you’re done, squeeze the sponge firmly and store it somewhere it can dry out, since a built-in soap pocket can hold extra moisture.
7) Magnetic Cleaner for Deep Cups and Glassware
Deep cups and glassware can be hard to reach, especially if the opening is narrow or the bottom is wider than your hand can comfortably fit. This hack uses magnets to move a sponge through tight spaces.
How to do it:
- Slice a sponge in half.
- Cut a slit in the side of each piece.
- Insert two flat opposing magnets—one in each sponge piece.
- Seal the sides with hot glue to keep the magnets enclosed.
- Place one sponge inside the cup and hold the other on the outside.
- Slide the outside piece; the inside sponge will follow.
This gives you a way to scrub areas your hand can’t easily reach. Move slowly and use gentle pressure at first, especially with thinner glass, so you don’t accidentally bang the inner sponge into the sides.
If you need more scrubbing power, use a sponge with a scouring side on the inside piece (as long as it’s safe for your glassware) and keep the outside piece softer for a comfortable grip.
8) Sponge Floor Protector for Furniture Legs
If you have hardwood floors, sponges can help reduce scratching from moving furniture. They work as a temporary cushion and can also be useful while you’re rearranging a room.
How to do it:
- Cut the sponge to match the size and shape of your furniture legs.
- Glue each piece to the bottom of the legs.
You can slide furniture with less worry about scratches, and it can also make movement quieter. If a chair or table has uneven legs, adding another piece of sponge can help balance it out.
This is a particularly helpful quick fix when you notice a chair scraping or wobbling and you need a solution immediately. If the pieces compress over time, simply replace them with fresh sponge sections cut to the same shape.
9) Sponge Toilet Cleaner (When You Don’t Have a Brush)
If you find yourself without a toilet brush, you can improvise one with a sponge. This is useful for a temporary situation—such as a move, a travel rental, or a brush that needs replacing.
How to do it:
- Slit the shorter side of a sponge.
- Insert an old toothbrush or a short stick to act as a handle.
This works especially well with a sponge that has a scouring pad attached: one side can handle heavier scrubbing while the other does lighter wiping. When finished, you can sanitize the sponge or discard it.
For a bit more control, make the slit snug so the handle doesn’t wobble. And as with any bathroom-cleaning tool, keep this sponge dedicated to that purpose only—don’t reuse it elsewhere.
10) Homemade “Magic Eraser” Style Sponge with Baking Soda
For tough stains, baking soda and a sponge can create a powerful, simple scrubber. Baking soda adds gentle abrasion that can help lift residue without needing a specialized product.
How to do it:
- Cut a space in the side or top of a sponge.
- Make a paste with baking soda and water.
- Fill the sponge with the paste.
Whenever you need to tackle a stubborn mark, scrub with your baking-soda-filled sponge. This can quickly clean surface stains, including on countertops and cabinets.
It’s also a nice option for quick spot-cleaning because you can keep the paste inside the sponge rather than mixing a fresh batch every time. If the paste dries out, add a little water and squeeze the sponge to redistribute it.
11) Sponge Air Freshener for Small Spaces
Need a subtle air freshener for a closet, bathroom corner, gym bag area, or another small space? A sponge can hold scent without being overpowering, and it takes up very little room.
How to do it:
- Add a few drops of essential oil (for example, ylang ylang) onto a sponge.
- Around ten drops can last for a while.
You can customize the scent based on whether you want something more energizing or calming. If you share a closet, cut the sponge in half and scent each half differently.
To keep things tidy, place the scented sponge on a small dish, in a breathable container, or on a shelf where it won’t touch clothing directly. When the scent fades, refresh it with a few more drops rather than over-saturating it all at once.
12) Faucet and Stainless Cleaner (Lemon Juice + Baking Soda)
If you don’t have a lemon for the classic lemon-cleaning approach, lemon juice and a sponge can still do the job. This combination is especially handy for quick touch-ups when fingerprints and water marks make fixtures look dull.
How to do it:
- Mix 1 tablespoon lemon juice with 1 teaspoon baking soda.
- Let a sponge absorb the mixture.
- Wipe down faucets and stainless steel.
If the job wasn’t too tough, you can store the sponge in a jar in the fridge and use it throughout the week.
When you wipe, focus on the base of the faucet and the area behind the handles where drips often collect. Finish by buffing with a dry cloth if you want a more polished look, especially on stainless surfaces where leftover moisture can show.
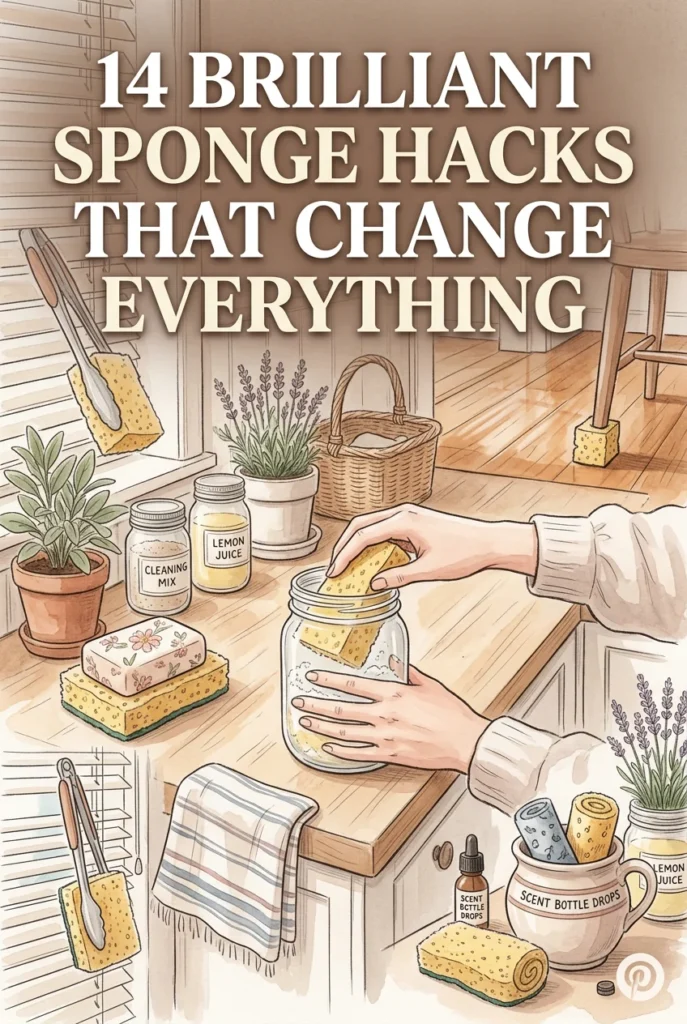
13) Nail Polish Remover Jar (Less Waste, Less Spilling)
Nail polish remover can feel wasteful when you’re soaking cotton for just one finger, and it’s easy to spill if the bottle tips. A sponge-in-a-jar setup helps you use less remover while keeping the process contained.
How to do it:
- Choose a small jar with a tight lid (wide enough to comfortably fit your fingertips).
- Cut a sponge to fit inside the jar, then cut a slit down the center of the sponge (or an “X” opening) so you can slide a finger in.
- Place the sponge in the jar and pour in nail polish remover until the sponge is saturated (not floating).
- To use, insert a finger into the slit and gently twist against the sponge to remove polish.
- Seal the lid tightly between uses to reduce evaporation and prevent spills.
This is a simple way to keep the remover where you need it—inside the sponge—rather than soaking multiple cotton pads. If the sponge starts to discolor heavily over time, swap it for a fresh piece and reuse the same jar setup.
14) Frozen Sponge Ice Pack (Cleaner Lunchboxes and Cooler Bags)
If you’ve ever used loose ice in a lunch bag or small cooler, you know the downside: it melts and creates puddles that soak wrappers and leave everything damp. A frozen sponge can work as a compact ice pack that also absorbs meltwater.
How to do it:
- Soak a clean sponge in water, then squeeze it so it’s wet but not dripping.
- Place the sponge in a sealable freezer bag (or a reusable container) and seal it tightly.
- Freeze overnight.
- Use it in lunchboxes, picnic bags, or small coolers as a slim cold pack.
Because the sponge holds water in place, it helps reduce the messy slosh that can happen with ice cubes. When it thaws, you can refreeze it again, and the bag keeps your food area cleaner than a bare sponge would.
Extra Tips to Make These Hacks Work Better
A few small habits can make sponge-based cleaning easier and more hygienic:
- Dedicate sponges by zone: keep separate sp