

9 Things Nobody Tells You About Gardening Tools: Essential Insights for Selection, Maintenance & Storage
Intro for 9 Things Nobody Tells You About Gardening Tools
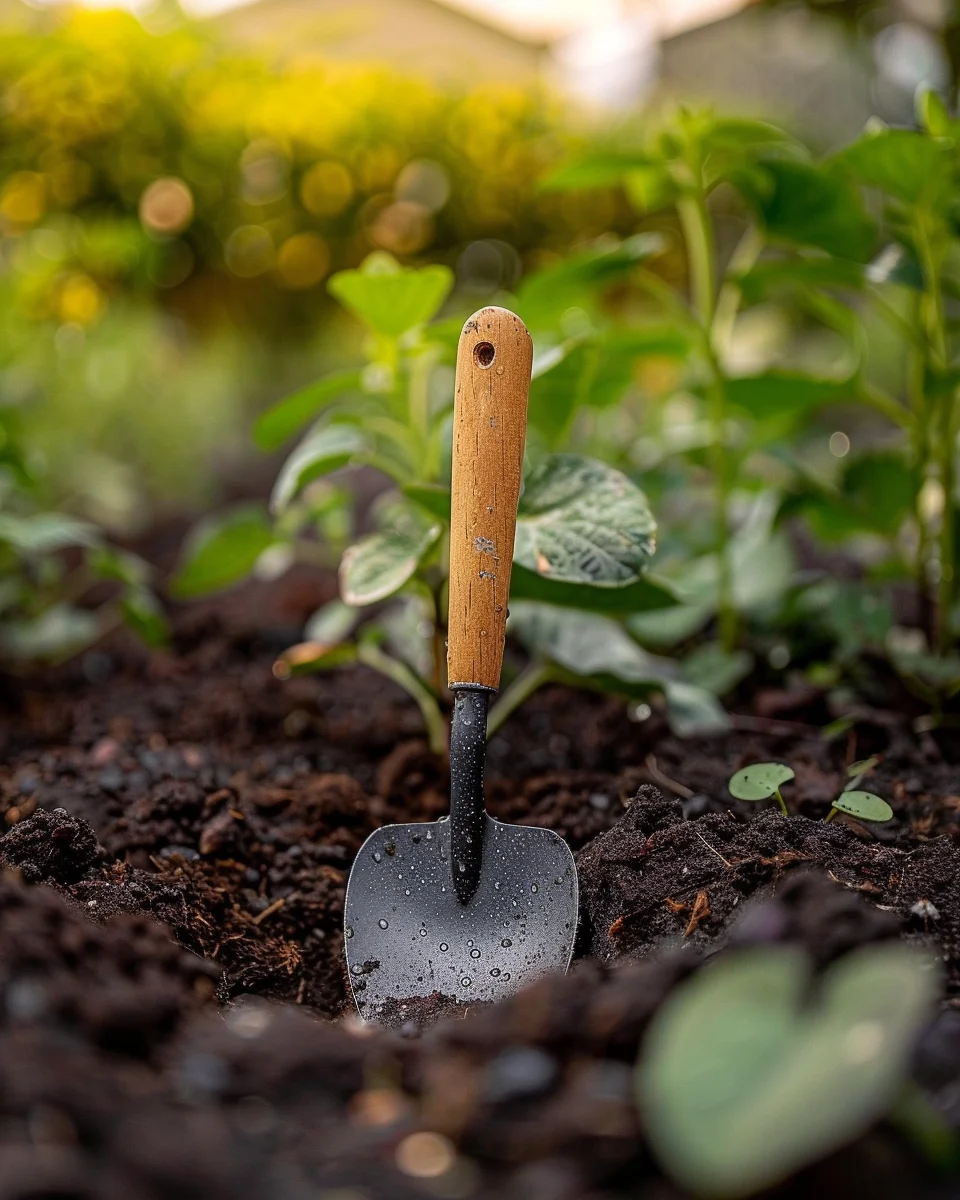
Gardening tools are the unsung heroes of any successful garden, yet many gardeners discover important truths about them only through experience. From unexpected maintenance needs to storage solutions that extend tool life, there’s a wealth of knowledge that often goes unmentioned. Quality gardening tools can last decades when properly selected and maintained, saving you money and frustration in the long run. Whether you’re cultivating a small herb garden or managing extensive vegetable beds, understanding these hidden aspects of gardening tools will transform your gardening experience and results across all climate zones.
When to plant 9 Things Nobody Tells You About Gardening Tools
While gardening tools themselves aren’t planted, understanding when to use specific tools is crucial for gardening success. In early spring when soil temperatures reach 7-10°C (45-50°F), lightweight tools like hand trowels and cultivators become essential for preparing beds. Summer gardening in temperatures above 20°C (68°F) calls for watering tools and mulch spreaders. Fall cleanup requires sturdy rakes and pruners, while winter is ideal for tool maintenance when frost has settled in. Regardless of your climate zone, having the right tool ready at the right time is a fundamental yet often overlooked aspect of successful gardening.
Best time to plant 9 Things Nobody Tells You About Gardening Tools
The optimal timing for tool acquisition and maintenance follows the gardening calendar. In cool climates, February-March is ideal for purchasing and preparing tools before the growing season begins. Warm climate gardeners should prepare tools in January-February before early planting starts. Tool maintenance is best performed in November-December in temperate regions when garden activity slows. For transplanting tools like dibbers and bulb planters, ensure they’re ready by early spring or fall planting windows. Establishing a tool maintenance schedule that aligns with your region’s gardening calendar ensures your equipment is always ready when needed.
Best 9 Things Nobody Tells You About Gardening Tools varieties to grow
• Felco F-2 Pruners – The self-sharpening mechanism means less maintenance while maintaining precision cuts for years.
• Hori Hori Garden Knife – Multifunctional design replaces several tools with serrated and straight edges plus measurement markings.
• Radius Garden Ergonomic Hand Trowel – The ergonomic grip prevents wrist strain during extended use, a benefit rarely mentioned in product descriptions.
• Fiskars Long-Handle Digging Shovel – The fiberglass handle weighs significantly less than wood but offers superior durability in varying weather conditions.
• Corona Extendable Handle Rake – Adjustable length accommodates different users and tasks without requiring multiple tools.
• Barebones Living Hand Trowel – The heat-treated boron steel maintains sharpness longer than standard stainless steel options.
• Silky Pocketboy Folding Saw – The replaceable blade system extends tool life indefinitely, making it surprisingly economical long-term.
• Sneeboer Hand Fork – Hand-forged steel construction means it can be resharpened repeatedly, unlike stamped metal tools that quickly become disposable.
How to plant 9 Things Nobody Tells You About Gardening Tools
Materials list:
– Tool storage solution (wall-mounted rack, garden shed, or storage bench)
– Boiled linseed oil for wooden handles
– Fine-grit sandpaper
– Mineral oil or food-grade lubricant
– Rust preventative spray
– Tool cleaning brush
– Sharpening stone or file
– Microfiber cloths
Step-by-step:
1. Establish a dedicated storage area that protects tools from moisture and direct sunlight, which causes premature deterioration.
2. Before first use, apply boiled linseed oil to wooden handles to prevent splitting and cracking; repeat annually.
3. Remove manufacturing residues from new metal tool parts using fine-grit sandpaper followed by a clean wipe-down.
4. Apply a thin layer of mineral oil to metal surfaces to establish a protective barrier against rust.
5. Create a cleaning station near your tool storage with a stiff brush for removing soil after each use.
6. Label tools with bright paint or tape on handles to prevent loss in garden beds.
7. Set up a maintenance schedule in your calendar, as regular care is often overlooked until tools fail.
8. Establish proper storage positions – hang long-handled tools, store sharp tools in protective sheaths.
9. Create a simple inventory system to track tool condition and replacement needs.
How to grow 9 Things Nobody Tells You About Gardening Tools
The lifespan of your gardening tools “grows” with proper care. Tools should be stored out of direct sunlight, as UV exposure degrades both wooden handles and plastic components. Establish a watering schedule for wooden handles – apply linseed oil every 3-6 months depending on use frequency and climate humidity. Fertilize metal parts with light machine oil monthly in humid regions, quarterly in dry climates. Apply a protective mulch of tool wax to metal surfaces before winter storage. Thin the collection regularly by donating unused tools rather than letting them deteriorate in storage. For container gardening, invest in specialized container tools with narrower profiles. Most surprisingly, tool maintenance itself requires specific tools – files, sharpening stones, and cleaning brushes – that many gardeners overlook until they’re urgently needed.
Caring for 9 Things Nobody Tells You About Gardening Tools
Clean tools immediately after use, as dried soil becomes abrasive and promotes rust. For pruners and shears, disinfect blades with isopropyl alcohol between plants to prevent disease spread – a critical step many gardeners skip. Common tool ailments include rust (treat with white vinegar soak followed by steel wool scrubbing), loose handles (fix with wood wedges rather than replacing the tool), and dull edges (sharpen at 20-degree angles for most cutting tools). Harvest the full potential of your tools by sharpening regularly – most cutting tools need attention every 5-10 hours of use. For storage, hang tools rather than leaning them, as pressure points create warping. Surprisingly, many premium tools are designed to be serviced rather than replaced – investigate manufacturer repair services before discarding seemingly broken tools.
Understanding bolting in 9 Things Nobody Tells You About Gardening Tools
“Bolting” in gardening tools refers to fasteners that loosen over time, particularly where handles connect to metal heads. This occurs due to expansion and contraction from temperature changes and the physical stress of use. The primary triggers include improper storage in areas with temperature fluctuations, using tools beyond their intended purpose, and failing to check connections regularly. Prevent bolting by storing tools in climate-controlled spaces, applying thread-locking compounds to critical connections, and performing quarterly inspections. If bolting occurs, disassemble the connection, clean thoroughly, apply appropriate adhesive or locking compound, and reassemble with proper torque. Unlike plant bolting, tool bolting is entirely preventable with minimal effort.
Why does 9 Things Nobody Tells You About Gardening Tools turn bitter?
• Rust contamination – Metal oxidation creates a bitter taste in harvested produce; clean tools thoroughly before harvesting edibles
• Improper material selection – Some cheap tools use metals that leach compounds into soil; invest in food-safe tools for edible gardens
• Chemical residue – Lubricants and preservatives on tools can transfer to plants; use food-grade oils for tools used with edibles
• Cross-contamination – Tools used for chemical applications then used on edibles without cleaning; maintain separate tools for different garden tasks
• Galvanic corrosion – Different metals touching in wet conditions create electrical currents that accelerate deterioration; avoid mixed-metal tools in humid environments
Companion planting for 9 Things Nobody Tells You About Gardening Tools
Companion tools work together like companion plants. Pair hand pruners with holsters to prevent loss and soil contamination. Combine watering cans with moisture meters to prevent overwatering. Match digging forks with garden sieves for soil preparation and amendment incorporation. Integrate hoes with hand cultivators for efficient weed management at different scales. Avoid combining wooden-handled tools with automatic irrigation systems, as constant moisture exposure accelerates handle rot. Similarly, don’t store steel and copper tools together in humid conditions, as galvanic corrosion will damage both. The most overlooked companion to all tools is a maintenance kit – files, oil, and cleaning supplies should be as accessible as the tools themselves.
Seasonal calendar
• January: Inventory tools, order replacements, sharpen cutting tools
• February: Apply protective oils to wooden handles, check for loose fittings
• March: Clean and organize spring planting tools, disinfect propagation equipment
• April: Inspect irrigation tools, clean and repair as needed
• May: Maintain weeding tools at peak sharpness, check wheelbarrow tire pressure
• June: Clean and oil pruning tools weekly during active growth
• July: Check tool handles for sun damage, reapply protective oil
• August: Sharpen deadheading tools, maintain harvesting equipment
• September: Prepare fall cleanup tools, sharpen edges on leaf rakes
• October: Clean and oil digging tools after fall planting
• November: Deep clean all tools before winter storage
• December: Apply rust preventative to metal surfaces, repair or replace damaged tools
Problems & solutions
Problem | Quick Fix
— | —
Rusty tool heads | Soak in white vinegar overnight, scrub with steel wool, dry thoroughly, apply oil
Splintering wooden handles | Sand smooth, apply boiled linseed oil, allow 24 hours to dry
Dull cutting edges | Sharpen with appropriate file or stone at original bevel angle, finish with honing oil
Loose tool heads | Remove handle, clean socket, insert wooden shims or epoxy, reassemble firmly
Broken plastic handles | Wrap with fiberglass repair tape rather than replacing entire tool
Bent tines or prongs | Straighten carefully using vice and pliers while cold, never when hot
Sticky moving parts | Disassemble if possible, clean with degreaser, apply silicone or PTFE lubricant
Common questions about growing 9 Things Nobody Tells You About Gardening Tools
Q: How often should I sharpen my pruning tools?
A: Sharpen after every 5-8 hours of active use, or when you notice increased effort needed to make cuts. A sharp tool is safer and causes less plant damage than a dull one.
Q: Can I leave my tools outside if they’re under cover?
A: Even covered outdoor storage exposes tools to humidity fluctuations that accelerate rust and wood deterioration. Store tools in a shed or garage with moderate temperature control.
Q: What’s the minimum set of tools needed for a container garden?
A: A quality hand trowel, pruners, watering can with rose attachment, and soil scoop will handle 90% of container gardening tasks in spaces up to 10 square meters.
Q: How do I know when to replace rather than repair a tool?
A: Replace when the metal shows significant pitting (not just surface rust), when wooden handles have rotted (not just splintered), or when moving parts have excessive play that can’t be adjusted.
Q: Are expensive tools really worth the investment?
A: Quality tools often cost 3-5 times more but last 10-20 times longer with proper care. The ergonomic benefits also reduce gardening fatigue and injury risk, making them worthwhile for regular gardeners.
Q: Can I use regular household oil for tool maintenance?
A: Household oils like cooking sprays go rancid. Use boiled linseed oil for wood and food-grade mineral oil or specialized tool oil for metal parts to prevent contamination and ensure proper protection.
Q: How should I clean tools that have been used around diseased plants?
A: Disinfect with 70% isopropyl alcohol or a 10% bleach solution, ensuring 30 seconds of contact time. Rinse, dry thoroughly, and oil metal parts to prevent corrosion from disinfectants.