
How to Grow Spring Seedlings with Heat Mats: Jumpstart Your Garden for Earlier Harvests
Intro for spring seedlings with heat mats
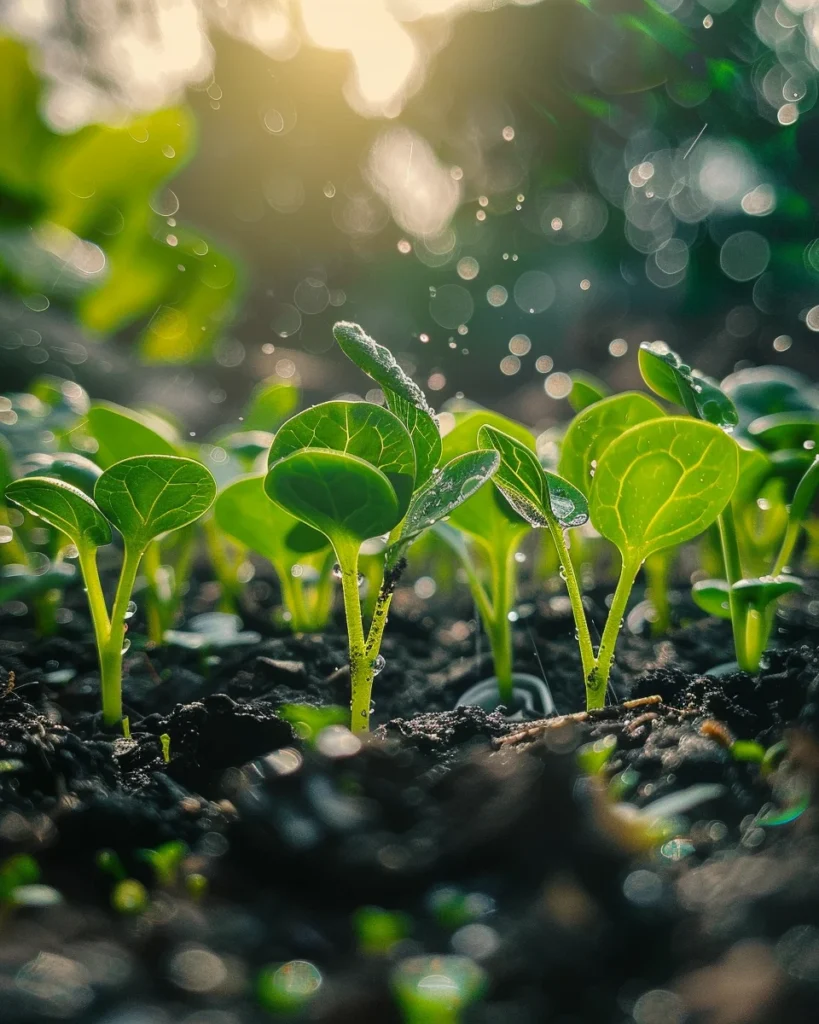
Heat mats are gardening game-changers that provide consistent bottom heat to speed up germination and produce stronger seedlings. By maintaining optimal soil temperatures between 20-25°C (68-77°F), heat mats can reduce germination time by up to 50% for many vegetables and flowers. They’re particularly valuable in cooler climates where spring soil temperatures lag behind ideal growing conditions. Heat mats create a controlled microclimate that encourages uniform germination, stronger root development, and healthier seedlings overall. This technique allows gardeners to start growing weeks earlier than outdoor conditions would permit, extending the growing season and maximizing harvests in temperate regions.
When to plant spring seedlings with heat mats
Heat mats are most beneficial when starting seeds 4-8 weeks before your region’s last expected frost date. In temperate regions, this typically means beginning in late January through March. For cool-season crops like lettuce, spinach, and brassicas, soil temperatures of 18-21°C (65-70°F) are ideal. Warm-season crops like tomatoes, peppers, and eggplants prefer warmer soil temperatures of 24-29°C (75-85°F). The beauty of heat mats is they allow you to create these optimal conditions regardless of ambient temperatures, making them particularly valuable in early spring when indoor temperatures might fluctuate.
Best time to plant spring seedlings with heat mats

In cool temperate regions (UK, US Zones 4-6), start using heat mats from mid-January for slow-growing flowers, mid-February for warm-season vegetables, and late February to early March for fast-growing vegetables. In warmer regions (US Zones 7-9), you can begin 2-4 weeks earlier. Most seedlings should remain on heat mats until germination occurs, then can be moved to cooler growing areas with adequate light. For direct sowing outdoors, heat mats aren’t applicable, but pre-warming soil with black plastic can achieve similar benefits once outdoor temperatures begin to moderate.
Best spring seedling varieties to grow with heat mats
- Tomatoes (Solanum lycopersicum) – Benefit greatly from consistent 24°C (75°F) soil temperatures, reducing germination time from 7-14 days to 5-8 days.
- Peppers (Capsicum annuum) – Notoriously slow to germinate without heat; mats can reduce germination from 21 days to 7-10 days.
- Eggplant (Solanum melongena) – Requires consistent warmth; heat mats can improve germination rates from 60% to over 90%.
- Basil (Ocimum basilicum) – Germinates quickly with bottom heat and produces stronger seedlings less prone to damping off.
- Marigolds (Tagetes spp.) – Germinate more uniformly with bottom heat, making them excellent companion plants started early.
- Petunias (Petunia × hybrida) – Tiny seeds germinate more reliably with consistent bottom heat of 22-24°C (72-75°F).
- Melons (Cucumis melo) – Heat-loving crops that benefit from early indoor starts with bottom heat for longer growing seasons.
How to plant spring seedlings with heat mats
Materials needed:
- Seedling heat mat (waterproof, UL-listed)
- Thermostat controller (optional but recommended)
- Seed starting trays with clear domes
- Seed starting mix (sterile, soilless)
- Seeds
- Spray bottle or watering can with fine rose
- Labels and marker
- Timer (optional)
- Grow lights
Step-by-step planting:
- Set up your heat mat on a waterproof, level surface away from drafts and direct sunlight.
- If using a thermostat controller, attach it to the mat and set to the appropriate temperature for your seeds (check seed packets for specific requirements).
- Fill seed trays with moistened seed starting mix to about 1cm (½ inch) from the top.
- Plant seeds at the depth recommended on the seed packet (generally 2-3 times the seed’s diameter).
- Mist the soil surface gently to ensure good seed-to-soil contact without disturbing placement.
- Cover trays with clear domes to maintain humidity.
- Place trays on the heat mat and turn it on.
- Check moisture levels daily – the heat will increase evaporation.
- Once seeds germinate, remove the dome gradually (a few hours more each day) to acclimate seedlings.
- Position grow lights 5-10cm (2-4 inches) above seedlings once they emerge.
How to grow spring seedlings with heat mats
Provide 14-16 hours of light daily using grow lights positioned close to seedlings to prevent stretching. Water from below by filling the tray under the cells rather than overhead to prevent damping off. Allow the surface to dry slightly between waterings. Begin fertilizing with half-strength liquid organic fertilizer once the first true leaves appear. Maintain consistent temperatures – most seedlings prefer 18-21°C (65-70°F) after germination, so you may need to remove them from the heat mat or adjust the thermostat. Run your hands gently over seedlings daily or use a small fan on low setting to strengthen stems. For container growing, heat mats can be used to warm the potting mix before planting, but are typically removed once seeds germinate.
Caring for spring seedlings with heat mats
Monitor temperature regularly with a soil thermometer to ensure it stays within the optimal range. Rotate trays every few days if you notice uneven growth. Watch for signs of damping off (seedlings suddenly collapsing at soil level), which can be prevented with good air circulation and avoiding overwatering. Leggy seedlings indicate insufficient light – lower your grow lights or increase their intensity. Begin hardening off seedlings about 7-10 days before transplanting outdoors by gradually exposing them to outdoor conditions for increasing periods. For pest prevention, avoid bringing outdoor plants near your seedlings and inspect regularly for aphids or fungus gnats, which can be controlled with sticky traps or a light application of neem oil.
Understanding bolting in spring seedlings with heat mats
Bolting refers to premature flowering and seed production, particularly in leafy greens and herbs. While heat mats themselves don’t directly cause bolting, the transition from consistent warm temperatures to fluctuating outdoor conditions can trigger it. Bolting is primarily caused by rising temperatures, increasing day length, or transplant shock. To prevent bolting, gradually acclimate seedlings to outdoor conditions through proper hardening off. For heat-sensitive crops like lettuce and spinach, remove them from heat mats as soon as they germinate and grow them under cooler conditions. If seedlings do begin to bolt after transplanting, harvest immediately as the flavor will deteriorate rapidly once the flowering process begins.
Why does seedling growth stall with heat mats?
- Excessive heat: Temperatures above 30°C (86°F) can inhibit growth – use a thermostat controller to maintain appropriate temperatures.
- Insufficient light: Heat promotes growth that needs corresponding light intensity – position grow lights closer to prevent stretching.
- Leaving seedlings on mats too long: Many plants prefer cooler soil after germination – remove from heat once sprouted.
- Nutrient deficiency: Rapid growth from heat requires nutrients not present in seed starting mix – begin light fertilization after true leaves appear.
- Root binding: Fast-growing seedlings may become root-bound quickly – transplant to larger containers if necessary.
Companion planting for spring seedlings with heat mats
Good companions for shared heat mats:
- Tomatoes and peppers – similar temperature requirements and growing periods.
- Basil and parsley – herbs that benefit from similar warm germination conditions.
- Eggplant and okra – both heat-loving crops with similar germination needs.
- Marigolds and zinnias – flowering companions that germinate well together.
- Brassicas (cabbage family) – can be started together at slightly lower temperatures.
Avoid grouping together:
- Cool-season crops (lettuce, spinach) with warm-season crops (tomatoes, peppers) – temperature needs differ significantly.
- Fast-germinating seeds with slow-germinating varieties – management becomes difficult.
- Shallow-rooted seedlings with deep-rooted varieties – watering needs will differ.
Seasonal calendar
- January: Set up heat mat system, order seeds, clean and sanitize trays.
- February: Start slow-growing flowers, peppers, eggplants on heat mats (zones 5-7).
- March: Start tomatoes, herbs, and faster-growing flowers; begin hardening off early seedlings in warmer regions.
- April: Start heat-loving melons and cucumbers; transplant hardened-off seedlings as soil warms.
- May: Complete transplanting of warm-season crops; clean and store heat mats in warmer regions.
- September: In mild climates, heat mats can be used again for fall/winter crops and cool-season vegetables.
- October-December: Clean equipment, research varieties for next season, repair or replace damaged equipment.
Problems & solutions
| Problem | Quick Fix |
|---|---|
| Leggy, stretched seedlings | Lower grow lights to 5-10cm above plants; improve air circulation with a small fan |
| Seedlings not germinating | Check mat temperature with soil thermometer; ensure consistent moisture; verify seed viability |
| Mold on soil surface | Improve air circulation; reduce humidity by partially removing dome; apply fine layer of vermiculite |
| Seedlings wilting despite moist soil | Check for excessive heat; move off heat mat; ensure thermostat is functioning properly |
| Uneven germination | Rotate trays daily; check for hot spots on mat; ensure even moisture distribution |
| Roots growing through drainage holes into mat | Place a thin barrier between tray and mat; transplant to larger containers sooner |
| Seedlings dying after emergence | Check for damping off; reduce watering; improve air circulation; apply cinnamon as natural fungicide |
Common questions about growing spring seedlings with heat mats
Q: How long should seedlings stay on heat mats?
A: Most seedlings should remain on heat mats only until germination occurs, then be moved to a cooler growing area with adequate light. For warm-season crops like tomatoes and peppers, this is typically 5-10 days; for cooler-season crops, often just 3-5 days.
Q: Do I need a thermostat controller with my heat mat?
A: While not absolutely required, a thermostat controller is highly recommended as it prevents overheating and provides the precise temperatures different seeds need for optimal germination, improving success rates and preventing wasted energy.
Q: Can I reuse seed starting mix from previous years?
A: It’s best to use fresh, sterile seed starting mix each year to prevent disease. If you must reuse, sterilize it first by baking in an oven at 82°C (180°F) for 30 minutes.
Q: How much water do seedlings on heat mats need?
A: Heat mats increase evaporation, so seedlings typically need more frequent watering. Check daily and water when the surface begins to dry, preferably from below by filling the reservoir tray rather than watering from above.
Q: Can I use heat mats for all types of seeds?
A: Most seeds benefit from some bottom heat, but temperature requirements vary. Cool-season crops like lettuce prefer 18-21°C (65-70°F), while warm-season crops like peppers prefer 24-29°C (75-85°F). Some seeds, like certain perennials, require cold stratification before heat.
Q: What size heat mat do I need?
A: Choose a heat mat that fits your seed trays with minimal overhang. Standard sizes include 10″×20″ (25×50cm) for one standard flat, 20″×20″ (50×50cm) for two flats, and 48″×20″ (122×50cm) for four standard flats.
Q: Is it safe to leave heat mats on continuously?
A: Quality, UL-listed heat mats are designed for continuous operation. However, using a thermostat controller not only improves plant results but also saves electricity by cycling the mat on and off as needed to maintain the set temperature.